
The Cat Tails QUILT is a charming and cozy addition to any home, especially for cat lovers and quilting enthusiasts alike. Whether you are looking to craft a quilt that showcases your love for feline friends or simply want a unique piece to enhance your home decor, the Cat Tails QUILT offers both style and sentimentality. This quilt design often features playful cat motifs, delicate patterns, and soft, inviting fabrics that bring warmth to any space.
In the world of quilting, the Cat Tails QUILT has gained popularity not just for its adorable designs but also for the variety of techniques used to create it. From patchwork to appliqué, quilters have endless creative options to make each quilt truly one of a kind. Moreover, the combination of colors and fabrics can transform a simple quilt into a stunning piece of art.
If you are considering creating your own Cat Tails QUILT, or even purchasing one, it’s essential to understand the design elements, materials, and steps involved. In this article, we will explore the history of the Cat Tails QUILT, how to make one, tips for choosing the right fabrics, and how to care for your quilt to ensure it lasts for years to come.
1. The History and Charm of Cat Tails QUILT
The Cat Tails QUILT holds a special place in the quilting community. This design often pays tribute to the deep bond between humans and their feline companions, translating that affection into art. The concept likely originated from traditional patchwork quilting, where animal motifs became popular for their whimsical and personalized touch.
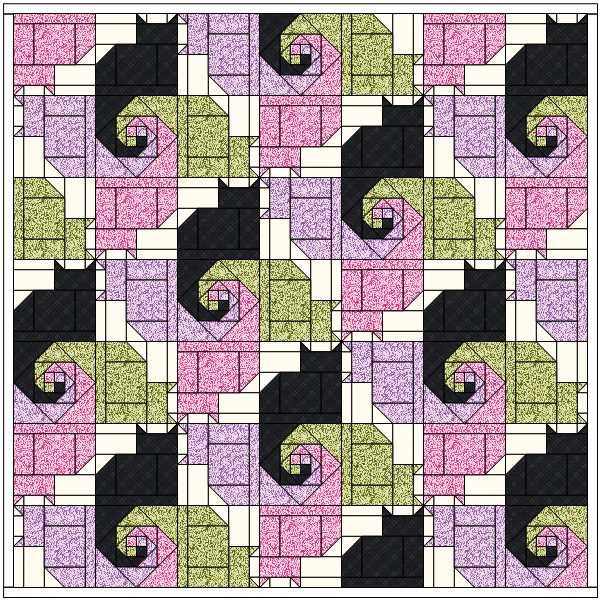
Quilters began integrating cat designs into their work as a way to express their love for pets. These designs often depict cats in various poses—curled up asleep, playfully chasing their tails, or peeking out from behind fabric patterns. The Cat Tails QUILT quickly became a beloved project for both beginner and experienced quilters.
Beyond its artistic appeal, this quilt symbolizes comfort and companionship. Cats have long been associated with coziness, and a quilt featuring these adorable creatures only enhances that feeling. The charm of a Cat Tails QUILT lies in its ability to tell a story—each patch representing a playful moment or a cherished memory with a feline friend.
Whether passed down as a family heirloom or crafted as a gift, the Cat Tails QUILT remains a timeless piece that brings both beauty and sentiment to any home.
2. How to Make Your Own Cat Tails QUILT
Creating a Cat Tails QUILT is a fulfilling project that allows quilters to combine their love for cats with their passion for crafting. Here’s a step-by-step guide to help you start your quilting journey:
- Choose Your Design: Begin by selecting a Cat Tails QUILT pattern. You can opt for simple cat silhouettes, intricate appliqués, or a combination of both. Consider sketching out your design to visualize the final look.
- Select Your Fabrics: Fabrics play a crucial role in bringing your quilt to life. Choose soft, high-quality cotton with colors that complement your cat-themed design. Mixing prints, solids, and textures can add depth and interest to your quilt.
- Prepare Your Materials: Gather all the necessary tools, including fabric scissors, rotary cutters, quilting rulers, thread, and a sewing machine. Having everything ready will make the process smoother.
- Cut and Arrange the Pieces: Carefully cut your fabric according to the pattern. Lay out your pieces to ensure the design flows seamlessly. This step helps you make adjustments before sewing.
- Sew the Quilt Top: Start stitching the fabric pieces together, working row by row. Ensure your seams are straight and secure to create a polished finish.
- Quilt and Bind: Once the top layer is complete, add the batting and backing fabric. Quilt the layers together using your preferred method—straight-line quilting or free-motion quilting—then finish by binding the edges.
By following these steps, you’ll have a beautiful, handmade Cat Tails QUILT that reflects your creativity and love for cats.
3. Tips for Choosing the Perfect Fabrics for Your Cat Tails QUILT
Selecting the right fabrics for your Cat Tails QUILT is essential to achieve a cohesive and eye-catching design. Here are some expert tips to guide your choices:
- Prioritize Quality: Opt for high-quality cotton or linen fabrics. These materials are durable, soft, and easy to work with, ensuring your quilt withstands time and use.
- Mix Patterns and Solids: Balance your design by combining printed cat motifs with solid colors. This contrast helps the cat designs stand out without overwhelming the quilt.
- Stick to a Color Palette: Choose a harmonious color scheme. Neutral tones with pops of color often work best, but you can also create a bold, vibrant quilt with jewel tones.
- Consider Texture: Fabrics with subtle textures, like flannel or batik, can add depth and visual interest to your quilt without overpowering the cat-themed patterns.
- Pre-Wash Your Fabrics: Always wash and press your fabrics before cutting. This prevents shrinkage and color bleeding after your quilt is complete.
- Personal Touch: If possible, incorporate fabric pieces that hold sentimental value—like a scrap from an old pet blanket or a favorite shirt—to make your Cat Tails QUILT even more special.
4. Caring for Your Cat Tails QUILT to Ensure Longevity
Once your Cat Tails QUILT is finished, proper care is crucial to preserve its beauty and functionality. Follow these simple care tips:
- Gentle Washing: Wash your quilt in cold water on a delicate cycle. Use a mild detergent to protect the fabrics and colors.
- Avoid Harsh Chemicals: Steer clear of bleach or strong detergents, as they can weaken the fabric fibers and cause fading.
- Air Dry When Possible: While machine drying is convenient, air drying your quilt helps prevent shrinking and extends its lifespan.
- Store Properly: When not in use, store your quilt in a cool, dry place. Avoid plastic containers—opt for breathable cotton storage bags instead.
- Rotate Display: If you use your Cat Tails QUILT for decoration, rotate its position periodically to prevent uneven fading from sunlight exposure.
- Repair Promptly: Address any loose threads or small tears immediately. Hand-stitch repairs keep your quilt in pristine condition.
By following these care tips, your Cat Tails QUILT will remain a treasured piece for generations.
FAQ: Everything You Need to Know About Cat Tails QUILT
1. What is a Cat Tails QUILT? A Cat Tails QUILT is a handcrafted quilt featuring cat-themed designs, often using patchwork, appliqué, or embroidery techniques.
2. Can beginners make a Cat Tails QUILT? Absolutely! Many Cat Tails QUILT patterns cater to beginners, offering simple cat silhouettes and straightforward sewing techniques.
3. How long does it take to make a Cat Tails QUILT? The time depends on the complexity of the design. A simple quilt may take a few days, while intricate patterns can take weeks or even months.
4. What fabrics are best for a Cat Tails QUILT? High-quality cotton, linen, and flannel are popular choices. These fabrics are durable, soft, and easy to sew.
5. Can I customize a Cat Tails QUILT? Yes! Many quilters add personal touches like pet names, favorite colors, or fabric pieces with sentimental value.
6. How do I wash a Cat Tails QUILT? Wash gently with cold water and a mild detergent. Air dry or tumble dry on low to preserve the fabric.
PATTERN HERE
Creating or owning a Cat Tails QUILT is more than just about having a beautiful quilt—it’s about celebrating the love for cats and the art of quilting. From choosing the perfect fabrics to caring for your masterpiece, every step adds a personal touch to this cozy creation.
We hope this guide has inspired you to start your own Cat Tails QUILT project or appreciate the work that goes into these charming quilts. If you have any thoughts, tips, or experiences to share, please leave a comment below. Your feedback and suggestions are always welcome!