
The Crochet Granny Square Bucket Hat Tutorial is the perfect project for those who love combining vintage style with a modern flair. This charming accessory blends the timeless granny square design with the functional appeal of a bucket hat. Whether you’re an experienced crocheter or a motivated beginner, this guide will walk you through every step needed to create your own vibrant and stylish bucket hat.
In this tutorial, we’ll cover everything from selecting your yarn and hook to joining your squares and shaping the brim. The crochet technique used is beginner-friendly and only requires basic stitches, making it an ideal project to hone your skills. With a splash of color and a touch of handmade charm, your finished hat will turn heads wherever you go.
Throughout this Crochet Granny Square Bucket Hat Tutorial, we’ll use easy-to-follow instructions optimized for clarity and effectiveness. Whether you’re making one for yourself, as a gift, or even to sell, this guide offers a reliable, Google AdSense-friendly approach to building your crochet skills while having fun.
1. Choosing Materials for Your Crochet Bucket Hat
To begin your Crochet Granny Square Bucket Hat Tutorial, the first step is gathering your materials. Using the right supplies ensures your project turns out stylish and durable.
Opt for 100% cotton yarn for breathability and structure. Cotton yarn holds its shape well, making it ideal for accessories like hats that need form. Choose a worsted weight (medium #4) yarn for the best balance between flexibility and sturdiness.
You’ll need a crochet hook that matches your yarn. A 4.0mm to 5.0mm hook is typically suitable for worsted-weight cotton. Check your yarn label for the recommended hook size and make a gauge swatch if necessary.
You’ll also want to prepare a yarn needle for weaving in ends, a pair of scissors, and stitch markers to help keep your pieces aligned during joining. These simple tools will streamline your crocheting process.
Pick yarn colors that match your personality! The beauty of a granny square bucket hat lies in its colorful, patchwork-like appearance. Contrasting or complementary colors work best for a bold, eye-catching finish.
If you’re just starting with crochet, consider buying a beginner’s kit that includes yarn, hooks, and accessories. These kits are a great investment and often come with helpful guides or patterns.
2. Creating the Classic Granny Squares
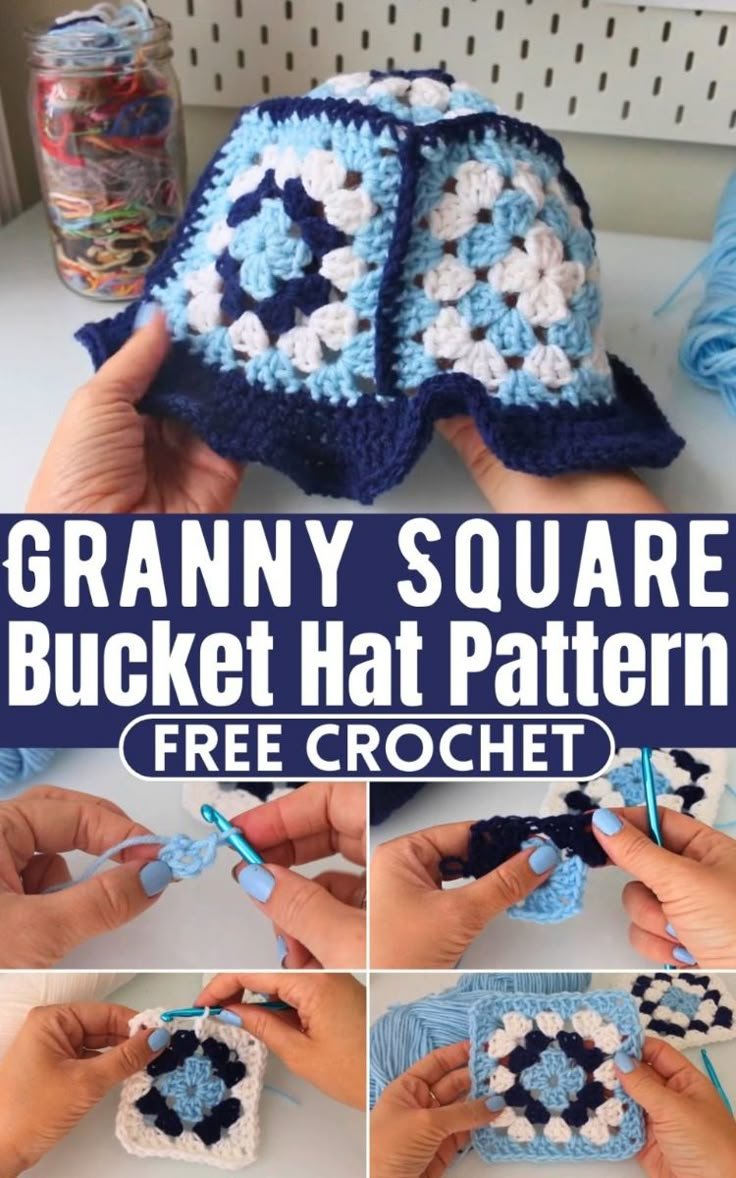
The soul of any Crochet Granny Square Bucket Hat Tutorial lies in the classic granny squares. These squares form the structure and design base of the entire hat.
Start with a magic ring or a simple chain loop, then work your first round using double crochet (dc) clusters separated by chain stitches. The traditional granny square has a repeating pattern that’s easy to memorize and satisfying to complete.
Most granny squares are made with four or five rounds, depending on the size you need. For a standard adult-sized bucket hat, 3.5 to 4-inch squares work perfectly. Use a ruler or tape measure to check the size as you go.
Make at least five squares for the crown of your hat, and an additional five to six for the sides. You can adjust the number depending on the fit you want. Arrange them in a rough circle and side strip to preview the final look.
Try mixing colors creatively within each square—perhaps a different hue per round or alternating a light background with bold centers. This makes your crochet project truly personalized.
After finishing your squares, weave in all the loose ends. Use your yarn needle to neatly hide tails inside the stitches to keep everything clean and polished.
3. Assembling and Shaping the Hat
Now comes the most rewarding part of the Crochet Granny Square Bucket Hat Tutorial—assembling your squares into a wearable hat!
Begin by arranging your five squares in a circular shape to form the crown of the hat. Use slip stitches or a whip stitch with your yarn needle to join the sides. Make sure the corners align properly for a neat, consistent shape.
Once the crown is assembled, attach the side squares around the edges. These squares form the walls of your bucket hat. Join them using the same method and ensure the pattern flows well across the hat body.
After the top and sides are connected, it’s time to shape the brim. Crochet directly into the bottom edge of the hat, adding stitches evenly around the base. Use single crochet or half-double crochet rows to build the brim.
To give your brim a bucket-style flare, increase your stitches in every few rounds. For example, you can add one stitch after every six or seven stitches in a round. This creates the desired outward curve.
Keep crocheting rounds until the brim reaches your preferred length, usually around 2 to 3 inches. The structure should be soft yet supportive, perfect for sun coverage and style.
Finish off the hat with a final round of slip stitches or a decorative edge. Scalloped edging or reverse single crochet (crab stitch) adds a nice touch and helps prevent curling.
4. Styling, Customizing, and Caring for Your Hat
A major highlight of any Crochet Granny Square Bucket Hat Tutorial is discovering the many ways to wear and personalize your new accessory.
The hat is incredibly versatile. Wear it with casual outfits for a retro-chic vibe, or add it to your festival or beach wardrobe for a statement look. The color combinations alone can set the tone of your entire ensemble.
Consider embellishing your hat with small crochet flowers, buttons, or appliqués for a touch of creativity. Even a simple tie or ribbon threaded through the brim can make a huge difference in style.
You can also adjust the fit of your hat by modifying the number or size of the granny squares. Fewer squares make a snug fit, while extra squares give a more relaxed, slouchy look.
To keep your hat in good condition, hand wash it gently in cold water with mild detergent. Avoid wringing or stretching it—press gently between towels to remove excess moisture.
Let your hat air dry flat, reshaping it if needed. Cotton yarn tends to maintain its structure well, but a little reshaping helps preserve the original bucket style.
Store your crochet granny square bucket hat flat or on a shelf, not hanging, to avoid distortion. With proper care, your handmade piece will last for years to come.
FAQ – Frequently Asked Questions
Q: How many granny squares do I need to make a bucket hat?
A: Most adult-sized bucket hats require 10 to 12 granny squares—5 for the crown and 5 to 7 for the sides. Adjust based on the square size and desired fit.
Q: What size should each granny square be?
A: Ideal squares are between 3.5 and 4 inches across. Keep your gauge consistent to ensure proper fitting when all squares are joined.
Q: Can beginners make a granny square bucket hat?
A: Absolutely! This Crochet Granny Square Bucket Hat Tutorial is beginner-friendly and only uses basic stitches like chain, double crochet, and slip stitch.
Q: What’s the best yarn for making a crochet bucket hat?
A: Cotton yarn is highly recommended because it holds its shape well and is breathable—perfect for summer wear.
Q: How can I make my hat stiffer?
A: You can apply a light starch spray after finishing, or use a yarn with a firmer twist. Alternatively, crochet a tighter gauge for a more structured feel.
Q: Can I sell hats made from this tutorial?
A: Yes, you can sell finished items, but please give credit to the tutorial when applicable. Handmade hats are popular at craft fairs and online shops.
In this Crochet Granny Square Bucket Hat Tutorial, we covered everything from choosing the right yarn to crafting individual granny squares, assembling them, and styling the final piece. Whether you’re new to crochet or looking to try something different, this hat is a fun, creative project that adds color and charm to your wardrobe.