
Creating a crochet ladybug with wool is a delightful way to combine creativity, color, and craft into a small but charming project. Whether you’re a seasoned crocheter or just picking up your first hook, this wool-based insect pattern is both beginner-friendly and rewarding. Plus, its vibrant appearance makes it a wonderful gift, decoration, or toy for kids.
The beauty of crochet lies in its versatility, and when paired with the natural softness of wool, the results are warm, textured, and durable. Crochet ladybugs with wool are especially appealing because they allow you to work with various colors, practice basic shaping techniques, and create a recognizable character in just a few hours.
In this article, you’ll find a step-by-step guide on how to start your crochet ladybug with wool journey, what materials you’ll need, essential techniques to master, tips for personalization, and answers to common questions. Let’s jump into the world of crochet, one stitch at a time!
1. Materials Needed to Crochet a Ladybug with Wool
To make a successful crochet ladybug with wool, starting with the right materials is key. The wool you choose will impact the feel, appearance, and durability of your ladybug. Picking soft, high-quality wool makes the process more enjoyable and the final result more impressive.
First, select your yarn. You’ll need red and black wool as the primary colors, and optionally a bit of white for the eyes. Choose medium-weight (worsted) wool for a sturdy yet soft feel. Thicker yarn will give you a bigger ladybug, while finer yarn will make it smaller and more delicate.
A crochet hook that matches your yarn’s recommended size is essential. For worsted-weight wool, a 4.0 mm (G/6) crochet hook works well. Make sure to check the label on your yarn to ensure you’re using the right hook size for tension and appearance.
You’ll also need safety eyes or black embroidery thread if you plan to stitch the eyes instead. Fiberfill stuffing is necessary to give your ladybug a plush, 3D look. It’s lightweight, washable, and easy to work with, perfect for soft amigurumi-style projects.
A yarn needle is useful for sewing pieces together and weaving in ends. Scissors, stitch markers, and a ruler are optional but can make your work neater and easier to track.
Don’t forget a small container or basket to organize your tools and materials. Keeping your space tidy helps you focus better and keeps wool from tangling.
Now that your tools are ready, you’re all set to begin the creative process of crafting your crochet ladybug with wool. Let’s explore how to bring your design to life!
2. Step-by-Step Guide to Crochet a Ladybug with Wool
Now that you’ve gathered your materials, it’s time to start stitching your crochet ladybug with wool. This section outlines the basic steps to guide you through the process from start to finish.
Start by crocheting the body. Use red wool to make a round sphere using the magic ring method, increasing your stitches each round to form a dome. Then, decrease the rounds until a full round shape forms. Leave a small opening for stuffing.
Switch to black wool and crochet a smaller half-sphere to create the ladybug’s head. This part attaches easily to the body and helps define the iconic shape of a ladybug.
Crochet small black circles to represent the ladybug’s spots. Typically, 6 spots look balanced on the back. You can make these flat by working in a magic ring with a few rounds. Stitch them securely onto the red body.
For the legs and antennae, use black yarn to make thin tubes or simply crochet chains and slip stitches for a simpler look. Attach three legs on each side of the body and two antennae on top of the head.
Now it’s time to assemble everything. Use a yarn needle to sew the head onto the body, attach the spots, and position the legs and antennae. Be careful to align everything neatly for a professional finish.
Lastly, add the eyes. If you’re using safety eyes, insert them before closing the body. For embroidered eyes, use white and black thread to stitch small ovals or circles. And there you have it — your adorable crochet ladybug with wool is complete!
3. Crochet Techniques and Tips for a Perfect Ladybug
Even if you’re new to crochet, this project is great for building essential skills. It uses common stitches and methods that are foundational to many other crochet projects. Let’s look at the key techniques involved in making your crochet ladybug with wool.
The magic ring is used to start crocheting in the round. It creates a tight center with no hole, ideal for amigurumi-style projects like this one. Mastering this method makes your project look polished and professional.
Single crochet is the main stitch you’ll use. It creates a dense fabric perfect for stuffed toys. Practice maintaining even tension as you go to avoid an uneven or lumpy finish.
Increasing and decreasing stitches are essential for shaping. You’ll increase to make the round body and decrease to close it. Count carefully and use stitch markers to stay on track with your rounds.
Color changes will also come into play when switching from red to black yarn. To change colors smoothly, complete the last stitch in the old color and pull through the new color at the end. This technique avoids harsh transitions and gives a cleaner look.
When attaching pieces like spots and antennae, use the whip stitch or mattress stitch for secure and nearly invisible seams. Make sure each piece is positioned symmetrically for a balanced design.
Finally, always stuff your ladybug firmly but not overly tight. This helps it hold its shape while remaining soft and huggable. A gentle squeeze test can help you gauge the right amount of fiberfill.
4. Creative Variations and Personalization Ideas
Once you’ve mastered the basic crochet ladybug with wool, why not try a few creative twists? Customizing your project adds personality and makes it more fun — especially for gifting or selling.
Try using different colors. While red and black are classic ladybug colors, pastel pink, blue, or even rainbow wool can give your creation a unique flair. These color variations are especially popular for baby toys or nursery decor.
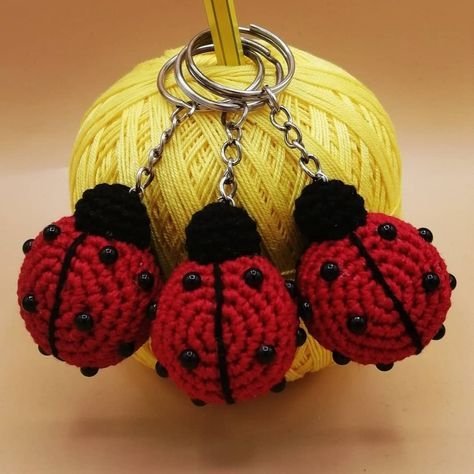
Add accessories like a small crocheted flower or a mini leaf under the ladybug. These details elevate the project and can turn it into a cute keychain, brooch, or wall hanging.
Turn your ladybug into a hanging ornament by attaching a loop of yarn to the top. This is great for mobiles, car mirrors, or seasonal decorations like Easter or springtime.
Use embroidered initials or hearts to personalize the toy for someone special. This makes your crochet ladybug with wool an ideal gift for birthdays, Valentine’s Day, or even Mother’s Day.
You can also scale the project. Use chunky wool and a larger hook for a pillow-sized version, or fine thread and a small hook for a delicate mini ladybug. Both options have charm and purpose depending on your use.
Lastly, consider making a full set — ladybug families in different sizes! These make delightful playsets for kids and charming table displays. The more you create, the more creative possibilities you’ll discover with wool and crochet.
FAQ: Frequently Asked Questions about Crochet Ladybug with Wool
Q: Is a crochet ladybug with wool beginner-friendly?
A: Yes! It mainly uses basic stitches like single crochet, increases, and decreases. It’s a great first project for those new to amigurumi or small crochet animals.
Q: What type of wool is best for this project?
A: Worsted weight wool or acrylic/wool blends are ideal. They are soft, easy to work with, and durable enough for toys and decorations.
Q: How long does it take to make a crochet ladybug?
A: Depending on your skill level, it can take between 2 to 4 hours. Beginners may take longer, but it’s a relatively quick project.
Q: Can I wash a crochet ladybug made with wool?
A: Yes, but use cold water and hand-wash gently. Let it air dry. Avoid using hot water or a dryer, as wool can shrink or felt.
Q: Are there safety concerns with crochet ladybugs for children?
A: Always use securely attached safety eyes or embroider eyes for infants. Make sure all parts are sewn tightly to prevent choking hazards.
Q: Can I sell my crochet ladybug with wool?
A: Absolutely! Handmade crochet items are popular at craft fairs, online shops, and markets. Be sure to create your own version or modify patterns if you’re selling.
The crochet ladybug with wool is a charming, creative, and rewarding project that offers fun for all levels of crocheters. From gathering your materials to stitching every detail, it’s a craft full of joy, texture, and character. You’ve now learned how to choose the best wool, follow key crochet techniques, add personalization, and even answer common questions.
We hope this guide has inspired you to start crocheting your own ladybug! If you’ve enjoyed this article or have suggestions to improve it, please leave your honest opinion in the comments. We love hearing from our readers and fellow crochet enthusiasts. Happy stitching! 🧶🐞