
If you’ve been looking for a fun and functional sewing project, how to make a fabric basket FREE PATTERN is exactly what you need. Whether you’re a beginner or a seasoned crafter, fabric baskets are a creative way to use leftover fabric while adding a touch of handmade charm to your home. These baskets are not only stylish but also practical for organizing your space.
Learning how to make a fabric basket FREE PATTERN is a fantastic project because it combines basic sewing techniques with customizable designs. You can use them to store sewing supplies, toys, makeup, or even as unique gift containers. Plus, the project is budget-friendly and offers a great opportunity to upcycle scrap materials.
In this article, we’ll walk you through step-by-step instructions on how to make a fabric basket FREE PATTERN and share tips to make your creations durable and beautiful. With four well-structured sections and clear explanations, you’ll feel confident diving into this DIY project. Let’s get started!
1. Choosing the Right Materials for Your Fabric Basket
The first step in how to make a fabric basket FREE PATTERN is selecting the appropriate materials. While this may seem straightforward, the durability and appearance of your final product depend heavily on your fabric and supplies.
Start with sturdy cotton or canvas fabric, as they offer both structure and style. Choose patterns and colors that match the decor of the room where the basket will be used. You’ll need two types of fabric: one for the exterior and one for the lining.
Fusible interfacing or batting is essential to provide shape and support to your basket. Lightweight interfacing works for softer baskets, while heavier interfacing creates a firmer finish.
Thread quality also matters. Use a strong polyester thread to ensure your stitches hold up to daily use. Neutral colors work well, but you can also use colored thread for decorative topstitching.
You’ll need basic sewing tools like scissors or rotary cutters, pins, a ruler, a fabric pen, and of course, your sewing machine. Make sure all your tools are ready before you begin.
Finally, consider adding embellishments such as ribbon handles, buttons, or tags. These small details can elevate your basket from functional to fabulous.
2. Cutting and Preparing Your Fabric Pieces
After choosing the right materials, the next step in how to make a fabric basket FREE PATTERN is cutting and preparing your fabric accurately. Precise measurements ensure that your basket turns out symmetrical and neat.
Start by cutting your exterior and lining fabric into rectangles. A common size for small baskets is 10×14 inches, but you can adjust dimensions depending on the purpose of your basket.
Next, cut your interfacing or batting slightly smaller than your fabric pieces. This helps reduce bulk in the seams while still providing structure to the sides of your basket.
Iron the interfacing to the wrong side of your exterior fabric, following the manufacturer’s instructions. Ensure it’s fused completely to avoid wrinkles or bubbles.
If your design includes boxed corners, mark and cut 2×2 inch squares from each corner of the fabric pieces. These will be sewn to give your basket depth and shape.
It’s helpful to mark your seam allowances with a fabric pen or chalk. Standard seam allowance is 1/4 inch, but some patterns may vary, so be sure to check.
Finally, gather all your prepared pieces and organize them by layers—exterior, lining, and interfacing—so you’re ready for the next stage: sewing.
3. Assembling the Fabric Basket
Now that your fabric pieces are prepped, it’s time to start sewing. This is where the real magic happens in how to make a fabric basket FREE PATTERN. You’ll bring all your pieces together to form the final product.
Begin by sewing the sides and bottom of the exterior fabric together, right sides facing. Do the same for the lining, but leave a 3-inch gap at the bottom for turning the basket inside out later.
Next, sew the boxed corners of both the exterior and lining fabrics. Match the side and bottom seams, pin them together, and sew straight across. This step gives your basket its three-dimensional shape.
Once both sections are complete, insert the exterior basket into the lining with right sides together. Line up the side seams and pin around the top edge.
Sew around the entire top edge with a 1/4-inch seam allowance. Be careful to keep all layers aligned and flat while sewing.
Now, pull the entire basket through the hole you left in the lining. This will turn your basket right-side out. Push the lining into the basket and make sure everything is smoothed out.
Topstitch around the upper edge of the basket for a clean, finished look. This also helps hold the shape and adds a professional touch to your handmade basket.
4. Customizing and Using Your Fabric Basket
One of the joys of how to make a fabric basket FREE PATTERN is how customizable the final product is. Once you’ve completed the basic structure, the possibilities for personalization are endless.
Add handles using fabric strips or ribbons. You can sew them into the top seam or attach them with rivets for a more polished look. Handles make your basket easy to carry and add to its functionality.
Try using different fabric textures, such as denim, burlap, or flannel, for unique seasonal or decorative variations. Mixing prints is another creative way to personalize your basket.
Label your baskets using fabric tags or iron-on transfers. These are perfect for organizing multiple baskets in an office, nursery, or closet.
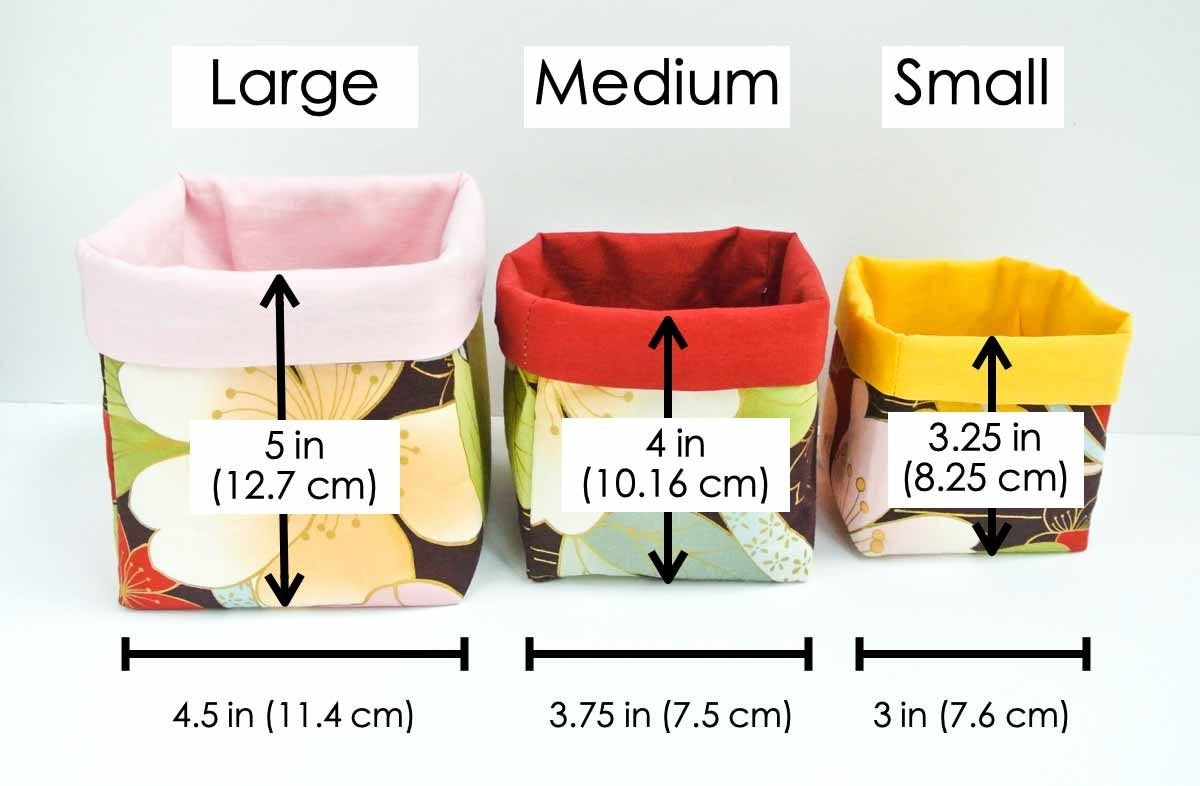
Make a nesting set of baskets in various sizes. These stackable baskets are great space savers and make wonderful gifts for housewarmings, baby showers, or holidays.
Don’t forget to photograph and share your work! Posting your creations on social media or craft blogs is a great way to connect with others and inspire creativity.
Lastly, consider gifting a DIY kit. Cut and prepare the materials for a friend and share your knowledge on how to make a fabric basket FREE PATTERN—it’s a thoughtful and handmade gift idea.
Frequently Asked Questions (FAQ)
What is the best fabric to use for a fabric basket?
Cotton or canvas fabrics work best for durability and ease of sewing. Quilting cotton is a popular choice for decorative lining, while heavier fabrics are great for the outer layer.
Can I make a fabric basket without a sewing machine?
Yes, but it will take more time and effort. Hand sewing is possible using a strong needle and durable thread, but a sewing machine will produce faster and stronger results.
How can I make my basket stand up better?
Use heavyweight interfacing or add an extra layer of fusible fleece for added structure. You can also use cardboard inserts in the base, though they’re not washable.
What size should I make my fabric basket?
It depends on its purpose. Small baskets (8×10 inches) are great for makeup or keys, while larger ones (12×16 inches or more) can hold toys, towels, or craft supplies.
Are fabric baskets washable?
If made with washable materials (like cotton and polyester thread), yes. However, avoid machine drying if the basket has interfacing that might wrinkle or shrink.
Can I sell fabric baskets made from free patterns?
Check the usage rights of the specific pattern. Many free patterns allow personal and limited commercial use, but always credit the original designer if required.
We hope this guide on how to make a fabric basket FREE PATTERN has inspired you to create something beautiful and functional. With simple materials and a bit of sewing, you can make versatile storage baskets that bring style and organization into your space.
From choosing the right materials to customizing your final product, each step in how to make a fabric basket FREE PATTERN was designed to help you feel confident and creative. Whether you’re sewing for yourself or gifting a handmade item, the result is always rewarding.
We’d love to hear your thoughts! Leave a sincere opinion in the comments and share any suggestions or questions you have. Happy sewing!