
The Sew Together Bag Pattern Tutorial Quilt Pattern is one of the most practical and creative projects for sewing enthusiasts. Whether you are a beginner exploring quilting techniques or an advanced maker who enjoys unique organizational projects, this bag pattern combines utility with style. From storing sewing tools to carrying small items on the go, it is both functional and visually appealing. This tutorial highlights the main steps, tips, and benefits of creating your own bag using quilting techniques.
Working with a Sew Together Bag Pattern Tutorial Quilt Pattern allows crafters to experiment with fabric combinations, zippers, and quilting stitches while producing something truly useful. The structured design includes multiple compartments and zippers, making it a favorite project among quilters. Because the process involves piecing, sewing, and assembly, it’s an excellent opportunity to refine quilting skills while producing a project you will enjoy using daily.
The popularity of the Sew Together Bag Pattern Tutorial Quilt Pattern comes not only from its utility but also from its charm. Makers love that this bag can showcase scraps, bold fabrics, or carefully coordinated designs. It’s also customizable—by adjusting fabric choices, zipper colors, or quilted panels, each finished bag becomes a reflection of personal style. In this article, we’ll explore the steps, tips, and creative possibilities for making your own.
Understanding the Sew Together Bag Pattern
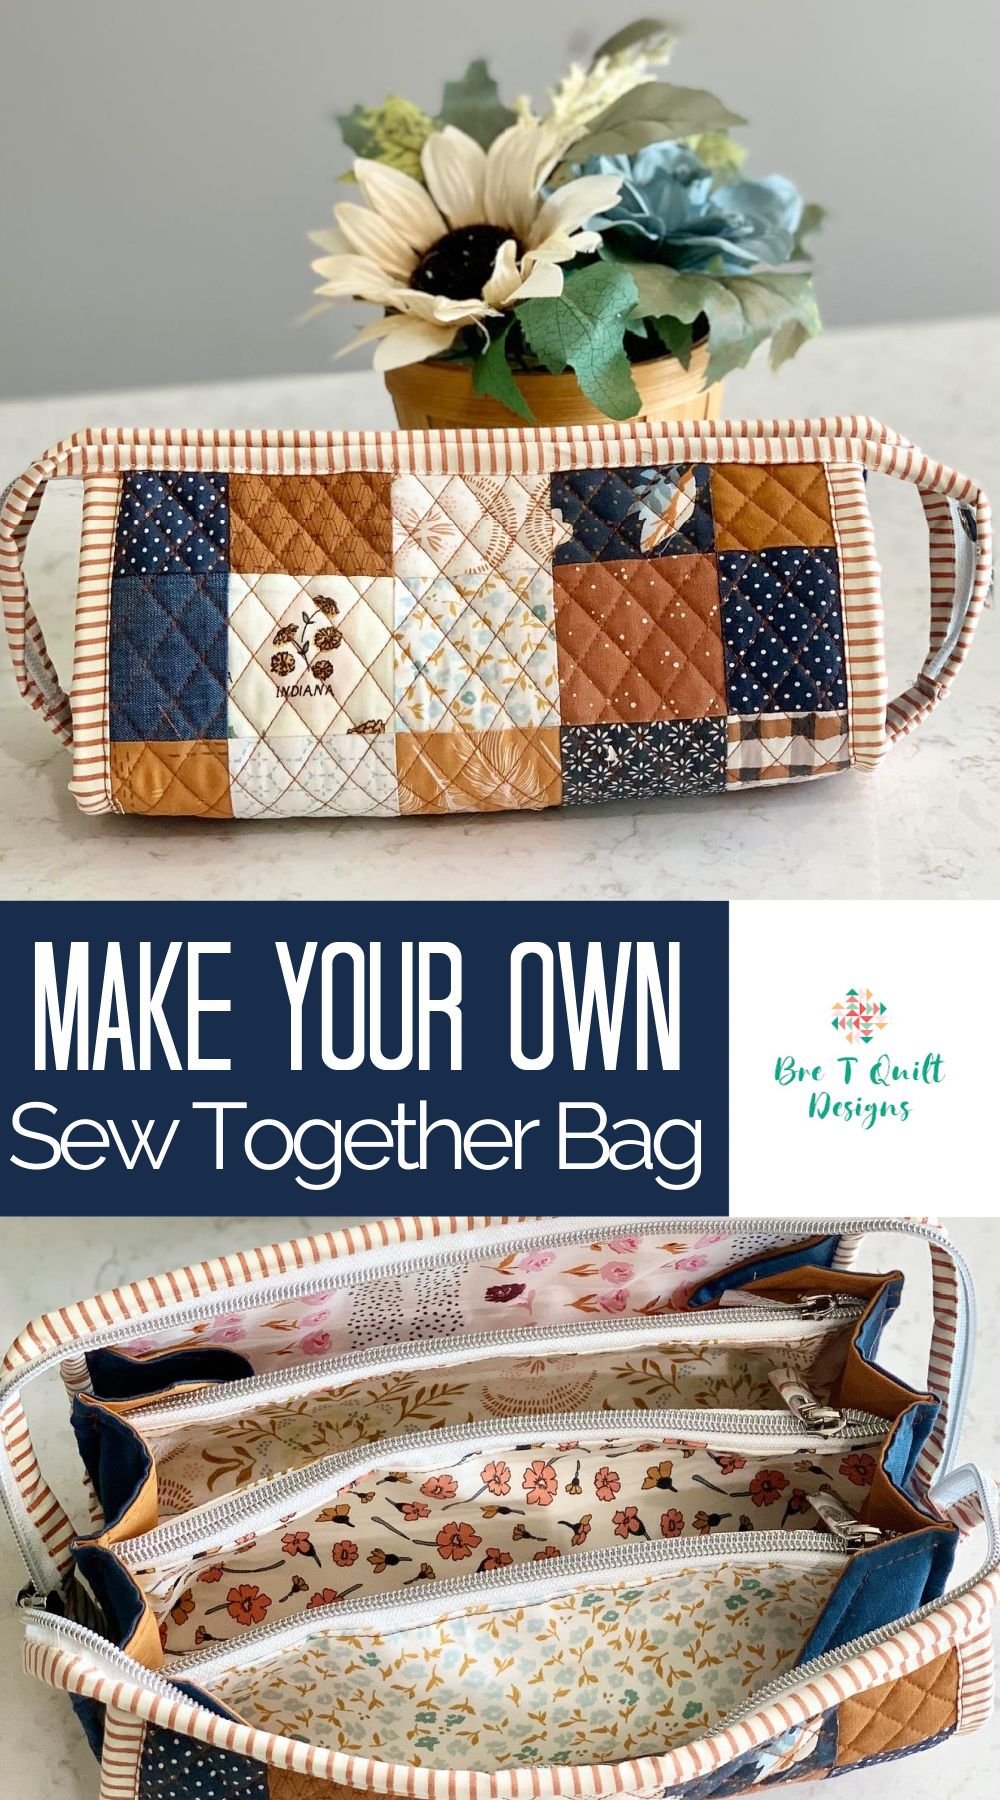
The Sew Together Bag Pattern Tutorial Quilt Pattern is built around the concept of a zippered organizer with multiple compartments. Its structure makes it stand out from regular pouches or cosmetic bags. The bag includes three interior zipper pouches, open spaces between them, and an outer zipper that closes the whole project securely.
One of the main reasons this pattern is so loved is because it provides ample storage without being bulky. Many quilters use it to carry rotary cutters, threads, needles, and small tools, but it also works perfectly as a travel accessory. The combination of quilting techniques with functional sewing makes it both an artistic and practical project.
Understanding the bag’s structure before sewing is important. The exterior panels can be quilted using your favorite pattern, from simple straight-line quilting to more detailed free-motion designs. Inside, the organizer layout requires accurate measurements and attention to detail during assembly.
The pattern also introduces beginners to working with zippers, which may seem intimidating but become easier with practice. Since the bag includes multiple zippers, it’s a great way to become comfortable sewing them in place. Once mastered, this technique can be applied to other quilting and sewing projects.
Another reason to explore this tutorial is its versatility. While originally designed as a sewing organizer, the bag can be adapted for cosmetics, stationery, or even as a compact travel kit. Its structure makes it one of the most versatile quilted bags available.
Overall, the Sew Together Bag Pattern Tutorial Quilt Pattern combines quilting artistry with everyday practicality. By understanding its design, quilters can appreciate the balance of creativity and functionality that makes this project timeless.
Step-by-Step Sewing Process
Creating the Sew Together Bag Pattern Tutorial Quilt Pattern requires careful preparation and patience. The first step is gathering materials, including quilting cottons, interfacing, zippers, and a sturdy thread. Many makers prefer to use coordinating fabrics for the interior and exterior to create a cohesive design.
Begin by quilting the exterior panels. This step allows you to showcase creativity with stitching, from simple lines to intricate motifs. Quilting adds both texture and durability, ensuring the bag holds its shape after repeated use. A walking foot or free-motion quilting foot can make this step easier.
Next, prepare the zippers. Since the bag requires multiple zippers, cutting and aligning them accurately is essential. Using zipper tabs is a helpful technique that simplifies assembly while keeping the zippers neat. Beginners often find this step rewarding because it builds confidence in handling zippers.
Once the zippers are ready, start assembling the compartments. Each zippered pocket should be sewn carefully, aligning fabric edges and ensuring smooth seams. Pressing after each step is key to achieving a professional finish. The open spaces between compartments add flexibility for storing larger items.
After completing the interior, attach the exterior quilted panel. This step brings everything together, creating the recognizable structure of the bag. Basting clips or pins can help hold layers securely in place before stitching. The final zipper, which encloses the whole bag, is added at this stage.
The finishing touches involve binding the edges. Binding not only hides raw seams but also adds durability and polish. Choosing a contrasting or matching binding fabric is another way to personalize the bag. With the final stitches in place, your handmade quilted organizer is ready to use or gift.
Creative Variations and Personalization
One of the most exciting parts of making the Sew Together Bag Pattern Tutorial Quilt Pattern is personalizing it. Since the structure is already defined, makers can focus on fabric choices, quilting styles, and finishing details to make the bag unique.
Scrap-friendly designs are popular. Many quilters use leftover fabric pieces to create patchwork exteriors, turning scraps into a functional and beautiful project. This eco-friendly approach also adds charm and individuality to the finished bag.
Color coordination plays a big role in personalization. A bag made with bold, contrasting fabrics will look lively and fun, while a monochromatic version feels elegant and modern. Playing with zipper colors further enhances the design, giving the bag character.
Adding decorative quilting is another way to make the project special. From floral motifs to geometric patterns, quilting stitches turn the exterior into a canvas. Free-motion quilting is especially effective for this type of bag, allowing unlimited creativity.
Personal touches like appliqué, embroidery, or even fabric painting can also elevate the design. These small details showcase the maker’s personality and transform the bag into a one-of-a-kind piece.
For those who love gifting, the Sew Together Bag Pattern Tutorial Quilt Pattern makes an ideal handmade present. Adding a name label, charm, or custom lining fabric can make the bag even more meaningful for the recipient.
Tips for Success with the Pattern
When creating the Sew Together Bag Pattern Tutorial Quilt Pattern, there are several strategies that can make the process smoother. Starting with accurate cutting is key—small mistakes early on can cause challenges during assembly. Always double-check measurements before cutting fabric and interfacing.
Using quality zippers is another important tip. Since this bag relies heavily on zippers, investing in durable ones ensures longevity. Nylon coil zippers are often easier to sew than metal ones, especially for beginners.
Pressing at every step is essential. It not only keeps seams crisp but also makes final assembly easier. A well-pressed project looks more professional and is easier to handle when sewing multiple layers together.
Don’t be afraid to use basting clips instead of pins, especially when handling thick layers. Clips hold fabric securely without distorting seams, making assembly more manageable.
Patience is also crucial. The pattern involves multiple steps, and rushing can lead to mistakes. Taking time to read instructions carefully and practicing zipper installation on scraps can build confidence.
Finally, remember to enjoy the process. The Sew Together Bag Pattern Tutorial Quilt Pattern is not only about the final product but also about the joy of making. Each step, from quilting to binding, is an opportunity to grow skills and create something useful.
FAQ
What is the Sew Together Bag Pattern Tutorial Quilt Pattern used for?
It’s a zippered organizer bag, ideal for sewing tools, travel items, cosmetics, or stationery. Its quilted design adds durability and a handmade touch.
Is this pattern suitable for beginners?
Yes, although it involves multiple zippers and layers, beginners can succeed by following instructions carefully and practicing techniques beforehand.
Do I need special tools to make this bag?
Basic sewing supplies, a sewing machine, and quilting tools are enough. A walking foot and basting clips can make the process easier.
Can I make the bag using scraps?
Absolutely. Many makers use fabric scraps for the exterior, creating patchwork panels that are both eco-friendly and charming.
How long does it take to complete the project?
Depending on experience, the project can take anywhere from a few hours to a couple of days. Quilting and zipper installation may require extra time for beginners.
Can the bag size be adjusted?
Yes, advanced makers can modify dimensions to create smaller or larger versions, although it may require adjusting zipper lengths and interior compartments.
PATTTERN HERE
The Sew Together Bag Pattern Tutorial Quilt Pattern is a rewarding project that combines creativity, quilting, and practical design. By understanding its structure, following the sewing process carefully, and adding personal touches, anyone can create a unique organizer bag. With practice, this project becomes a great way to build confidence in quilting and zipper techniques while producing something truly useful.