
Butterfly Foundation Paper Piecing Quilt Pattern is one of the most enchanting and creative projects a quilter can undertake. With its delicate wings, symmetrical designs, and the endless color possibilities that mirror nature’s beauty, this pattern transforms simple fabrics into a masterpiece of precision and grace. Whether you are new to paper piecing or an experienced quilter looking to refine your skills, the Butterfly foundation paper piecing Quilt Pattern offers a rewarding challenge that combines technique with artistry.
This quilting method allows you to achieve sharp, accurate angles and intricate shapes that would be difficult with traditional piecing. Foundation paper piecing uses a printed paper template as a guide, ensuring that every seam aligns perfectly, creating clean lines that bring the butterfly motif to life. Beyond the technical skill it develops, this quilting technique invites you to experiment with color gradients, blending shades that reflect the natural beauty of butterfly wings—from vibrant blues to gentle pastels.
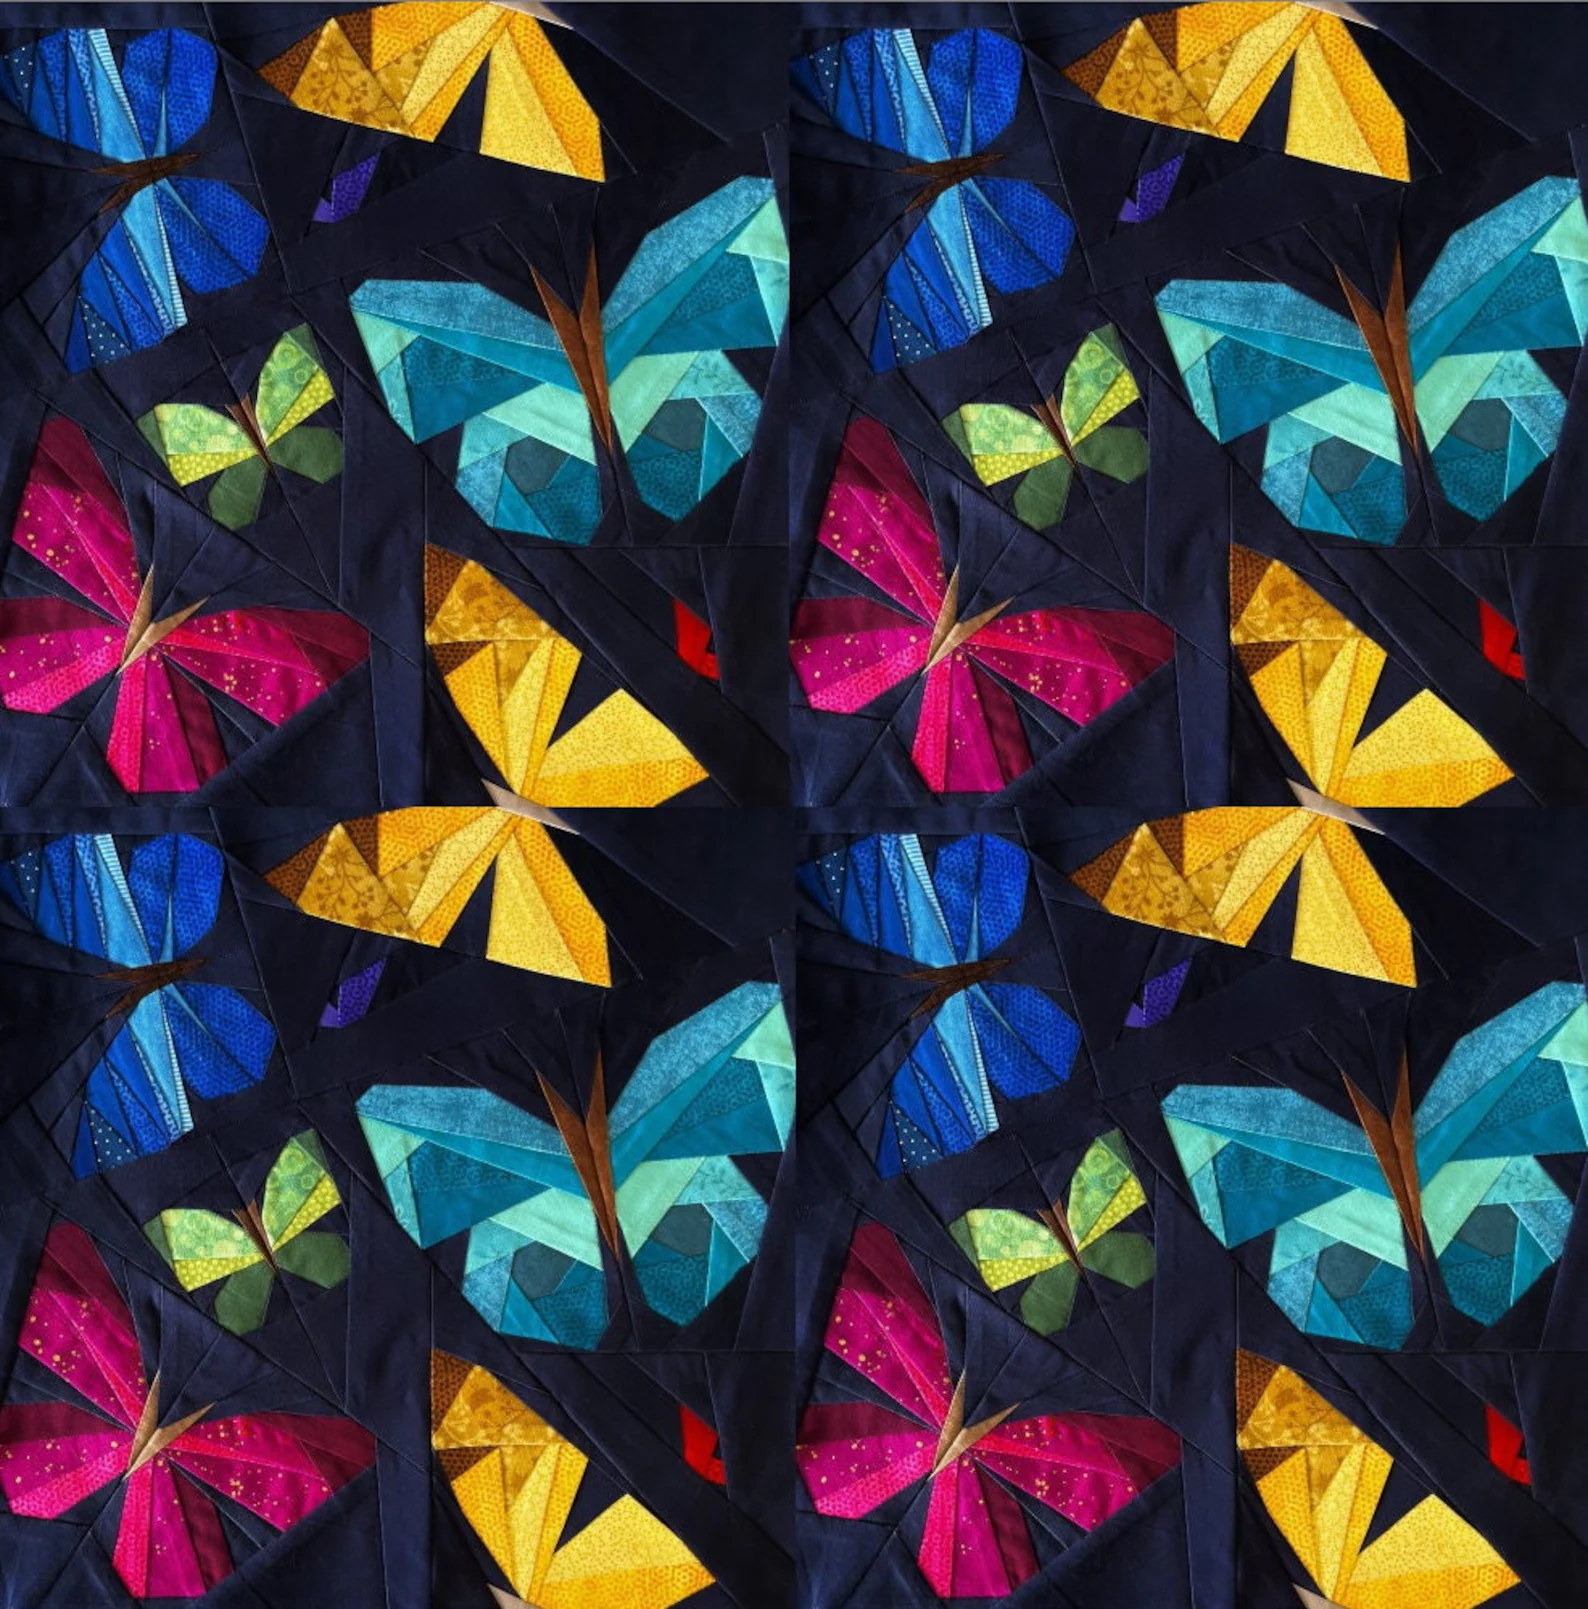
Incorporating the Butterfly foundation paper piecing Quilt Pattern into your next project also provides a chance to personalize your quilting style. You can create a single butterfly block as a centerpiece, or design an entire quilt filled with fluttering butterflies in varied sizes and tones. No matter the approach, the result is always breathtaking. This pattern symbolizes transformation and freedom—perfect themes for a quilt that celebrates creativity, patience, and precision.
1. Understanding Foundation Paper Piecing
To master the Butterfly foundation paper piecing Quilt Pattern, it’s essential to first understand the foundation paper piecing (FPP) method. This technique relies on sewing fabric directly onto a printed foundation, usually paper, following a numerical sequence that guarantees accuracy. Each section of the design is stitched in order, forming a structured and clean composition that eliminates the guesswork common in freehand piecing.
The key advantage of this technique lies in its precision. Because you’re stitching along printed lines, your finished butterfly will have crisp edges and perfect symmetry. This makes FPP ideal for complex motifs, especially ones like butterfly wings, where each curve and angle matters. Even beginners find success with this method once they get comfortable flipping and pressing the fabric correctly.
To begin, you’ll need basic quilting tools: foundation paper, a sewing machine, rotary cutter, fabric scraps, and an iron. Choosing the right paper is important; many quilters use lightweight foundation paper that’s easy to tear away once stitching is complete. This ensures that your Butterfly foundation paper piecing Quilt Pattern maintains its integrity without distorting the seams during removal.
The process starts by placing your first piece of fabric on the paper, right side facing outward. You then position the second piece, sew along the printed line, and press it open. Repeating this process builds your butterfly block piece by piece, section by section. Over time, you’ll see the shape of your butterfly emerge with striking detail and precision.
As you gain confidence, you’ll find that this method also encourages creativity. You can adjust your fabric choices, modify the color layout, or even scale the pattern to create different sizes of butterflies. The Butterfly foundation paper piecing Quilt Pattern gives you both structure and artistic freedom—a perfect balance for quilters who love both order and imagination.
Finally, remember that patience is part of the beauty of this technique. Each step builds upon the last, leading to a finished quilt block that feels like an achievement. Your butterfly will not only represent your technical skill but also your dedication to the craft.
2. Choosing Fabrics and Colors
Selecting fabrics for your Butterfly foundation paper piecing Quilt Pattern is one of the most enjoyable parts of the process. Butterflies are naturally vibrant, offering endless inspiration for your color palette. You can go bold with bright primary colors, or choose soft tones for a gentle, ethereal effect. Each choice tells a different story and affects how your quilt will feel overall.
When choosing fabrics, consider using solids and tone-on-tone prints. These help emphasize the clean lines created by the paper piecing technique. Too many busy prints can obscure the precise butterfly shape, while subtle patterns highlight the symmetry and structure beautifully. Experimenting with gradients—such as shifting from dark to light across a wing—adds depth and visual interest.
A good rule of thumb is to pick fabrics that contrast well against your background fabric. If your butterfly features vibrant pinks or blues, pair them with a neutral backdrop like white, gray, or cream. This contrast helps your butterfly stand out, making the design pop on your quilt. Remember, the Butterfly foundation paper piecing Quilt Pattern thrives on contrast and clarity.
You can also use fabric scraps from previous projects, giving your quilt a patchwork charm. This approach not only reduces waste but also infuses your butterfly quilt with personal memories from other creative moments. Foundation paper piecing works perfectly with small scraps, as each segment of the pattern uses small pieces of fabric.
Try laying out your fabrics before you start stitching. Seeing how the colors interact on your worktable can spark new ideas. You might even find unexpected combinations—like pairing teal with coral or mustard with lavender—that bring your butterfly to life in unique ways. The flexibility of this pattern invites you to explore your artistic side without limits.
Ultimately, color selection is a deeply personal choice. Whether you go for realistic hues or fantastical shades, the end result will be uniquely yours. The Butterfly foundation paper piecing Quilt Pattern becomes not just a quilt, but a reflection of your creativity, mood, and style.
3. Step-by-Step Guide to Creating Your Butterfly Quilt Block
Now that your fabrics are chosen, it’s time to bring your Butterfly foundation paper piecing Quilt Pattern to life. Begin by printing your foundation template. Each butterfly block will typically have several numbered sections, guiding you through the assembly process. Ensure your printer settings are accurate so that the scale of the design remains correct.
Start with section one by placing your first fabric piece on the unprinted side of the paper, making sure it covers the area entirely. Next, position your second piece right sides together, aligning the edge with the stitching line. Sew along the printed line using a short stitch length—this makes it easier to remove the paper later. Then, fold the paper back and trim the excess fabric to maintain neat seams.
Continue adding pieces in numerical order, pressing after each seam to keep your block flat and precise. Be mindful of your fabric’s direction, especially when creating symmetrical wings. The Butterfly foundation paper piecing Quilt Pattern depends on mirrored accuracy, so take your time to align each piece properly before sewing.
Once all sections are complete, trim the block to the correct size, leaving a seam allowance around the edges. Gently tear away the paper from the back, starting from the corners and working inward. The shorter stitch length helps the paper release without damaging the seams. After all the paper is removed, give your block a final press with a warm iron.
You can repeat this process to create multiple butterfly blocks for a full quilt layout. Each block can be identical or varied in color and size for a dynamic effect. Combining several blocks gives the illusion of butterflies fluttering across your quilt top, creating a sense of motion and harmony.
Finally, assemble your quilt by joining the blocks with sashing or background panels. Add borders, quilt as desired, and finish with a binding that complements your color scheme. Your finished Butterfly foundation paper piecing Quilt Pattern quilt will be a testament to your precision, patience, and passion for the craft.
4. Tips and Creative Ideas for Customization
Once you’ve mastered the basics of the Butterfly foundation paper piecing Quilt Pattern, you can explore creative variations that make your quilt stand out. One popular idea is to use metallic or ombré fabrics to mimic the shimmering effect of real butterfly wings. These fabrics catch light beautifully and add a touch of elegance to your quilt.
Another option is to vary the sizes of your butterflies. By enlarging or shrinking the foundation template, you can create a design with butterflies of different scales, giving your quilt a dynamic, lifelike appearance. This variation adds depth and visual rhythm, making your project more captivating.
If you enjoy adding embellishments, consider using embroidery or beadwork to accentuate the butterfly details. Small beads can mimic the glint of sunlight, while embroidery stitches can outline the wings or body, adding texture and charm. Just be sure any added elements are securely stitched and won’t interfere with the quilt’s functionality.
You can also experiment with different layouts. For example, scatter your butterfly blocks across the quilt top or align them in a symmetrical formation. You might even create a gradient effect, with lighter butterflies at the top and darker ones at the bottom. The Butterfly foundation paper piecing Quilt Pattern allows for endless creativity in layout design.
Adding personal touches makes your quilt even more special. You could dedicate it to a loved one, choose colors that reflect their personality, or incorporate hidden fabric pieces that hold sentimental value. Quilts tell stories, and your butterfly quilt can symbolize hope, change, and beauty in every stitch.
Finally, remember that every quilt you make improves your skills and deepens your love for the art. The more you practice, the more intuitive the process becomes. With patience and creativity, your Butterfly foundation paper piecing Quilt Pattern will not only be a stunning display of craftsmanship but also a meaningful piece of art that captures your spirit.
FAQ About the Butterfly Foundation Paper Piecing Quilt Pattern
1. What is the main benefit of using the Butterfly foundation paper piecing Quilt Pattern?
It allows quilters to achieve highly precise and detailed butterfly shapes that are difficult to sew using traditional piecing methods.
2. Is this pattern suitable for beginners?
Yes, beginners can use it with patience. Starting with simple butterfly designs helps build confidence before tackling more complex ones.
3. What type of fabric works best for this pattern?
Solid and tone-on-tone fabrics highlight the clean lines of the pattern. Avoid overly busy prints that can distract from the butterfly shape.
4. Can I reuse the paper template?
Generally, paper templates are designed for single use because they tear during removal. However, you can print multiple copies for repeated projects.
5. How can I add texture or embellishment to my butterfly quilt?
You can use embroidery, fabric paint, or beads to highlight wing details, as long as the embellishments are securely attached.
6. How do I prevent my fabric from shifting while sewing?
Use a shorter stitch length and press after each seam. This ensures your fabric stays in place and your lines remain accurate.
PATTERN HERE
The Butterfly foundation paper piecing Quilt Pattern offers both beauty and challenge, making it a rewarding project for quilters of all levels. Through precision, creativity, and color, you can craft a quilt that celebrates transformation and freedom—the very essence of the butterfly itself. Whether displayed as wall art or gifted to someone special, your finished quilt will radiate charm and skill. We hope this guide has inspired you to begin your own butterfly masterpiece. Please share your thoughts, experiences, and suggestions—we’d love to hear your honest feedback on this beautiful quilting journey.