
Santa Helper Hat Crochet Pattern brings a joyful touch to your holiday season with creativity, warmth, and handmade charm. This pattern is not only fun to make but also a perfect way to spread Christmas cheer among friends and family. Whether you are a seasoned crocheter or a beginner eager to dive into festive crafts, this project will make you fall in love with the magic of yarn and imagination. By following the rightSanta Helper Hat Crochet Pattern, you can create adorable hats for kids, adults, and even pets, turning your celebrations into a colorful winter wonderland.
Crocheting your own Santa Helper Hat is more than just a crafting hobby—it’s a way to express love and care through handmade art. Every stitch tells a story, and every color brings life to your festive decorations. You can personalize your hat with pom-poms, stripes, and even bells to make it unique. This is also a wonderful project for gift giving, as nothing compares to the warmth of a handmade present during the holiday season. With this Santa Helper Hat Crochet Pattern, your creativity becomes the heart of your Christmas décor.
This pattern also offers flexibility for all skill levels. You can adjust the size, style, and details according to your preference. Plus, crocheting this hat is a relaxing and rewarding way to prepare for the holidays. The rhythmic motion of the hook, the softness of the yarn, and the satisfaction of seeing your project come to life make it an ideal winter pastime. The Santa Helper Hat Crochet Pattern will not only enhance your skills but also fill your home with a cozy, cheerful spirit.
1. Materials and Tools You Will Need
To start your Santa Helper Hat Crochet Pattern, gather all your materials in advance. The main supplies include yarn, crochet hooks, scissors, and a tapestry needle. Choosing the right type of yarn is crucial, as it determines the comfort and look of your finished hat. Acrylic or cotton yarns are ideal choices for this project due to their durability and softness.
Make sure to select holiday-inspired colors like red, white, green, and gold. These shades bring the festive essence of Christmas into your creation. If you want a more modern look, you can experiment with pastel tones or glittery yarn for extra sparkle. The Santa Helper Hat Crochet Pattern allows endless creativity when it comes to color combinations.
Crochet hook size depends on your yarn thickness. A 4.0 mm or 5.0 mm hook usually works best for medium-weight yarns. However, always check your yarn label for the recommended hook size. Having stitch markers on hand can help you track your rounds and ensure consistency throughout the hat.
Before you begin, make sure you have a soft measuring tape to determine head circumference. This ensures the hat fits perfectly, whether you’re making it for a child or adult. Always remember to crochet a small test swatch to verify your gauge before starting the full project.
Don’t forget the little extras! Pom-poms, small bells, or faux fur trims can transform your Santa Helper Hat into a festive masterpiece. These decorative touches bring playfulness and authenticity to your final creation.
Lastly, keep your workspace organized and well-lit. This will make crocheting more enjoyable and prevent mistakes. With all materials ready, you’re prepared to dive into the fun process of crafting your Santa Helper Hat Crochet Pattern.
2. Step-by-Step Guide to Making Your Hat
Start by creating a magic ring or chain foundation, depending on your preferred technique. This will form the base of your Santa Helper Hat Crochet Pattern. Work your stitches in continuous rounds to avoid visible seams. A common stitch used for this project is the half double crochet (HDC), as it provides a soft yet durable texture.
As you progress, increase your stitch count gradually to shape the crown of the hat. This helps the top part fit comfortably and smoothly. Once the desired width is achieved, you can maintain the same stitch count for several rounds to form the body of the hat. Remember, the Santa Helper Hat Crochet Pattern should taper slightly to achieve that classic elf or Santa helper shape.
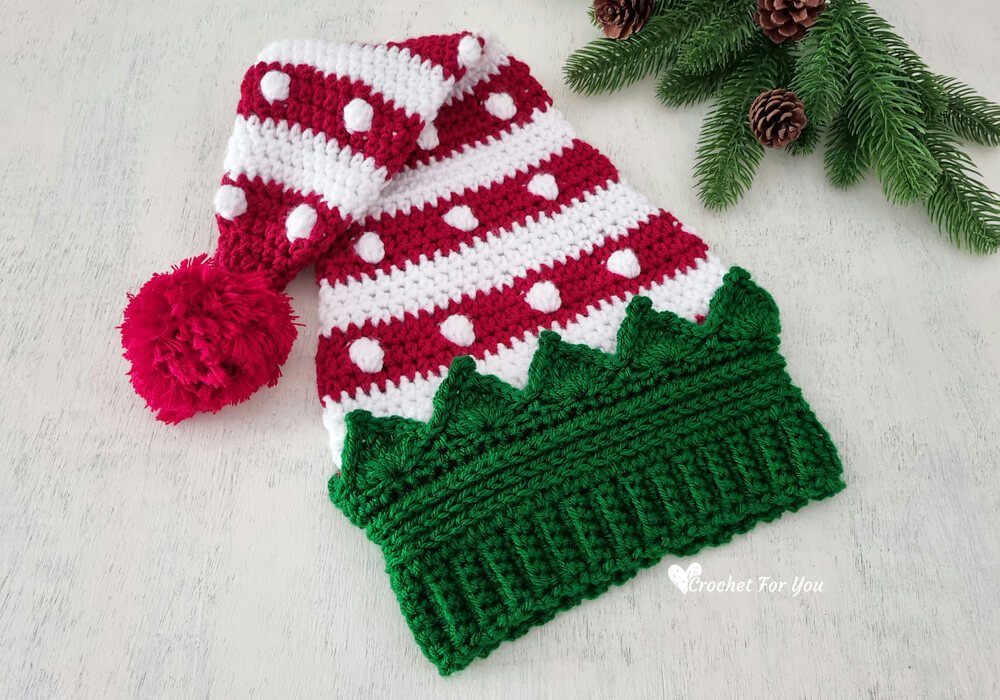
Next, alternate colors for a striped design. Red and white are traditional, but adding green or gold stripes creates a fun, festive variation. Keep your color changes neat by weaving in the ends securely to maintain a polished appearance.
After completing the body, you’ll work on the brim. This part usually requires a few rounds of ribbing made with front and back post stitches, giving the hat a snug fit. You can also add faux fur yarn or white fluff yarn around the edge for a Santa-style look.
Finally, make a pom-pom using leftover yarn or a pom-pom maker. Attach it to the tip of your hat to complete the cheerful design. The pom-pom adds personality and movement, making your Santa Helper Hat Crochet Pattern stand out in every holiday photo.
If you’re making multiple hats, consider labeling them by size. You can easily adjust the pattern for children, adults, or even pets. It’s a delightful way to bring everyone together in matching holiday accessories.
3. Tips for Perfecting Your Crochet Santa Helper Hat
When working on your Santa Helper Hat Crochet Pattern, tension is everything. Keep your stitches even to ensure the hat maintains its shape. Loose tension may cause the hat to stretch too much, while tight stitches can make it stiff. Finding balance takes practice but will make your final result flawless.
Blocking your finished hat is another great tip. This process helps smooth out uneven stitches and gives your hat a professional look. To block your crochet, lightly dampen it and shape it over a head form or bowl. Let it dry completely before wearing or gifting.
Consider adding a lining to make your hat warmer and more comfortable. A fleece or soft cotton lining can prevent the yarn from itching and provide extra coziness during cold weather. This small detail elevates your Santa Helper Hat to a higher level of comfort.
Experiment with stitch variations to give your project a unique twist. For example, try alternating between single crochet and puff stitches for texture. This makes your Santa Helper Hat Crochet Pattern more eye-catching and original.
If you plan to sell or gift your hats, personalize them with name tags or labels. Handmade items carry emotional value, and such personal touches make them even more meaningful.
Lastly, take your time and enjoy the process. Crocheting is meant to be relaxing and joyful, especially when creating festive pieces. Each stitch you make adds warmth and charm to your Santa Helper Hat Crochet Pattern.
4. Creative Ways to Style and Gift Your Hat
Once your Crochet Santa Helper Hat Crochet Pattern is complete, it’s time to show it off! There are countless ways to style and present your handmade creation. Pair it with cozy sweaters, scarves, and mittens for a coordinated winter look. You’ll instantly radiate Christmas cheer wherever you go.
These hats also make excellent gifts. Handmade presents always stand out because they carry love and effort. Whether for friends, family, or coworkers, a Crochet Santa Helper Hat will surely make them smile. Add a small handmade tag that says “Made with Love” to make it extra special.
If you enjoy photography, use your hat as a prop for festive photoshoots. Children wearing these hats look adorable, and family photos become timeless keepsakes. The Santa Helper Hat Crochet Pattern adds a whimsical touch to every holiday picture.
You can also create a matching set for everyone in the family. Imagine Christmas morning with everyone wearing coordinating helper hats—it’s pure holiday magic! You can even make smaller versions for pets, making your celebrations inclusive and joyful.
Another fun idea is to sell your creations at local craft fairs or online markets. Many people look for handmade holiday accessories, and your Santa Helper Hat Crochet Pattern can attract attention for its uniqueness and craftsmanship.
Lastly, use your hat as a holiday decoration. Hang it by the fireplace or place it on a stuffed toy for an adorable Christmas display. Your crochet masterpiece can bring festive energy to any corner of your home.
FAQ
1. What type of yarn works best for the Crochet Santa Helper Hat Crochet Pattern?
Medium-weight acrylic or cotton yarn is ideal. They are soft, easy to work with, and durable enough for regular wear during the holidays.
2. Can beginners try this pattern?
Yes! The Santa Helper Hat Crochet Pattern is beginner-friendly. With basic stitches like single crochet, half double crochet, and color changes, anyone can make it successfully.
3. How can I make the hat fit perfectly?
Measure the head circumference before starting and adjust your stitch count accordingly. Making a small swatch to test your gauge will help ensure the right size.
4. Can I wash the finished hat?
Yes, but it’s best to hand wash it in cold water and lay it flat to dry. This helps preserve the shape and color of your crochet work.
5. What decorations can I add?
Pom-poms, bells, faux fur trims, and ribbons are popular choices. These additions make your Santa Helper Hat festive and full of personality.
6. How long does it take to complete the hat?
Depending on your crochet speed, the project can take anywhere from 3 to 6 hours. Beginners might take a little longer, but the process is enjoyable and rewarding.
PATTERN HERE
The Santa Helper Hat Crochet Pattern is the perfect project to bring festive joy and handmade beauty into your holiday season. From choosing yarns to adding finishing touches, every step is filled with creativity and warmth. You’ll not only craft a stylish accessory but also create memories that last a lifetime.
We hope this guide inspired you to start your own Santa Helper Hat Crochet Pattern today. If you’ve tried it, share your honest opinion and suggestions—we’d love to hear your thoughts and see how your creations turned out!