
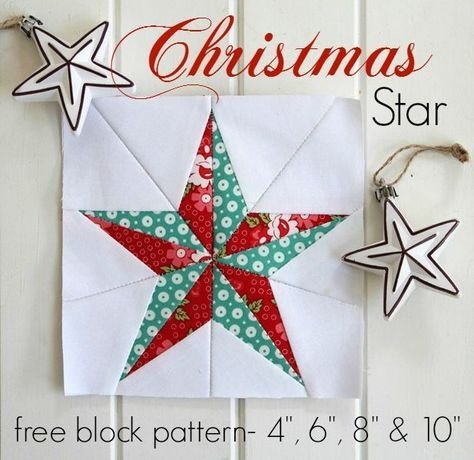
The Christmas Star Quilt Pattern has become one of the most beloved holiday quilting projects among crafters who enjoy blending tradition, creativity, and festive charm. Right from the first stitch, this pattern brings a warm seasonal glow to any home. Whether you are preparing handmade gifts, decorating your living room, or adding a personalized touch to Christmas celebrations, using the Christmas Star Quilt Pattern is a beautiful way to express your creativity during the holiday season. In this article, you will learn everything about creating this stunning piece, from techniques to fabric choices, to assembling each star block with confidence.
Choosing the Christmas Star Quilt Pattern allows beginners and advanced quilters alike to enjoy a project that is both visually impressive and pleasantly achievable. Its geometric harmony, mixed with the symbolic meaning of the star, makes it an excellent holiday craft. The star design stands out in festive décor and pairs beautifully with classic Christmas tones. But beyond aesthetics, this quilt pattern also helps develop essential quilting skills such as precise cutting, accurate piecing, and the ability to work with repeating blocks. With time, patience, and the right guidance, you can turn your quilt into a timeless Christmas heirloom.
As you explore the Christmas Star Quilt Pattern, you will discover how versatile and customizable it truly is. You can play with colors like deep reds, shimmering golds, forest greens, creams, and even icy blues to match your personal holiday palette. Its adaptability allows you to create table runners, full quilts, wall hangings, and even festive pillow covers. The steps described throughout this guide are designed to be simple, clear, and beginner-friendly while offering advanced quilters new ways to refine their design elements. Let’s begin with the essential preparation and techniques that transform fabric and thread into a glowing Christmas masterpiece.
Understanding the Essentials of the Christmas Star Quilt Pattern
When starting the Christmas Star Quilt Pattern, one of the most important steps is gathering high-quality cotton fabrics that perform well when cut into sharp points. Quilters generally prefer fabrics with dense weave and vibrant holiday prints. This ensures crisp blocks and long-lasting results. Selecting fabrics with different contrasts helps define the geometric star design, making it stand out visually.
Another key element is choosing the right tools. Rotary cutters, self-healing mats, and clear acrylic rulers allow precision when working with star points and angles. Because the Christmas Star Quilt Pattern uses repeated units, accurate measurement ensures your blocks join neatly and create a smooth, even finish. Small variations can misalign the star, so preparation becomes essential.
Pressing techniques are also highly important. A well-pressed seam contributes to the clean structure of the star. Using a steam iron, finger pressing between steps, and avoiding bulky seam intersections help each star block lay flat. This makes your finished quilt more professional-looking and increases durability.
Stitch length matters as well. A shorter stitch length is recommended for quilt blocks with multiple angles. This gives higher stability and prevents seams from stretching or coming apart. When working on the Christmas Star Quilt Pattern, a stitch length around 2.0 is usually ideal, especially for beginners.
Before assembling the quilt, performing a test block is extremely useful. Creating a practice star helps you verify color placement, contrast, and cutting accuracy. This step saves time later, preventing the need to correct mistakes after multiple blocks have already been sewn.
Finally, understanding the layout is fundamental. Many quilters sketch their layout on paper or use digital planners to envision how each star will appear in the final quilt. Since the Christmas Star Quilt Pattern relies on repeated motifs, planning ensures the design tells a cohesive visual story.
Choosing Fabrics and Colors for a Stunning Christmas Star Quilt
Selecting the right fabrics helps bring the Christmas Star Quilt Pattern to life beautifully. Traditional Christmas colors like red, green, gold, and white remain classic favorites. However, modern quilters also explore pastel palettes, metallic accents, and monochromatic tones to match various holiday decors.
Mixing prints and solids enhances visual interest. Using a bold print for the star points and a subtle background creates depth. Conversely, using solids for the star and prints for the background can produce a dramatic, elegant look. The Christmas Star Quilt Pattern thrives on contrast to make each star shine brightly.
Texture also impacts the final design. While most quilters use cotton, incorporating linen blends or subtle textured fabrics adds dimension. Just be sure your fabrics behave similarly when washed and cut, ensuring stability in your blocks.
Many crafters also consider incorporating holiday-themed prints such as snowflakes, holly leaves, or tiny ornaments. These prints pair beautifully with the star motif and fit the festive mood. Just remember that overly busy prints may hide the star design, so balance is key.
Color placement should be intentional. Testing color combinations in small swatches helps you visualize how your quilt will look when completed. Photographs under natural light also help evaluate contrast and ensure the Christmas Star Quilt Pattern appears crisp and defined.
Finally, background colors can transform the mood of the quilt. White or cream gives a classic look, while deep navy or black creates a sophisticated and modern holiday aesthetic. The right background can make your star blocks appear luminous and radiant.
Step-by-Step Tips for Piecing Your Christmas Star Quilt Blocks
The first step in assembling the Christmas Star Quilt Pattern is cutting all required pieces with accuracy. Using sharp tools ensures clean edges, which results in points that align smoothly when sewn. Labeling each fabric piece speeds up the assembly and reduces confusion.
Begin with the star points, since they form the center visual of the quilt. Half-square triangles and flying geese units are common components. Focus on seam accuracy and pressing direction. Each small improvement enhances the clarity of your final star shape.
Once the star points are completed, move on to the center square. This area can feature a special print, a fussy-cut motif, or a coordinating solid. The center square acts as the heart of the star, so choosing a visually appealing piece is worthwhile.
Next, assemble each unit according to your pattern instructions. Joining pieces methodically ensures a smooth construction flow. Working block by block helps maintain organization and reduces the likelihood of mistakes.
After assembling individual blocks, trim them to the exact finished size. This ensures consistency when joining the blocks into rows or columns. Precision trimming is especially valuable for the Christmas Star Quilt Pattern, where clean lines are essential.
Finally, lay out your completed blocks before stitching the final quilt top. This allows you to rearrange stars, adjust color distribution, and ensure visual harmony throughout the quilt. Small layout adjustments can greatly enhance the overall design.
Finishing Touches to Elevate Your Christmas Star Quilt
Quilting techniques define the texture and final presentation of the Christmas Star Quilt Pattern. Straight-line quilting works beautifully for beginners and creates a clean, classic finish. Diagonal quilting lines complement the star points and add dimension.
Free-motion quilting offers endless creative possibilities. Swirls, snowflakes, loops, and geometric lines can enhance the holiday theme. Choose designs that complement rather than overshadow the star blocks. If you prefer simplicity, a gentle stipple quilting pattern works well and adds softness.
Binding selection is another opportunity for creativity. A bold red or gold binding frames the quilt beautifully. Striped bindings add a whimsical touch, while solid colors provide a polished, traditional finish. Make sure the binding fabric coordinates with your star blocks.
Washing and blocking the quilt help set the stitches and give the final piece a smooth, flat look. Mild detergent and gentle washing are recommended. After drying, a light press ensures everything lies neatly and enhances the star design.
Labeling the quilt adds a personal touch and preserves the story of your creation. Include your name, the year, and the quilt’s title. Handmade quilts often become treasured keepsakes, and a label helps future generations appreciate their history.
Finally, display your quilt proudly. Whether draped over a couch, hung on a wall, or gifted to someone special, the Christmas Star Quilt Pattern brings holiday joy and warmth into any home.
FAQ – Christmas Star Quilt Pattern
1. Is the Christmas Star Quilt Pattern suitable for beginners?
Yes, beginners can successfully complete this quilt with patience and careful attention to measurements. The star blocks teach useful foundational skills.
2. What fabrics work best for this pattern?
High-quality cotton fabrics with good contrast are ideal. They produce crisp shapes and clean lines in the star points.
3. Can I use non-traditional colors?
Absolutely. Modern holiday palettes like navy, silver, blush pink, or metallic accents create a beautiful contemporary version of the Christmas Star quilt.
4. How long does it take to complete the quilt?
Time varies depending on block quantity, but many crafters finish the quilt top in a few days or weeks, depending on sewing frequency.
5. What size should the finished quilt be?
The size depends on the number of blocks you choose. The Christmas Star Quilt Pattern is flexible and works for table runners, throws, or full-sized quilts.
6. Do I need a special sewing machine?
No. Any basic machine that can sew straight stitches will work well for this project.
7. How do I keep my star points sharp?
Accurate cutting, consistent seam allowances, and careful pressing help keep star points crisp and aligned.
8. Can I quilt by hand instead of machine?
Yes, hand quilting creates a charming, traditional feel and works perfectly with this pattern.
Creating a quilt using the Christmas Star Quilt Pattern is a rewarding and festive experience that allows you to express creativity while producing a meaningful holiday piece. Throughout this guide, you learned how to choose fabrics, assemble star blocks, and finish your quilt with beautiful details. Whether you are crafting a gift or enhancing your home décor, this quilt pattern is a timeless choice that brings warmth to any Christmas celebration. I hope this article has inspired you to begin your own project. Please leave your honest opinion and share suggestions so I can continue creating helpful content for your crafting journey.