
The Crochet 70’s Vintage Daisy Flower Square Tutorial brings back the groovy vibes of a beloved era, combining timeless floral motifs with the charm of retro crochet. This beautiful square pattern is not only a nostalgic project but also a versatile piece you can use in various creations like blankets, bags, or wall hangings. Whether you’re an experienced crocheter or just learning the ropes, this tutorial will guide you through the process with ease and clarity.
Inspired by the carefree and colorful aesthetic of the 1970s, the daisy flower square remains a popular choice among crochet enthusiasts who admire vintage designs. The unique combination of bold petals, bright centers, and textured borders makes this pattern stand out from more modern motifs. It’s the perfect way to inject a bit of retro charm into your next handmade project.
In this Crochet 70’s Vintage Daisy Flower Square Tutorial, you’ll learn step-by-step how to create a square that pays tribute to the decade of peace, love, and handmade art. With just a few basic stitches and some creativity, you can bring this nostalgic flower to life and make your own piece of history with yarn.
1. Understanding the Basics of the 70’s Daisy Square
The 70’s Daisy Flower Square is made using fundamental crochet techniques, making it accessible for all skill levels. Most patterns start with a magic ring or a chain circle, forming the center where the petals will be worked. From there, each round builds upon the last to create the daisy and square shape.
One of the defining features of this motif is its bold daisy petals, which are often crocheted in white or bright colors to mimic real flowers. These petals typically use double crochet (dc) or treble crochet (tr) stitches to create a puffed, dimensional look. They radiate out from the center and give the square its signature floral appearance.
After completing the flower, the piece is squared off with a round or two of colored yarn, transforming the circular flower into a structured square. This outer layer is often where creative expression flourishes, as crocheters choose contrasting hues or traditional earth tones for a true vintage look.
The size of the finished daisy square depends on the yarn weight and hook size used. Commonly, worsted weight yarn and a 5.0mm hook are chosen, but adjustments can be made to suit your project. Using a thinner yarn results in a more delicate square, ideal for finer projects like clothing or doilies.
Another thing to consider is the joining method if you’re planning to combine multiple squares. Slip stitch, whip stitch, and join-as-you-go are all great options that maintain the aesthetic of the 70s. Each one gives a slightly different texture and look, so choose based on the overall feel of your creation.
Lastly, remember that the beauty of the Crochet 70’s Vintage Daisy Flower Square Tutorial lies in its adaptability. Whether you stick with the classic 70s palette or go for modern pastels, you’re still creating something that celebrates the golden age of crochet artistry.
2. Materials You’ll Need for the Vintage Daisy Square
To begin this Crochet 70’s Vintage Daisy Flower Square Tutorial, you’ll want to gather the right tools and yarn. The good news is, you don’t need anything fancy—just the basics and a splash of creativity.
Start with worsted weight yarn or cotton yarn, depending on your preference. For the true 70s aesthetic, choose bright, bold colors like mustard yellow, burnt orange, avocado green, or turquoise blue. These colors capture the essence of vintage crochet and make the daisy motif pop.
A 5.0mm (H-8) crochet hook is a great choice for this tutorial. It works well with worsted weight yarn and gives enough structure without making the square too tight or too loose. If your tension runs tight or loose, feel free to adjust your hook size accordingly.
You’ll also need a pair of sharp scissors, a yarn needle for weaving in ends, and stitch markers if you find them helpful when working in rounds. Though not strictly necessary, stitch markers can be especially useful for beginners when marking the start of each round.
When choosing yarn, consider using high-contrast colors for the center, petals, and square background. A typical combination is yellow for the center, white for the petals, and a vibrant or earthy shade for the square. This not only highlights the daisy but also gives a beautiful retro contrast.
Before starting, it’s a good idea to create a gauge swatch if you’re planning to make a blanket or garment. This ensures consistency across all your squares. Though not essential for decorative projects, it’s a valuable step for anything wearable or fitted.
Lastly, prepare a clean and well-lit workspace, especially if you’re using lighter or darker yarns that can be harder to see. Having your materials organized and accessible makes the whole crochet process smoother and more enjoyable.
3. Step-by-Step: Crochet Your First 70’s Daisy Square
Now we dive into the core of this Crochet 70’s Vintage Daisy Flower Square Tutorial. This step-by-step guide walks you through making a complete square from start to finish. Each round is simple, repetitive, and rewarding.
Round 1 starts with a magic ring or chain 4 and slip stitch to form a loop. Crochet 12 double crochets (dc) into the ring and join with a slip stitch. This creates the daisy center. Use yellow or orange yarn for a bold, sunny look.
Round 2 forms the petals. Switch to white yarn, chain 2, and work 2 treble crochets (tr), chain 2, then slip stitch into the same stitch. Repeat this in each stitch around for a total of 12 petals. This creates that iconic puffed daisy look.
Round 3 begins the transition to a square. Change to your background color and work double crochets between petals to start squaring the shape. Focus on spacing evenly and turning the flower into a square format gradually.
Round 4 and 5 build up the corners and sides. You’ll typically chain 2 or 3 in each corner and work sets of double crochets or granny stitch formations. This is where the flower square gets its defined shape and vintage structure.
Feel free to experiment with additional rounds if you want a larger square. Many crocheters expand their squares using the granny stitch pattern—clusters of three double crochets separated by chain spaces.
Once completed, finish off your square by weaving in the ends with a yarn needle. You now have a completed Crochet 70’s Vintage Daisy Flower Square that’s ready to be joined with others or used in a stand-alone project.
4. Creative Ways to Use Your Finished Daisy Squares
One of the best parts of mastering the Crochet 70’s Vintage Daisy Flower Square Tutorial is deciding how to use your finished squares. There are countless ways to turn these charming motifs into practical and beautiful items.
Create a retro-style blanket by crocheting multiple daisy squares together. Use a whip stitch or join-as-you-go method for a seamless look. Add a granny stitch border for extra flair and warmth.
Design a boho-inspired bag by using two or more squares for the sides and a lining for support. Add a strap and you have a stylish handmade tote with true vintage character. This is a favorite choice for those who love wearable crochet.
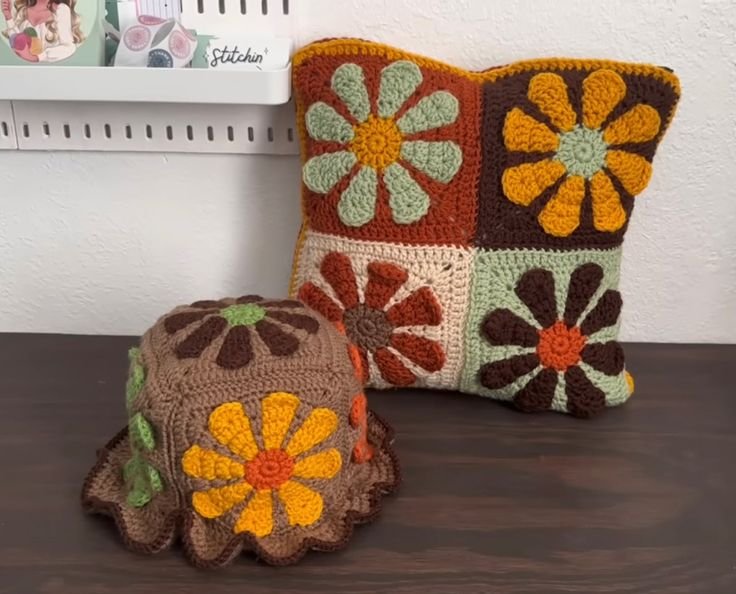
Make a pillow cover by sewing or crocheting daisy squares onto a fabric base or joining them back-to-back with a zipper or button closure. These add a burst of color and charm to any room decor.
Use them in wall hangings or bunting banners. Attach squares to a dowel rod with yarn tassels or string several together as garland. It’s a great way to add color and creativity to your craft room or living space.
Turn your squares into coasters or placemats. Crochet just one square in a thicker yarn or with additional rounds to create a larger piece. Add a felt or cork backing for a professional, durable finish.
Lastly, make wearable accessories like headbands, vests, or even jackets by creatively combining multiple daisy squares. With a bit of sewing or extra crocheting, your squares can become a fashion statement straight from the 70s.
FAQ – Crochet 70’s Vintage Daisy Flower Square Tutorial
Q1: Can beginners follow this tutorial easily?
Yes! This Crochet 70’s Vintage Daisy Flower Square Tutorial uses basic stitches and includes step-by-step instructions. It’s suitable for all skill levels, including beginners.
Q2: What kind of yarn should I use?
Worsted weight or cotton yarn works best for this pattern. Choose bold, retro colors like orange, yellow, and green to keep the 70s vibe alive.
Q3: How do I join multiple squares together?
You can use whip stitch, slip stitch, or join-as-you-go methods. Each method offers a different look and feel, so pick the one that suits your project style.
Q4: Can I make larger squares?
Absolutely! Add more rounds using granny stitch or double crochet patterns to expand the square to your desired size.
Q5: How can I use the squares in other projects?
Daisy squares can be used in blankets, bags, pillows, wall hangings, garments, and more. Their versatility makes them ideal for various creative projects.
Q6: Do I need to block the squares after finishing?
Blocking is optional but recommended if you want evenly sized and shaped squares, especially for projects that require precise joining
The Crochet 70’s Vintage Daisy Flower Square Tutorial offers not just a nostalgic crafting experience but also endless opportunities for creative expression. From understanding the history and basics to completing your own square and finding fun ways to use it, this guide helps bring your vision to life. We hope you’ve found this tutorial inspiring and informative. Please leave your honest opinion in the comments and share any suggestions or questions—we’d love to hear from you and support your crochet journey!