
How To Make A Patchwork Pig With Free Pattern Quilt Pattern is a creative and enjoyable way to bring quilting into a fun, decorative project. Many quilters look for unique designs that go beyond traditional blankets or throws, and a patchwork pig is one of those projects that combines charm, functionality, and the timeless beauty of quilting. By learning this technique, you can make a delightful pig-shaped soft toy or decorative piece while practicing your patchwork skills.
This type of project appeals to both beginners and experienced quilters because it is easy to customize. You can use leftover fabric scraps, favorite color combinations, or even themed prints to design your pig. The free quilt pattern makes the process even more approachable, guiding you through each step without the need for complicated instructions. Quilters often find joy in reusing fabric pieces, making this not only a fun craft but also an eco-friendly practice.
Another reason this pattern is so popular is its versatility. You can use your patchwork pig quilt pattern as a cuddly toy for children, a whimsical decoration for your sewing room, or even a thoughtful handmade gift. By following the right steps, your pig will have the perfect blend of character and craftsmanship. In the sections below, we will explore the materials, the process, and tips that will help you succeed with this project.
Gathering Materials For Your Patchwork Pig
To start making a patchwork pig with free pattern quilt pattern, the first thing you need is the right selection of materials. Choosing fabrics is one of the most exciting steps because the colors and textures will define the personality of your pig. Go for cotton fabrics, as they are easy to sew, durable, and widely available.
Apart from fabric, you will need some basic quilting tools. These include scissors or a rotary cutter, a cutting mat, quilting pins, a ruler, and a sewing machine. A hand-sewing needle and matching threads are also useful for small finishing touches. Always ensure your materials are sharp and precise to achieve neat results.
Stuffing is another essential element for your pig. Polyester fiberfill is commonly used because it is soft and creates a plush effect. You can also experiment with eco-friendly stuffing options, such as fabric scraps or cotton batting. Make sure to fill the pig evenly so it keeps its shape.
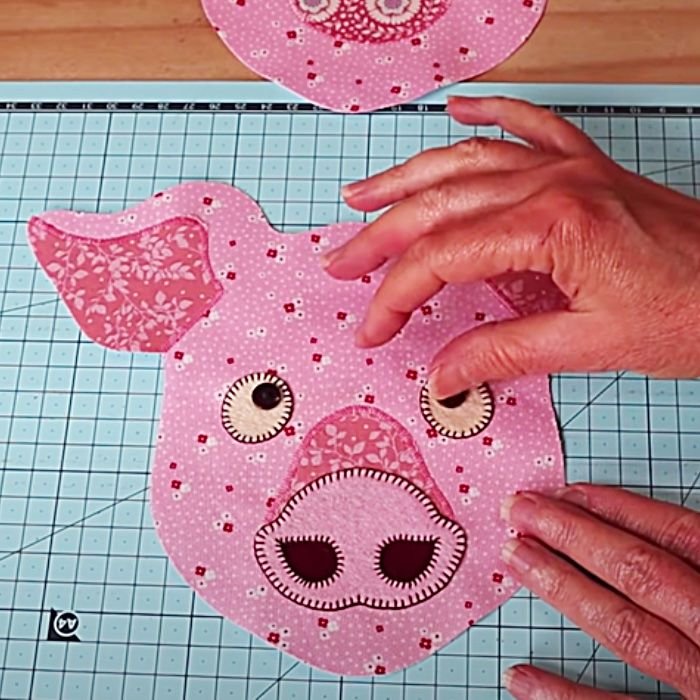
Don’t forget about safety details, especially if you are making the patchwork pig for children. Instead of using buttons for the eyes, you can embroider them with black thread. This prevents any choking hazards and adds a handmade touch.
Printing or sketching the free quilt pattern is also part of the preparation. Patterns usually include pieces for the pig’s body, ears, snout, and legs. Label each piece carefully and cut them from paper or cardboard before transferring them onto fabric.
Having everything ready before you start sewing saves time and reduces stress. Lay your materials out on a flat surface and organize them by type. This way, you can easily access everything as you work through the project.
Cutting And Piecing The Fabric
Once you have the materials, it’s time to cut and piece your fabrics. This step is where the patchwork truly comes alive. Using your chosen pattern, trace the shapes onto the fabric and cut carefully. Accuracy is key here; the better your cuts, the smoother the assembly will be.
Patchwork quilting involves sewing together small pieces of fabric to create a larger design. For the pig, you will piece together squares, rectangles, or other shapes before assembling them into the pig’s body. Experiment with different color layouts to give your pig a unique appearance.
When sewing the fabric pieces, use a ¼-inch seam allowance, which is the standard in quilting. Press each seam flat with an iron as you go. This keeps the patchwork neat and reduces bulk, making it easier to stitch the sections together.
The pig’s body can be pieced in panels. For example, the sides, back, and belly may each be separate patchwork sections. Once these panels are complete, you will sew them together to form the full pig shape.
It’s helpful to lay out your fabric pieces on a table before sewing. This allows you to visualize how the final design will look. If you notice any colors that clash or patterns that feel unbalanced, you can rearrange before stitching.
Be patient during this stage. Patchwork requires precision and care, but the effort pays off in a beautifully designed fabric pig. Each small piece you add contributes to the overall charm of the project.
Assembling And Stuffing Your Pig
After cutting and piecing, the next step in how to make a patchwork pig with free pattern quilt pattern is assembling the pieces. This stage transforms your flat quilt panels into a three-dimensional pig. Begin by sewing the sides to the belly section, followed by the back piece. Work slowly, aligning the seams properly for a professional look.
The pig’s snout and ears are small but important details. Sew them separately and attach them to the head before closing the seams. These features bring your pig to life and give it personality. You can also make variations, like floppy ears or a longer snout, to add uniqueness.
When most of the body is assembled, leave a small opening at the back or belly. This is where you will insert the stuffing. Start with small amounts and push them into the corners, such as the snout, ears, and legs, using a stick or the back of a pencil. Gradually fill the rest of the body until the pig feels firm but still soft.
Stuffing evenly is essential for balance. Too much in one area can distort the shape, while too little can make the pig floppy. Adjust until you are satisfied with how the pig looks and feels.
Once stuffed, sew the opening closed with a ladder stitch or invisible stitch. Take your time to make the seam secure and neat. This will ensure that the stuffing stays inside and the pig maintains its form over time.
At this stage, your pig will already look complete, but you can add extra details such as embroidered eyes, a curly tail, or decorative stitching. These touches add character and make your project feel truly handmade.
Tips For Personalizing Your Patchwork Pig
One of the most enjoyable aspects of making a patchwork pig quilt pattern is personalization. You can let your creativity flow by choosing themes, color palettes, or embellishments. Every pig can be unique, reflecting your personality or the person you are gifting it to.
A popular idea is to use fabrics that hold sentimental value, such as scraps from baby clothes, old quilts, or favorite shirts. This makes the pig a memory-filled keepsake that carries emotional meaning.
You can also experiment with seasonal themes. A pig made with red and green fabrics can become a festive decoration for Christmas, while pastel colors might be perfect for Easter or springtime.
Adding embroidery is another way to personalize your pig. You could stitch flowers, initials, or patterns onto the fabric pieces before assembling them. This makes the pig more detailed and artistic.
Don’t be afraid to play with textures. Mixing cotton with flannel, denim, or even corduroy can create a pig with interesting contrasts. Just ensure that the fabrics are easy to sew and similar in weight.
Lastly, think about the purpose of your pig. If it’s meant as a toy, keep it soft, safe, and washable. If it’s a decorative piece, you might add buttons, ribbons, or lace for extra flair. Tailor your choices to suit the final use.
FAQ About Patchwork Pig Quilt Pattern
1. What is a patchwork pig?
A patchwork pig is a soft toy or decorative figure made by sewing together fabric pieces in a patchwork style, often following a quilt pattern.
2. Do I need advanced quilting skills for this project?
No, this project is beginner-friendly. The free pattern provides clear guidance, and basic sewing skills are enough to complete it.
3. Can I make the pig using fabric scraps?
Yes! This is one of the best uses for leftover fabric. Scraps give the pig a unique and colorful design.
4. How long does it take to finish a patchwork pig?
The time varies, but on average, a beginner can complete the project in a weekend. More experienced quilters might finish it in a single day.
5. Is the patchwork pig safe for children?
Yes, as long as you avoid small parts like buttons for eyes. Embroidered or felt features are safer for toys.
6. Can I resize the pattern to make larger or smaller pigs?
Absolutely. Simply enlarge or reduce the printed pattern before cutting your fabric. The steps remain the same.
7. Do I need a sewing machine?
While a sewing machine makes the process faster and neater, you can also hand-sew the pig if you prefer.
8. How do I wash the finished pig?
If it’s made for children, use machine-washable fabrics and stuffings. Otherwise, spot cleaning with a damp cloth is usually enough.
PATTERN HERE
Learning how to make a patchwork pig with free pattern quilt pattern is a rewarding project for quilters of all levels. It combines the beauty of quilting with the joy of creating something whimsical and fun. By gathering the right materials, piecing fabric carefully, assembling with patience, and adding personal touches, you can make a pig that is both charming and meaningful.
Now that you’ve learned the steps and tips, we would love to hear from you. Share your honest opinion and suggestions about this article, and let us know how your own patchwork pig project turns out!