
How to Make a Wonderful Crochet Doily FREE PATTERN: is a creative journey into the timeless art of crocheting. Whether you’re a seasoned crafter or just beginning your exploration into the world of yarn, making your own crochet doily brings joy, satisfaction, and a beautiful handmade piece to decorate your space. In this article, we’ll walk you through everything you need to know to get started, from materials to step-by-step instructions.
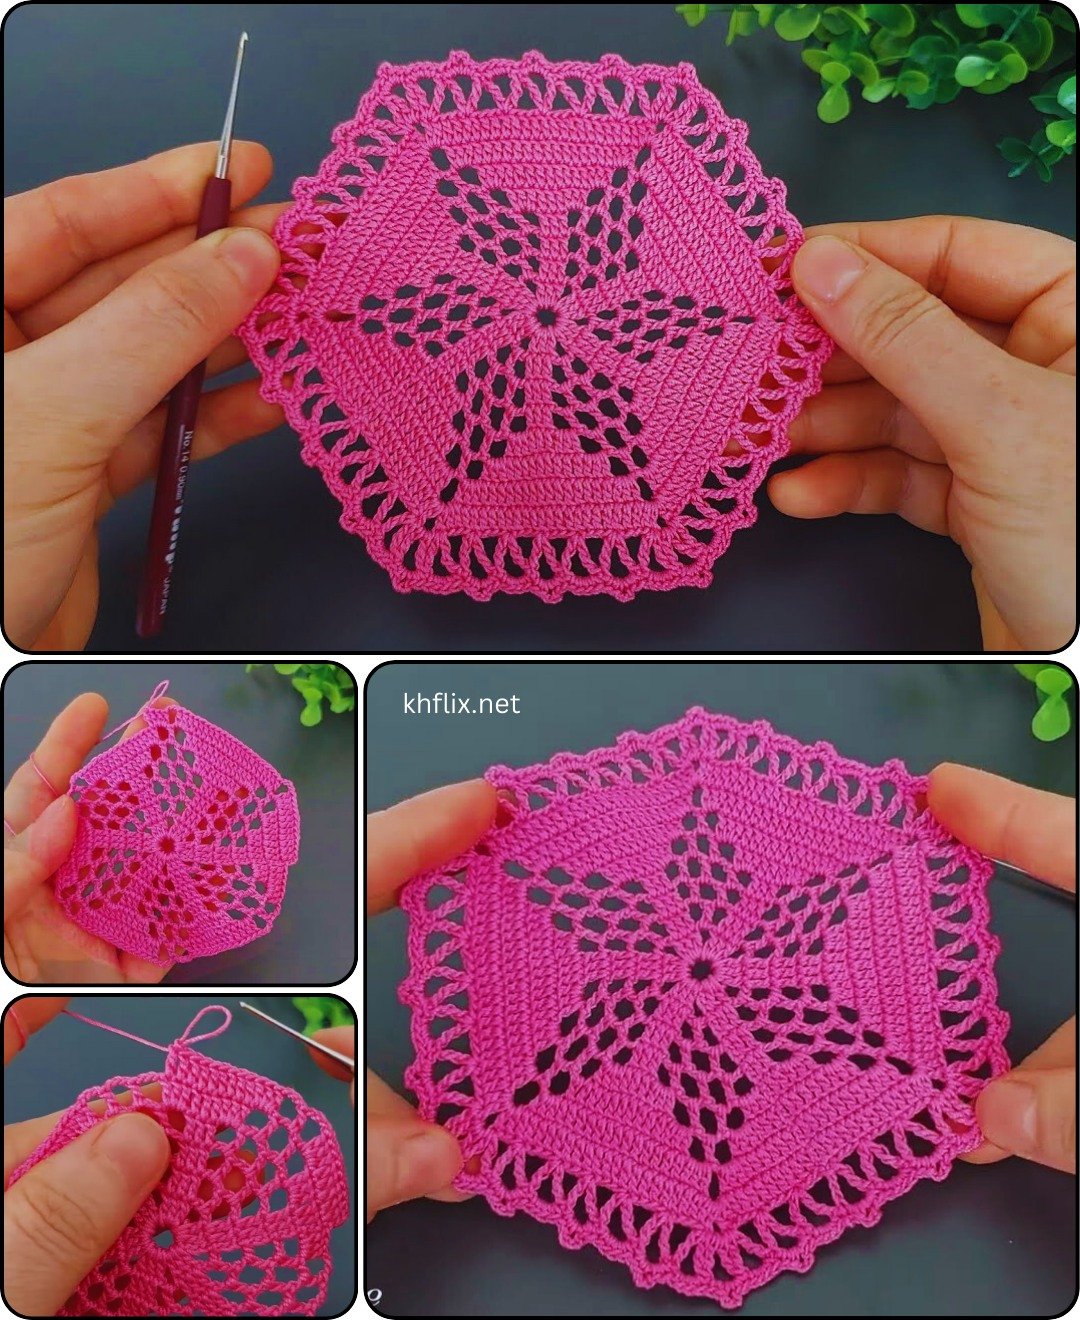
The beauty of a crochet doily lies in its delicate design and vintage charm. It’s a lightweight, lace-like creation that adds elegance to tables, dressers, or even as wall art. With the help of this guide, you’ll be able to create your very own masterpiece using a free crochet pattern, ensuring both accessibility and creativity.
By the end of this post, you’ll not only understand how to make a wonderful crochet doily FREE PATTERN: but also feel confident in applying your skills to new and more intricate designs. Let’s unravel the magic of crochet together!
1. Choosing the Right Materials for Your Crochet Doily
Before diving into your project, the first step in how to make a wonderful crochet doily FREE PATTERN: is selecting the proper materials. This impacts both the final look and ease of crocheting.
- Cotton yarn or thread is traditionally used for crochet doilies due to its fine texture and durability. Choose a high-quality cotton thread in your preferred color—white or cream is classic, but vibrant hues offer a modern twist.
- Your crochet hook size should match your chosen thread. Typically, a 1.5 mm to 2.5 mm hook is used for delicate doily designs. Check the yarn label for specific recommendations.
- Don’t forget sharp scissors and a tapestry needle for weaving in ends once your doily is complete. A stitch marker can be useful for keeping track of rounds if you’re using a complex pattern.
- When choosing a free pattern, look for one labeled as beginner-friendly if this is your first attempt. There are countless CROCHE patterns available online from generous designers.
- Have a blocking board and pins ready. Blocking helps shape your doily and open up the intricate lacework, giving it a professional finish.
- Lastly, gather patience and passion. Crocheting a doily isn’t just about creating a decorative piece—it’s about enjoying the process of crafting something truly special.
2. Understanding the Structure of a Crochet Doily
To master how to make a wonderful crochet doily FREE PATTERN:, it helps to understand its basic structure. Most doilies are worked in the round, starting from the center and expanding outward.
- A doily pattern typically begins with a magic ring or a few chains joined into a circle. This creates the base of your central motif and is the anchor point for the rest of the design.
- The majority of stitches in a doily are variations of chains, single crochets, double crochets, and slip stitches. These are combined in different ways to produce lacy patterns.
- Repeats are common in doily designs. You’ll often repeat a sequence of stitches around each round, which helps form the symmetrical floral or starburst shapes doilies are known for.
- Some free crochet patterns include diagrams, also known as charts, which visually map the stitches round by round. These can be helpful if you’re a visual learner.
- As you build each round, pay close attention to stitch count. Missing or adding a stitch can throw off the pattern and result in a warped doily.
- Many CROCHE artists block their doilies once completed. This involves dampening the piece and pinning it to a surface so it dries flat and symmetrical, revealing all the lacy details.
3. Step-by-Step: How to Make a Wonderful Crochet Doily FREE PATTERN:
Now it’s time for the hands-on part. Below is a simplified step-by-step method for making your very first doily. Remember, patience is key!
- Step 1: Start with a magic ring, or chain 6 and join with a slip stitch to form a ring. Chain 3 to begin your first round (this will count as your first double crochet).
- Step 2: Work 11 double crochets into the center of the ring. Join with a slip stitch to the top of the starting chain. You now have 12 stitches forming your center circle.
- Step 3: Begin building rounds. For example, in Round 2, you might chain 3, then work 1 double crochet into the same stitch, then 2 double crochets into each stitch around (24 total). This technique increases your circle.
- Step 4: Add lacy details. In later rounds, you’ll use chain spaces to create openwork. For example, “chain 5, skip 2 stitches, single crochet in the next” is a common lacy technique.
- Step 5: Follow the full pattern. Continue adding rounds according to your chosen free crochet pattern. If you’re following a diagram, mark each completed round for accuracy.
- Step 6: Finish and block. Once complete, fasten off and weave in ends. Soak your doily in lukewarm water, squeeze gently, and pin it on a board to dry in its final shape.
4. Tips and Tricks to Improve Your Crochet Doily Skills
If you’re passionate about how to make a wonderful crochet doily FREE PATTERN: and want to level up your skills, these tips will help you create cleaner, more beautiful results.
- Practice gauge control. Maintaining even tension will keep your doily flat and consistent. Uneven stitches can cause buckling or flaring, which is hard to fix later.
- Use stitch markers for rounds with complex repeats or tricky transitions. They help you avoid skipping stitches or repeating incorrectly.
- Experiment with color. While traditional doilies are white, colorful thread or even ombré yarn can bring a modern look to your creations.
- Learn to read charts. Visual patterns help you understand stitch placement at a glance and are widely used in advanced doily designs.
- Keep your thread clean. Because crochet thread is delicate and light-colored, be sure your hands and workspace are clean to avoid stains.
- Join online communities. Platforms like Ravelry, Pinterest, and Instagram are full of fellow CROCHE lovers sharing patterns, advice, and inspiration. Don’t be afraid to ask questions and share your work!
FAQ: How to Make a Wonderful Crochet Doily FREE PATTERN:
Q1: Can beginners really make a crochet doily?
Yes! There are many beginner-friendly free patterns that use basic stitches. Starting with a simple round doily is a great way to practice new skills.
Q2: What is the best thread for a crochet doily?
Mercerized cotton thread is the most recommended for its smooth texture and crisp finish. Choose size 10 for beginners.
Q3: How long does it take to crochet a doily?
Depending on size and complexity, it can take anywhere from 2 hours to a few days. Simpler patterns are faster to complete.
Q4: Do I need to block my finished doily?
Yes, blocking is essential. It helps open up the stitches, defines the lace design, and gives your doily a professional appearance.
Q5: Are doily patterns really free?
Absolutely! Many talented designers share free crochet doily patterns online. Always check copyright and attribution before sharing your finished work.
Q6: Can I sell items made from free doily patterns?
Yes, most free patterns allow you to sell finished items. Be sure to read the pattern’s terms of use and credit the designer when required.
PATTERN HERE
Now that you’ve learned how to make a wonderful crochet doily FREE PATTERN:, you’re ready to bring timeless charm to your home with a handcrafted touch. From choosing materials to following detailed rounds and finishing techniques, this guide has given you the tools to start creating with confidence.
Whether you keep your doily as a treasured piece or gift it to someone special, the joy of making something beautiful by hand is unmatched. We’d love to hear your thoughts—please share your honest opinion and feel free to suggest new topics or questions for our next crochet article! Happy crocheting! 🧶✨