
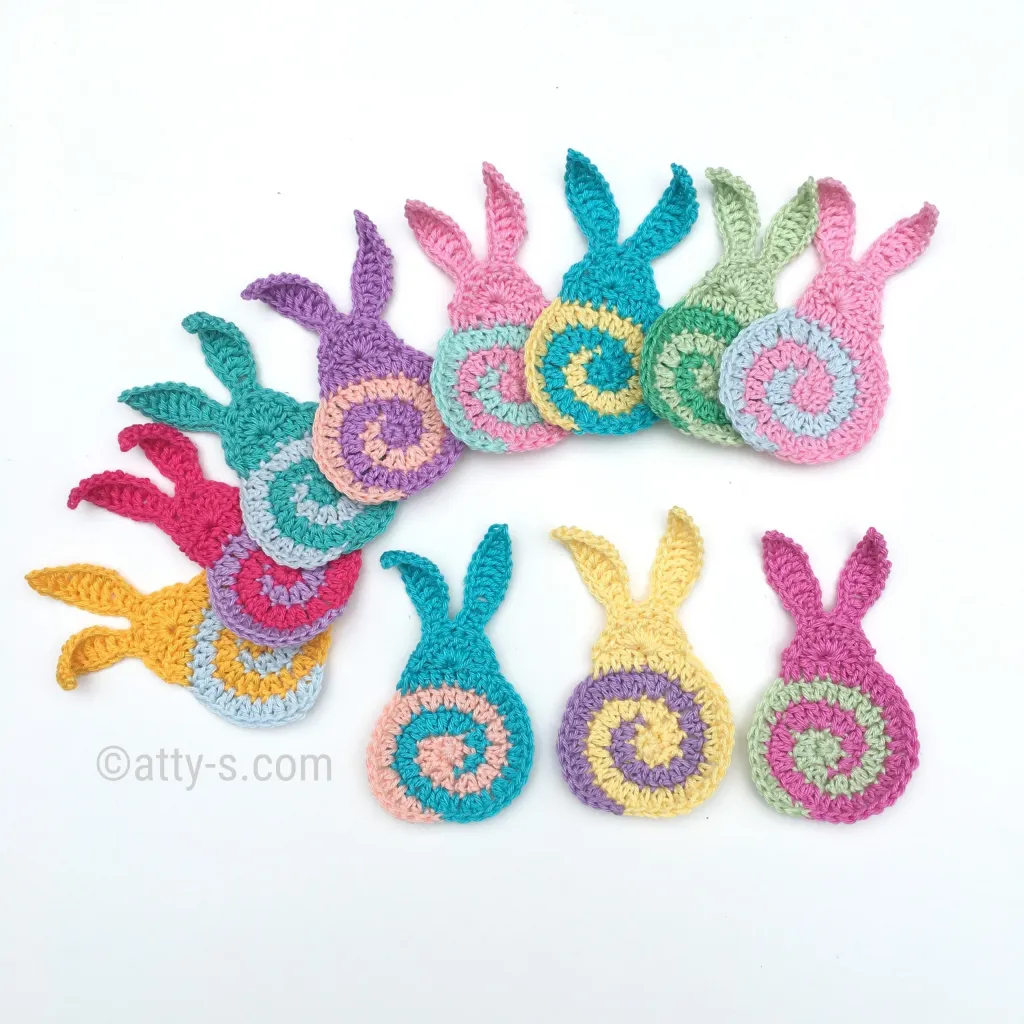
Looking for a Swirly Easter Bunny Free Crochet Pattern to add a touch of handmade charm to your Easter decor or gift ideas? You’re in the right place! This adorable bunny, with its playful swirls and soft texture, is the perfect project for both beginner and seasoned crocheters. Whether you want to create a cute centerpiece, a thoughtful gift for a loved one, or simply practice your crochet skills, this pattern has something for everyone.
Crocheting for Easter brings out the best of creativity — from pastel-colored yarns to intricate stitches, the possibilities are endless.
The Swirly Easter Bunny Free Crochet Pattern not only allows you to craft something beautiful but also lets you infuse each stitch with love and personality.
In this comprehensive guide, we’ll walk you through everything you need to know about making your very own swirly bunny, from materials to step-by-step instructions. Let’s hop right in and get started!
1. Materials Needed for the Swirly Easter Bunny
Before diving into the crochet process, it’s crucial to gather all the materials you need. The right supplies will make your crafting experience smoother and more enjoyable.
- Yarn: Opt for soft, pastel-colored yarn suitable for amigurumi projects. Acrylic or cotton yarn works best.
- Crochet Hook: A 3.5mm or 4.0mm crochet hook is ideal for this pattern.
- Stuffing: Use high-quality polyester fiberfill for a plush and huggable bunny.
- Safety Eyes: Small black safety eyes to give your bunny a cute, expressive face.
- Tapestry Needle: For weaving in ends and sewing parts together.
- Scissors: A sharp pair for clean cuts.
Once you have all the materials ready, you can move on to the actual crocheting process with confidence.
2. Step-by-Step Instructions to Crochet Your Swirly Bunny
Now that your supplies are gathered, let’s start crocheting! Follow these simple steps carefully to bring your bunny to life.
- Head and Body: Begin by crocheting a magic ring and work in continuous rounds. Gradually increase stitches to shape the head.
- Ears: Crochet two long, slightly curved ears. Use simple single crochet stitches to achieve a soft, floppy look.
- Arms and Legs: Create short, stubby limbs using the same yarn and stitch pattern as the body.
- Tail: Craft a small pom-pom for the bunny’s fluffy tail.
- Swirls: Add the signature swirls by crocheting thin chains and sewing them onto the body in a spiral fashion.
- Assembly: Sew all parts together carefully, ensuring the bunny is symmetrical and secure.
Take your time with each step to ensure precision and neatness in every stitch.
3. Tips for Perfecting Your Crochet Bunny
Even if you’re a crochet beginner, these helpful tips will elevate your bunny to the next level.
- Tension Control: Keep your yarn tension consistent to avoid uneven stitches.
- Color Choices: Stick to soft pastel shades like baby pink, sky blue, and lavender for a classic Easter vibe.
- Stitch Markers: Use stitch markers to track the beginning of each round.
- Even Stuffing: Distribute stuffing evenly to prevent lumpy areas.
- Facial Features: Embroider a small nose and mouth with black thread for extra charm.
- Final Touches: Lightly brush the yarn surface to create a fuzzy effect if desired.
With these tips in mind, your Swirly Easter Bunny Free Crochet Pattern will turn out perfectly adorable.
4. Customizing Your Swirly Easter Bunny
One of the joys of crochet is the ability to personalize your creations. Let’s explore some fun ways to customize your bunny!
- Size Variations: Adjust the hook size and yarn weight to make larger or smaller bunnies.
- Accessories: Add a tiny scarf, flower crown, or bow tie to dress up your bunny.
- Multicolored Swirls: Use variegated yarn or different colors for the swirls.
- Embellishments: Sew on tiny beads or sequins for extra sparkle.
- Personalized Tags: Attach a small tag with the recipient’s name.
- Scented Stuffing: Add a few drops of essential oil to the stuffing for a sweet aroma.
Customizing makes each Swirly Easter Bunny Free Crochet Pattern uniquely yours.
FAQ About the Swirly Easter Bunny Free Crochet Pattern
Q1: Is this pattern suitable for crochet beginners?
Yes! The Swirly Easter Bunny Free Crochet Pattern uses basic stitches like single crochet and simple increases, making it beginner-friendly.
Q2: How long does it take to complete one bunny?
Depending on your skill level, it can take 4–6 hours to complete a small bunny.
Q3: Can I sell the bunnies I make using this pattern?
Absolutely! Just make sure to credit the pattern source and avoid mass production.
Q4: What if I don’t have safety eyes?
You can embroider eyes using black thread as a safe alternative, especially for children’s toys.
Q5: Can I use chunky yarn for this pattern?
Yes, but be aware that your bunny will be larger and may require a bigger hook size.
Q6: How do I wash the finished bunny?
Hand wash gently with mild soap, reshape, and air dry to maintain its form.
Creating a Swirly Easter Bunny Free Crochet Pattern is a fun and rewarding project, perfect for celebrating Easter or gifting to someone special. We’ve covered the materials needed, step-by-step instructions, pro tips, and creative customization ideas to help you crochet the cutest bunny ever.
We’d love to hear your thoughts! Leave a comment below sharing your experience, any tips you discovered, and what you’d like to see next. Happy crocheting!