
Teddy Bear Amigurumi Crochet Pattern projects have become one of the most beloved handmade crafts in the crochet community. The charm of creating your own soft, cuddly bear brings joy not only to those who craft it but also to those who receive it. With yarn, a hook, and creativity, you can transform simple materials into an adorable keepsake that radiates warmth and love. Whether you are a beginner exploring amigurumi for the first time or an experienced crocheter looking for a new pattern, this topic opens a world of creativity and comfort.
Amigurumi, the Japanese art of crocheting small stuffed toys, has gained immense popularity worldwide for its cuteness and personalization. Among these adorable creations, the Teddy Bear Amigurumi Crochet Pattern stands out as a timeless favorite. Every stitch captures the nostalgic essence of childhood and the cozy feeling of handmade care. With a few simple techniques, you can bring your teddy bear to life, adding details such as eyes, a little snout, and a scarf to give it personality.
Beyond its appearance, making a Teddy Bear Amigurumi Crochet Pattern is a relaxing and fulfilling activity. It allows crafters to express creativity, improve crochet skills, and produce heartfelt gifts for loved ones. You can experiment with different yarn textures, colors, and accessories, turning every bear into a unique creation. In this guide, you’ll learn about the materials, techniques, assembly, and customization ideas to craft your perfect teddy bear amigurumi.
1. Materials and Tools for Teddy Bear Amigurumi Crochet Pattern
The foundation of any successful amigurumi project lies in the quality and selection of materials. Choosing the right yarn and tools ensures your Teddy Bear Amigurumi Crochet Pattern has the perfect texture, durability, and softness. Each element contributes to the final look and feel of your creation.
Start by selecting cotton or acrylic yarn of medium weight. These types are durable, soft to the touch, and easy to handle. Cotton yarn provides a neat, defined stitch appearance, while acrylic adds fluffiness and warmth to your teddy bear. Choose earthy tones like beige, brown, or cream for a classic bear, or go bold with pastel or vibrant shades for a modern twist.
Your crochet hook size plays a major role in shaping the amigurumi. Typically, a 2.5 mm or 3 mm hook works best for keeping stitches tight, preventing stuffing from showing through the fabric. Always match your hook size to your yarn weight to achieve consistent results.
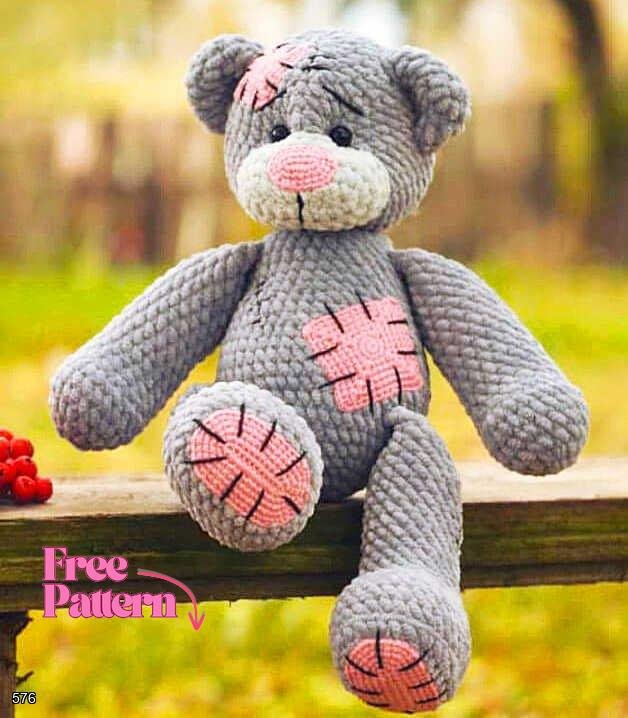
Don’t forget stuffing materials such as polyester fiberfill. This fluffy filler gives your teddy bear a soft and plump look. Distribute it evenly to avoid lumps, especially around the head and limbs. For safety, if the bear is for a baby, embroider the eyes instead of using plastic ones.
You’ll also need essential accessories like stitch markers, a yarn needle, and scissors. Stitch markers help you track rounds accurately, which is crucial when shaping your amigurumi. The yarn needle is used to sew parts together neatly and to weave in loose ends, giving your project a professional finish.
Lastly, consider adding embellishments like ribbons, buttons, or miniature clothing pieces. These details elevate your Teddy Bear Amigurumi Crochet Pattern from a simple toy to a personalized collectible.
2. Step-by-Step Process to Crochet Your Teddy Bear Amigurumi
Creating a Teddy Bear Amigurumi Crochet Pattern involves crafting individual parts—head, body, arms, legs, and ears—and sewing them together. Though it may seem complex, each piece is straightforward to make once you understand the steps.
Start with the head, which is typically worked in continuous rounds using the magic ring technique. This method ensures there’s no visible hole at the top, keeping the stuffing securely inside. Gradually increase the number of stitches until you form a rounded sphere shape, then decrease toward the end to close it neatly.
Next comes the body, which is crocheted similarly but slightly elongated. You can shape it by varying your stitch count in the middle rounds. The key is to keep your tension consistent, ensuring smooth transitions between increases and decreases.
The arms and legs are smaller cylindrical pieces. These can be lightly stuffed to make them flexible. For an adorable touch, you can curve the arms slightly so your bear can “hug” or hold small accessories. Positioning them symmetrically during assembly is crucial for balance.
The ears are usually small semicircular pieces that give your teddy its classic look. They are attached symmetrically on each side of the head. Take time to align them carefully, as they greatly influence your bear’s expression.
After crafting all the pieces, carefully stuff and sew them together. Begin by attaching the head to the body, ensuring a strong seam. Then position and secure the limbs and ears. Add details such as the snout, eyes, and nose to bring the bear’s face to life. This final step is what gives your Teddy Bear Amigurumi Crochet Pattern its soul.
Finally, check that all stitches and seams are secure. A well-finished amigurumi is both durable and beautiful, ready to be loved for years.
3. Tips for Perfecting Your Teddy Bear Amigurumi
Mastering the Teddy Bear Amigurumi Crochet Pattern requires patience, practice, and a few expert tips. Even experienced crocheters can benefit from refining their techniques for smoother results.
One essential tip is maintaining consistent stitch tension. Uneven tension can distort the shape, making one side larger or looser than the other. Practice controlling your yarn flow through your fingers to create even stitches.
Secondly, count your rounds carefully. It’s easy to lose track while crocheting in continuous spirals. Use a stitch marker at the beginning of each round to mark progress. This prevents confusion and ensures symmetry in your teddy bear’s body and limbs.
When adding stuffing, avoid overfilling. Too much stuffing can stretch stitches, while too little leaves floppy limbs. The ideal stuffing density allows the bear to maintain shape without bulging.
Pay attention to placement and proportion. The cuteness of an amigurumi teddy depends largely on the positioning of its facial features. A slightly lower or smaller snout, or closer-set eyes, can make the bear appear more endearing. Take time to experiment before final stitching.
Another professional trick is surface crocheting or embroidery to add texture. You can embroider eyebrows, blush marks, or even tiny patches to make your bear more expressive. These handmade details transform your Teddy Bear Amigurumi Crochet Pattern into something truly unique.
Lastly, if you make multiple bears, take notes on your yarn choices, hook size, and round counts. Consistent documentation ensures that every new teddy maintains the same charm as your first one.
4. Creative Customization Ideas for Teddy Bear Amigurumi
One of the most enjoyable aspects of the Teddy Bear Amigurumi Crochet Pattern is the endless customization possibilities. Each teddy can reflect a different theme, season, or personality through color choices and accessories.
You can start by experimenting with color combinations. Classic brown bears are timeless, but pastel shades create a sweet baby gift, while bright colors make cheerful decorative toys. Mixing yarns of different textures—like velvet or chenille—adds softness and luxury.
For special occasions, dress your bear with crocheted accessories. Try a tiny scarf for winter, a bow tie for formal charm, or a dress for a playful touch. Seasonal versions like Christmas bears with red hats or Easter bears with bunny ears can also make festive gifts.
Add emotional value by personalizing with initials or small tags. Embroider a name or date on the paw or belly to commemorate a birth, anniversary, or milestone. These details turn a simple toy into a meaningful keepsake.
If you love storytelling, create character themes. Design a sleepy bear in pajamas, a sporty bear with a cap, or a traveler bear with a backpack. Each one can tell its own story, making them perfect collectibles or handmade shop products.
Using different sizes of the same pattern can also enhance your creativity. By adjusting hook size and yarn thickness, you can create a family of bears—parents, cubs, and miniatures—that look adorable displayed together.
Finally, consider eco-friendly versions by using organic yarn and recycled stuffing. This not only supports sustainability but also gives your Teddy Bear Amigurumi Crochet Pattern a thoughtful, environmentally conscious touch.
Frequently Asked Questions (FAQ)
1. What yarn is best for making a Teddy Bear Amigurumi Crochet Pattern?
The best yarns are cotton and acrylic blends because they offer durability and softness. Cotton provides clear stitch definition, while acrylic gives your bear a plush, cozy texture.
2. Is the Teddy Bear Amigurumi Crochet Pattern suitable for beginners?
Yes! With clear instructions and patience, beginners can easily follow the basic steps. Starting with small parts helps build confidence before moving to larger bears.
3. How long does it take to crochet a teddy bear amigurumi?
Depending on your skill level and project size, it can take anywhere from 5 to 10 hours. Smaller bears take less time, while detailed or larger ones require more attention.
4. Can I sell the teddy bears I make using this pattern?
Absolutely. Handmade teddy bears are popular at craft fairs and online shops. Just ensure the design is your own interpretation if you’re using a pattern for commercial purposes.
5. What safety tips should I follow when making a teddy bear for children?
Always use embroidered eyes and securely sewn parts to avoid choking hazards. Choose non-toxic yarn and stuffing materials safe for babies and toddlers.
6. How do I wash or clean my amigurumi teddy bear?
Gently hand-wash with mild soap and cold water. Avoid twisting or wringing. Let it air-dry completely to maintain its shape and softness.
PATTERN HERE
Crafting a Teddy Bear Amigurumi Crochet Pattern is more than just a creative project—it’s a heartfelt experience that blends artistry and affection. From selecting yarn to sewing the final stitch, every step contributes to a unique handmade treasure. This adorable craft allows you to express your creativity, practice mindfulness, and create gifts that carry emotional value.
We hope this guide has inspired you to pick up your crochet hook and bring your own teddy bear to life. If you’ve enjoyed this article or tried the pattern, share your honest opinion and suggestions below. Your feedback helps other crafters learn, improve, and continue spreading the joy of crochet.