
The Wintch’s Hat Crochet Pattern is the perfect project to embrace your creativity during the fall and winter seasons. With its whimsical design and classic witchy charm, this crochet hat combines style and comfort for anyone who loves handmade fashion. Whether you’re dressing up for Halloween, attending a themed party, or simply looking for a cozy accessory with a magical twist, this crochet pattern will bring your imagination to life. The beauty of this project is that it suits all skill levels, from beginners to experienced crocheters.
When creating your own Wintch’s Hat Crochet Pattern, you’ll enjoy the process of shaping and styling a hat that reflects both tradition and creativity. Using just a few materials, you can create something extraordinary that feels timeless yet modern. The pattern allows plenty of room for personalization—choose your favorite colors, yarn textures, and embellishments to make your hat truly one of a kind. Crocheting this piece is more than just a craft; it’s an expression of art and individuality.
This crochet project is also a wonderful gift idea for friends or loved ones who appreciate handmade accessories. The Wintch’s Hat Crochet Pattern provides a sense of nostalgia and charm that’s hard to find in store-bought items. Plus, working on this project can be incredibly therapeutic—it’s a relaxing way to spend your time while producing something beautiful and functional. With just a hook, yarn, and patience, you can create a hat that exudes elegance, mystery, and craftsmanship.
1. Materials and Tools Needed for the Wintch’s Hat Crochet Pattern
To start your Wintch’s Hat Crochet Pattern, gathering the right materials and tools is essential. The type of yarn you choose can completely change the look and feel of your finished hat. Most crocheters prefer medium-weight yarn for durability and structure, but softer yarns can be used for a more flexible design. Make sure the yarn you select provides enough stiffness to hold the conical shape of the witch hat without collapsing.
You will also need an appropriately sized crochet hook, typically between 4.0mm and 5.5mm, depending on your yarn’s weight. Always check your gauge before starting to ensure the hat fits as intended. Additional materials include a tapestry needle for weaving in ends, scissors, and optional decorative items like ribbons, flowers, or buttons to give your Wintch’s Hat Crochet Pattern a personalized touch.
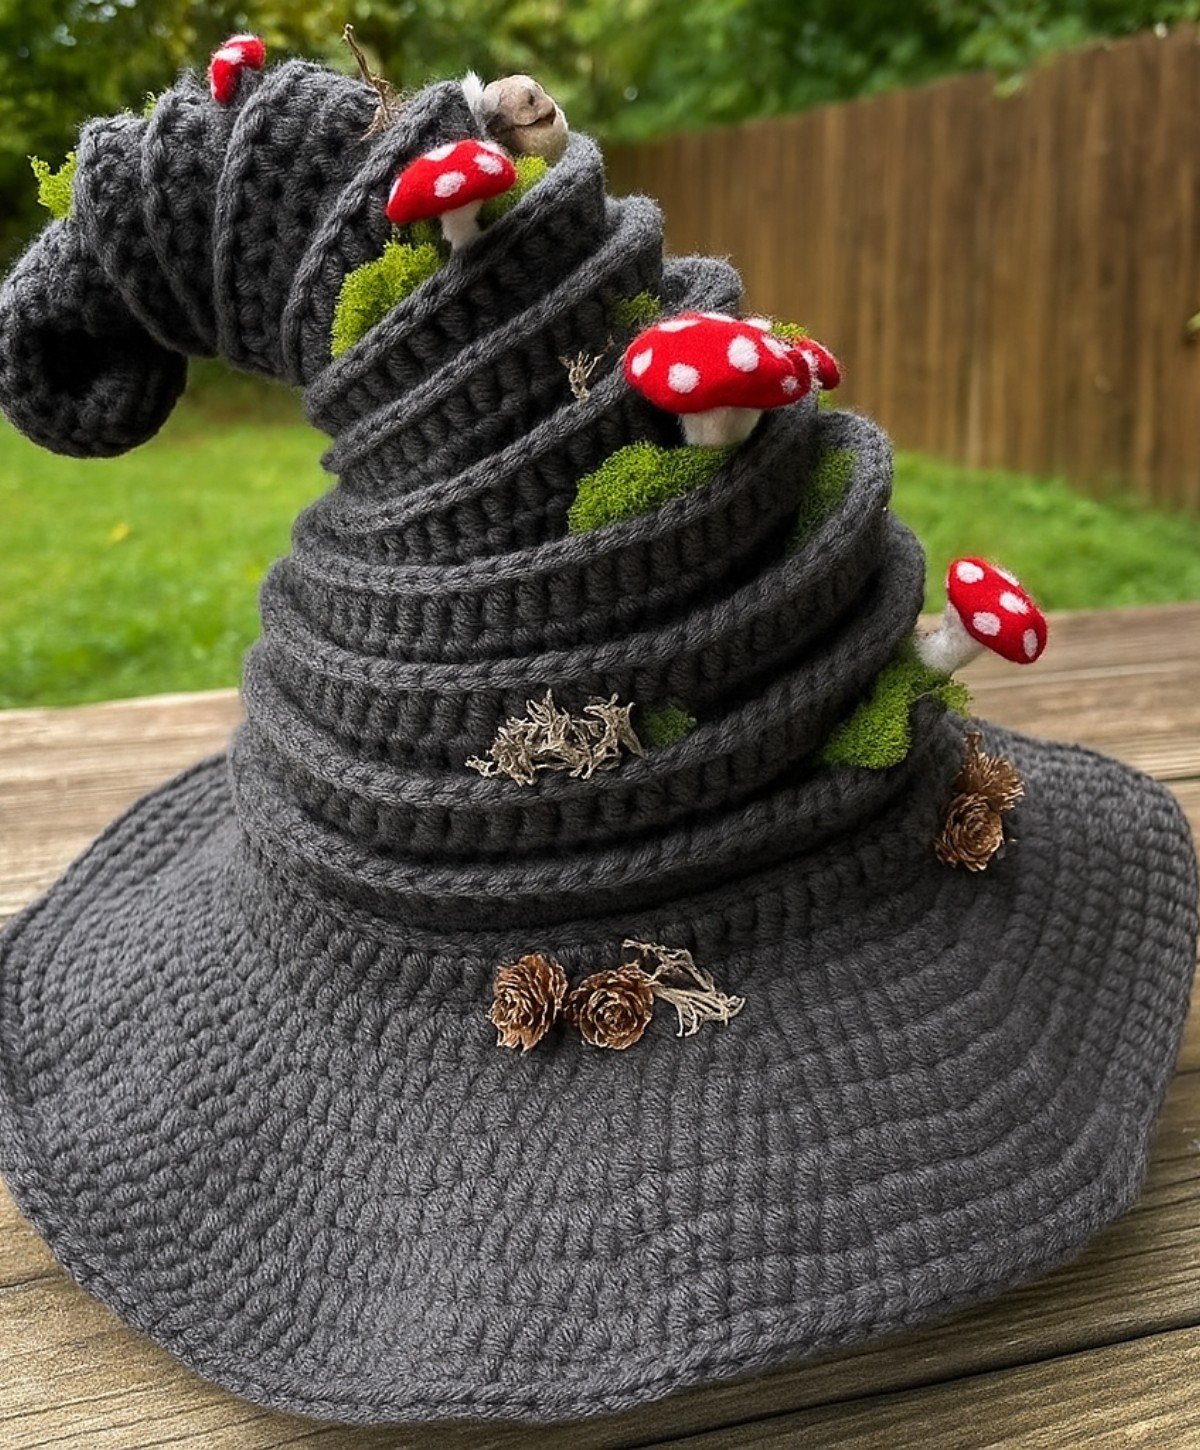
Color choice plays a big role in setting the mood of your project. Traditional witch hats are black, but you can use deep purples, greens, or even vibrant oranges for a more playful look. Combining different shades with a contrasting band around the brim can make your design pop and stand out.
When selecting yarn, consider the season and purpose of your hat. If it’s for a Halloween costume, a sturdy acrylic yarn might be best. For everyday wear, a soft wool blend could offer warmth and comfort. The versatility of the Wintch’s Hat Crochet Pattern allows you to adapt it to any occasion or style.
Before starting, prepare your workspace by organizing all your tools. This will make your crocheting process smoother and more enjoyable. Keep your yarn untangled and your hook within easy reach. Once you have everything ready, you can begin crocheting your magical creation with confidence and excitement.
Lastly, always read through the entire Wintch’s Hat Crochet Pattern instructions before you begin. This will help you understand the construction steps and avoid mistakes. Proper preparation ensures that your final hat turns out beautifully and fits perfectly.
2. Step-by-Step Guide to Making the Wintch’s Hat
The first step in crocheting your Wintch’s Hat Crochet Pattern is creating the top point of the hat. You’ll typically begin with a magic ring or chain circle to form the crown. Gradually increase your stitches in each round to shape the tall, pointed tip characteristic of a witch’s hat. Maintaining a consistent stitch tension is important for a smooth, symmetrical finish.
As you continue, the hat’s cone will start to take form. This part of the pattern usually involves several rounds of increases. It’s important to keep track of your stitch count to avoid irregularities. The cone should grow evenly, tapering out gently until it reaches your desired height. This is where your personal touch can come in—some crocheters prefer a long, whimsical point, while others opt for a shorter, structured tip.
Once the cone is complete, it’s time to crochet the brim. The brim adds character and drama to your Wintch’s Hat Crochet Pattern, and it’s typically worked by adding multiple rounds with gradual increases. You can create a stiff brim using tighter stitches or add wire around the edge to help it hold shape. The brim’s width can be adjusted according to your preference, from a narrow style to a wide, theatrical look.
After completing the main structure, it’s time for detailing. You can crochet a decorative band around the base of the cone using a contrasting color. Adding small embellishments like crocheted flowers, ribbons, or even charms enhances the uniqueness of your design. These little additions make your hat feel more personal and magical.
Before finishing, make sure to block your hat properly. Blocking helps the yarn settle into shape, ensuring your hat maintains its form. Use gentle steam or a damp cloth to mold it into the perfect witchy silhouette. Take your time—this final step is what gives your project a professional look.
Finally, weave in all loose ends neatly using your tapestry needle. With your Wintch’s Hat Crochet Pattern complete, you’ll have a handmade masterpiece that’s both stylish and enchanting. Whether worn or displayed, it’s sure to capture attention and admiration.
3. Styling Ideas for Your Wintch’s Hat Crochet Pattern
One of the most enjoyable aspects of working on a Wintch’s Hat Crochet Pattern is the endless styling possibilities. You can easily adapt your hat to different outfits, seasons, or events. For a classic Halloween look, pair your black witch hat with a long cloak and dark boots. Add a broomstick or a cauldron-inspired handbag, and you’ll be ready for any costume party.
For everyday wear, consider using lighter colors and more neutral embellishments. A soft gray or lavender Wintch’s Hat Crochet Pattern can serve as a cozy fall accessory. It adds a touch of fantasy to your outfit while keeping your head warm. Pair it with a knitted scarf and a cozy sweater for a charming autumn look.
You can also create themed hats for special occasions. For example, use red and green tones with sparkly yarn for a festive Christmas variation. For a gothic or fantasy aesthetic, add lace trims, metallic thread, or even beads to your design. The Wintch’s Hat Crochet Pattern allows you to express creativity through every stitch.
If you’re making hats for children, you can have fun adding playful touches. Use bright colors, attach small pom-poms, or even crochet little stars and moons to sew onto the brim. Kids love imaginative accessories, and this pattern is a great way to introduce them to the magic of handmade crafts.
The versatility of this crochet project means it can be as simple or elaborate as you desire. Whether your goal is to craft a subtle accessory or a show-stopping statement piece, the Wintch’s Hat Crochet Pattern adapts beautifully to your needs.
Finally, remember that presentation matters. If you plan to gift or sell your creations, package them nicely. Adding a handmade tag or wrapping it in tissue paper adds a personal, thoughtful touch that reflects your dedication and care.
4. Tips, Tricks, and Troubleshooting for a Perfect Finish
Even experienced crocheters can face small challenges while following a Wintch’s Hat Crochet Pattern, but with a few tips, you can ensure a flawless result. Always start by checking your tension. Too tight, and the hat will be stiff and uncomfortable; too loose, and it may lose shape. Practicing a few sample rows before beginning helps you find the perfect balance.
If your cone starts to curl or twist, it might be due to uneven increases. Make sure you’re spacing them evenly throughout each round. Using stitch markers can be a huge help to keep your work consistent. Don’t rush—slow, careful stitching ensures precision and beauty.
Blocking is often underestimated but is key to achieving a professional look. Using a hat form or shaping the cone around a household item (like a bowl or bottle) can help maintain structure while the hat dries. It’s worth the extra time to make your Wintch’s Hat Crochet Pattern look its best.
When it comes to customization, don’t be afraid to experiment. Mix yarn textures for unique effects—try pairing matte and shiny threads for a magical shimmer. You can also play with different stitch patterns to give the hat more texture or personality.
If you encounter frayed yarn or uneven edges, simply trim and rework small sections rather than starting over. Patience is key to perfecting your craft. Each project teaches you new techniques and skills.
Lastly, enjoy the journey. Crochet is not only about the final piece but also about the creative experience. Every Wintch’s Hat Crochet Pattern you make will carry your unique touch and energy, making it truly special.
FAQ – Wintch’s Hat Crochet Pattern
1. What level of skill is needed to make a Wintch’s Hat Crochet Pattern?
This pattern is suitable for beginners with basic crochet knowledge, though intermediate crocheters may complete it faster and with more precision.
2. How long does it take to complete the hat?
Depending on your speed, it can take between 4 to 8 hours. Beginners may take a little longer as they adjust to shaping the cone and brim.
3. Can I use different yarn weights for this pattern?
Yes, but keep in mind that heavier yarns will make a sturdier hat, while lighter yarns will result in a softer, more flexible version.
4. How do I make the hat stand upright?
Use a firm yarn, tighter stitches, or insert a wire around the brim. Blocking also helps set the shape properly.
5. Can I wash my crocheted witch hat?
Hand washing in cold water is recommended to preserve the yarn and maintain the hat’s shape. Lay flat to dry.
6. Can I resize the pattern for children or adults?
Yes. Simply adjust the number of rounds and increases in the cone section to create a smaller or larger fit.
Creating your own Wintch’s Hat Crochet Pattern is an enchanting experience that combines creativity, craftsmanship, and personal expression. From selecting the perfect yarn to shaping the brim and adding decorative touches, every step allows you to infuse your unique style into this magical project. Whether for a costume, gift, or daily accessory, this handmade hat will always capture attention and admiration.
If you’ve enjoyed this guide, please share your thoughts and suggestions in the comments. Your feedback helps inspire more crochet enthusiasts to keep creating, exploring, and bringing their imagination to life—one stitch at a time. ✨