

Creating a Flying Geese Quilt Block is a delightful way to add a dynamic design element to your quilting projects. This versatile block can be arranged in various ways to create stunning patterns, and the best part is, with a free pattern tutorial, even beginners can master this classic quilting technique. Whether you’re new to quilting or looking to refine your skills, this guide will walk you through the process step by step, ensuring your Flying Geese quilt blocks come out perfectly every time.
The Flying Geese Quilt Block is one of the most popular and enduring quilt block designs. It consists of a large central triangle flanked by two smaller triangles, resembling a flock of geese flying in formation. This block is often used in both traditional and modern quilts, making it a staple in any quilter’s repertoire. The simple yet striking design of the Flying Geese block allows for endless creative possibilities, whether used as a standalone design or combined with other blocks.
One of the key aspects of creating a successful Flying Geese Quilt Block is precision. Accurate cutting and sewing are crucial to ensuring that your blocks align perfectly, giving your quilt a professional finish. The tutorial free pattern provided in this article will guide you through each step, from selecting your fabrics to assembling the blocks. With a little practice, you’ll be able to create beautiful Flying Geese blocks that can be used in a wide variety of quilting projects.
As you dive into the world of Flying Geese quilt blocks, you’ll discover the joy of creating intricate designs with simple shapes. This tutorial will not only teach you how to make these blocks but also inspire you to experiment with different layouts and color combinations. Let’s get started!
1. Understanding the Flying Geese Quilt Block
The Flying Geese Quilt Block is a fundamental unit in quilting that consists of one large triangle (the “goose”) in the center, with two smaller triangles (the “sky”) on either side. The simplicity of this block makes it incredibly versatile and easy to learn, even for beginners. The key to mastering the Flying Geese block is understanding the basic structure and how to achieve accurate proportions.
One common method for creating the Flying Geese block is the traditional method, which involves cutting and sewing individual triangles together. This method is straightforward and allows for great precision, but it does require careful cutting to ensure that all pieces fit together perfectly.
Another popular method is the no-waste method, which is more efficient and ideal for quilters who want to minimize fabric waste. This method involves starting with one large square and four smaller squares, which are then sewn and cut to create four Flying Geese blocks at once. It’s a time-saving technique that many quilters prefer.
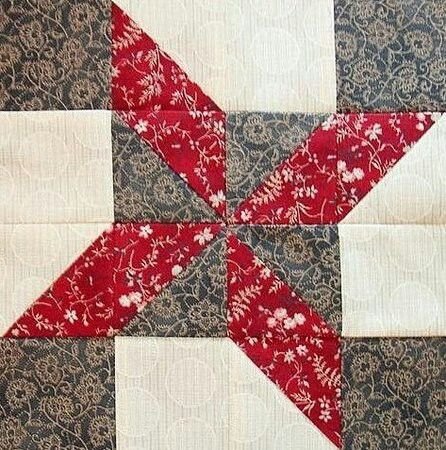
The Flying Geese block is often used as a building block in larger quilt designs. By repeating and rotating the blocks, you can create a variety of patterns, from classic chevrons to more complex star designs. The possibilities are endless, making the Flying Geese block a favorite among quilters.
Color choice plays a significant role in the appearance of your Flying Geese blocks. High-contrast colors will make the “geese” stand out sharply against the “sky,” while more subtle combinations can create a softer, more blended effect. Experimenting with different color schemes can lead to some truly unique and personalized quilts.
Precision is crucial when working with Flying Geese blocks. Ensuring that your seams are consistent and that your triangles align properly will result in a clean, professional-looking quilt. Using a rotary cutter and a ruler can help you achieve the accuracy needed for perfect blocks.
2. Step-by-Step Tutorial for Flying Geese Quilt Block
To begin creating your Flying Geese Quilt Block, you’ll need to gather your materials. For this tutorial, you’ll need fabric, a rotary cutter, a quilting ruler, and a sewing machine. Choose fabrics that contrast well to make your Flying Geese block stand out. Once you’ve selected your materials, you can start cutting your pieces according to the dimensions provided in the free pattern.
Start by cutting one large square for the “goose” and four smaller squares for the “sky.” The size of these squares will depend on the finished size of the block you want to achieve. The free pattern typically provides a cutting chart that specifies the dimensions for various block sizes.
Next, you’ll align two of the smaller squares on opposite corners of the large square, right sides together. Draw a diagonal line from one corner of the small squares to the other. This line will serve as your sewing guide. Sew along the line, then cut a quarter-inch away from the seam to separate the two triangles. Press the seams open to reveal the first part of your Flying Geese block.
Repeat the process with the remaining two small squares, aligning them on the remaining corners of the large square. Sew along the drawn line, cut, and press as before. You should now have four identical Flying Geese blocks, each featuring a large central triangle flanked by two smaller triangles.
Once your blocks are assembled, trim them to the exact size specified in the pattern. This step is crucial for ensuring that your blocks fit together perfectly when assembling your quilt top. Use a rotary cutter and a quilting ruler to achieve clean, precise edges.
Finally, arrange your Flying Geese blocks according to your desired pattern. The beauty of the Flying Geese block lies in its versatility—whether you want a simple row of geese or a complex star pattern, the possibilities are endless. Once you’re satisfied with the arrangement, sew the blocks together to complete your quilt top.
3. Tips for Perfecting Your Flying Geese Blocks
Achieving precision in your Flying Geese Quilt Block is essential for a polished, professional-looking quilt. One tip for ensuring accuracy is to starch your fabric before cutting. Starching helps to stabilize the fabric, reducing the likelihood of stretching or distortion as you cut and sew your pieces.
Another helpful tip is to use a scant quarter-inch seam allowance when sewing your blocks. This slightly narrower seam allows for the fabric to be folded and pressed without losing the intended dimensions of your block. It’s a small adjustment, but it can make a big difference in the final size of your quilt blocks.
When pressing your seams, always press toward the darker fabric. This helps to prevent the seam allowances from showing through on the front of your quilt, which is particularly important when using light-colored fabrics. Additionally, pressing rather than ironing (which involves more of a back-and-forth motion) helps to keep the fabric from stretching out of shape.
If you find that your Flying Geese blocks are not coming out to the correct size, consider using a specialty ruler designed for trimming Flying Geese blocks. These rulers are marked with lines that make it easy to trim your blocks to the exact dimensions needed, ensuring that all your blocks are uniform.
Consistency is key when creating multiple Flying Geese blocks for a quilt. Take your time with each step, and don’t be afraid to measure and re-measure your pieces to ensure accuracy. The more consistent your blocks, the easier they will be to sew together, resulting in a quilt top that lies flat and has crisp, clean lines.
Finally, practice makes perfect. The more you create Flying Geese blocks, the more comfortable you’ll become with the process. Don’t get discouraged if your first few blocks aren’t perfect—quilting is a skill that improves with time and practice. Keep at it, and you’ll soon be creating beautiful, precise Flying Geese blocks with ease.
4. Creative Variations of the Flying Geese Block
The Flying Geese Quilt Block is incredibly versatile, allowing for numerous creative variations. One popular variation is the “double” or “stacked” Flying Geese block, where two geese are stacked on top of each other in a single block. This creates a more intricate design and can add a sense of movement to your quilt.
Another variation is the “Dutchman’s Puzzle,” which uses eight Flying Geese blocks arranged in a pinwheel pattern. This design is both dynamic and visually striking, making it a favorite for more complex quilt designs. The Dutchman’s Puzzle is a great way to showcase contrasting fabrics and add a sense of motion to your quilt.
For a modern twist on the traditional Flying Geese block, try experimenting with asymmetrical arrangements. By offsetting the blocks or using different-sized geese, you can create a quilt with a more contemporary feel. This approach is perfect for quilters who like to push the boundaries of traditional design.
Using color gradients is another way to add interest to your Flying Geese quilt. By arranging your blocks in a gradient, where the colors gradually transition from light to dark (or vice versa), you can create a stunning ombré effect. This technique works particularly well in large quilts where the gradual color shift can be fully appreciated.
If you want to add a unique texture to your quilt, consider incorporating Flying Geese blocks made from different fabrics. Mixing and matching textures like cotton, linen, and velvet can add depth and interest to your quilt. Just be sure to adjust your sewing technique to accommodate the different fabric weights.
Lastly, consider using Flying Geese blocks as borders or sashing in your quilt. Instead of using them as the main design element, these blocks can frame your quilt or separate larger blocks, adding a decorative and cohesive touch to your overall design.
FAQ
Q: What is the best method for creating Flying Geese blocks?
A: There are several methods, including the traditional method, no-waste method, and using specialty rulers. The best method depends on your preference for fabric waste, precision, and the time you have available.
Q: How do I ensure my Flying Geese blocks are the correct size?
A: Accurate cutting and sewing are key. Use a scant quarter-inch seam allowance and trim your blocks with a specialty ruler to ensure they meet the correct dimensions.
Q: Can I use scraps to make Flying Geese blocks?
A: Yes, Flying Geese blocks are perfect for using up fabric scraps. Just ensure that your scraps are large enough to cut the required pieces for the block size you want.
Q: How do I press the seams on Flying Geese blocks?
A: Always press toward the darker fabric to prevent seam allowances from showing through on the front of your quilt. This also helps to reduce bulk in your seams.
Q: What fabric types work best for Flying Geese blocks?
A: Quilting cotton is ideal, but you can experiment with other fabrics like linen or even velvet for a unique texture. Just be mindful of fabric weight and adjust your sewing technique accordingly.
Q: Can Flying Geese blocks be used in modern quilt designs?
A: Absolutely! Flying Geese blocks are incredibly versatile and can be adapted to both traditional and modern quilt designs. Experiment with color, layout, and size to create a modern look.
Join our VIP broadcast list and gain access to exclusive patterns, all for free. As a VIP member, you’ll receive the best patterns daily, delivered directly to your device. ✨📱 It’s a unique opportunity to stay up-to-date with the latest trends and designs, curated just for you. Don’t miss out on enhancing your projects and discovering new inspirations with the best patterns every day! 🎨🔝
Conclusion
Creating a Flying Geese Quilt Block is a rewarding experience that offers endless possibilities for creativity. With this tutorial free pattern, you now have the tools and knowledge to create beautiful, precise blocks that can be used in a variety of quilt designs. Whether you’re a beginner or an experienced quilter, the Flying Geese block is a versatile and essential skill to master.
We hope this guide has inspired you to try your hand at making these dynamic quilt blocks. If you found this tutorial helpful, please leave a comment below with your thoughts and suggestions. Your feedback helps us continue to provide valuable content for the quilting community. Happy quilting!