
The Hidden Wells Quilt Pattern Tutorial is a captivating guide for quilting enthusiasts who want to explore a visually complex design that’s surprisingly easy to construct. This technique uses strip piecing and clever cutting to create intricate blocks that look far more difficult than they are. Perfect for beginners wanting to try something new or advanced quilters seeking a fresh challenge, this method delivers stunning results every time.
In this detailed Hidden Wells Quilt Pattern Tutorial, we’ll break down the entire process step-by-step, from fabric selection to final assembly. You’ll learn how to prepare your materials, cut and piece your strips, and rotate your blocks for that signature “hidden” effect. Plus, we’ll share tips to keep your lines crisp and seams aligned—ensuring your quilt turns out beautifully.
Quilting is not just a craft; it’s a relaxing way to express creativity, preserve tradition, and make something truly one-of-a-kind. With this Hidden Wells Quilt Pattern Tutorial, you’ll have everything you need to create a quilt that showcases both artistry and precision. Whether you’re sewing for yourself, a loved one, or a customer, this pattern delivers the “wow” factor every time.
1. Choosing Fabrics and Colors
When beginning your Hidden Wells Quilt Pattern Tutorial, the first step is to carefully select your fabric. The success of this quilt heavily relies on contrast and fabric placement, so opt for a combination of light, medium, and dark fabrics. This contrast is what gives the pattern its depth and dimension.
Using 100% cotton quilting fabric is ideal. Cotton presses well, holds its shape, and is easy to sew. Fat quarters or fabric strips work perfectly for this method, especially if you’re going for a scrappy look or want to use leftovers from previous projects.
Stick to a palette of 4–6 different fabrics to keep things manageable for beginners. You can go monochrome or use a vibrant rainbow of colors—the technique will still shine. Many quilters love using batiks, solids, or subtle tone-on-tone prints for this project.
Before cutting, always pre-wash your fabrics if you’re concerned about shrinkage or color bleeding. This helps ensure the longevity of your finished quilt and avoids disappointment later on.
Lay out your fabrics in the desired order before cutting your strips. This will help you visualize the final pattern and make adjustments if necessary. Rotating the arrangement of colors changes the overall look of your blocks significantly.
Keep your design board or digital layout close by. This visual reference will be invaluable when it’s time to sew and cut your strip sets. Planning at this stage prevents confusion later and helps maintain consistency.
2. Cutting and Piecing the Strip Sets
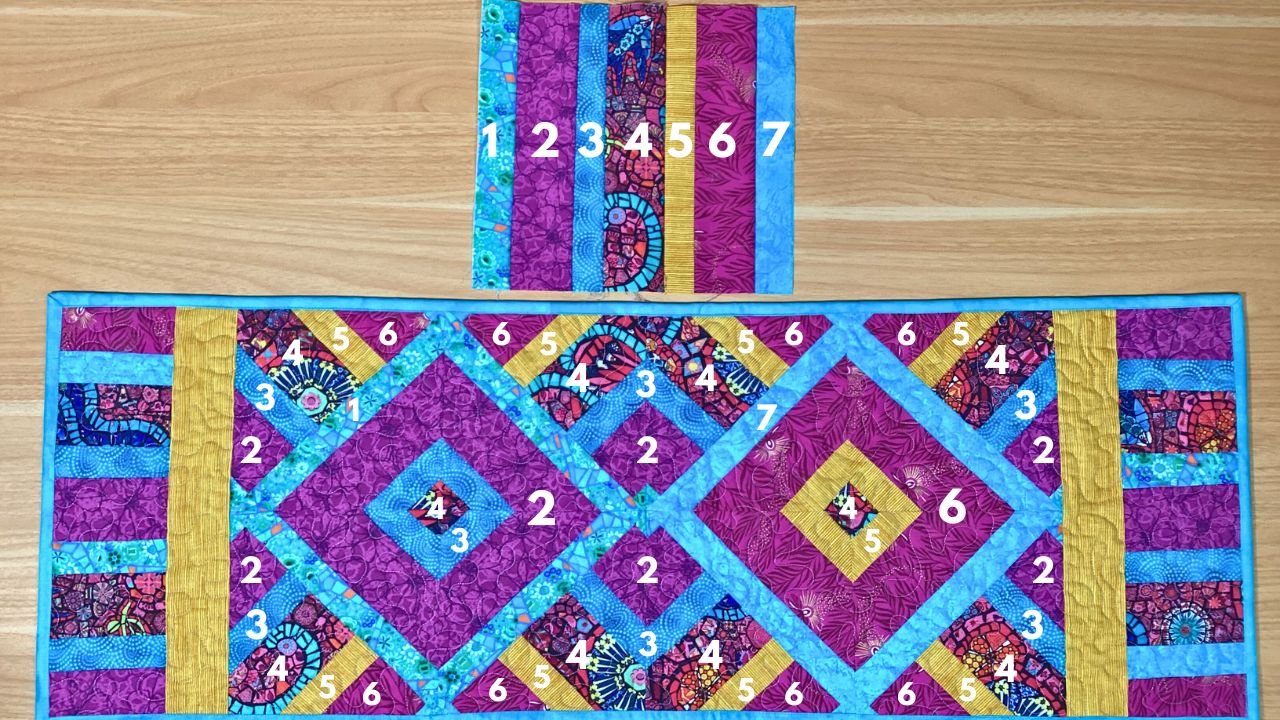
The Hidden Wells Quilt Pattern Tutorial continues with strip piecing, a favorite technique among quilters. Strip piecing saves time, reduces cutting errors, and ensures uniformity. Begin by cutting your chosen fabrics into 2.5″ wide strips, using a rotary cutter and ruler for precision.
Sew the strips together in a specific sequence to form a strip set. Press your seams open or to the side, depending on your preference. Consistent pressing helps with accurate cutting and crisp corners in your final quilt.
Once your strip sets are assembled, trim the edges for a clean starting point. Then cut the strip sets into squares—usually the same width as your strips (e.g., 2.5″, 3″, or 4″). Each square will eventually become part of a rotated block.
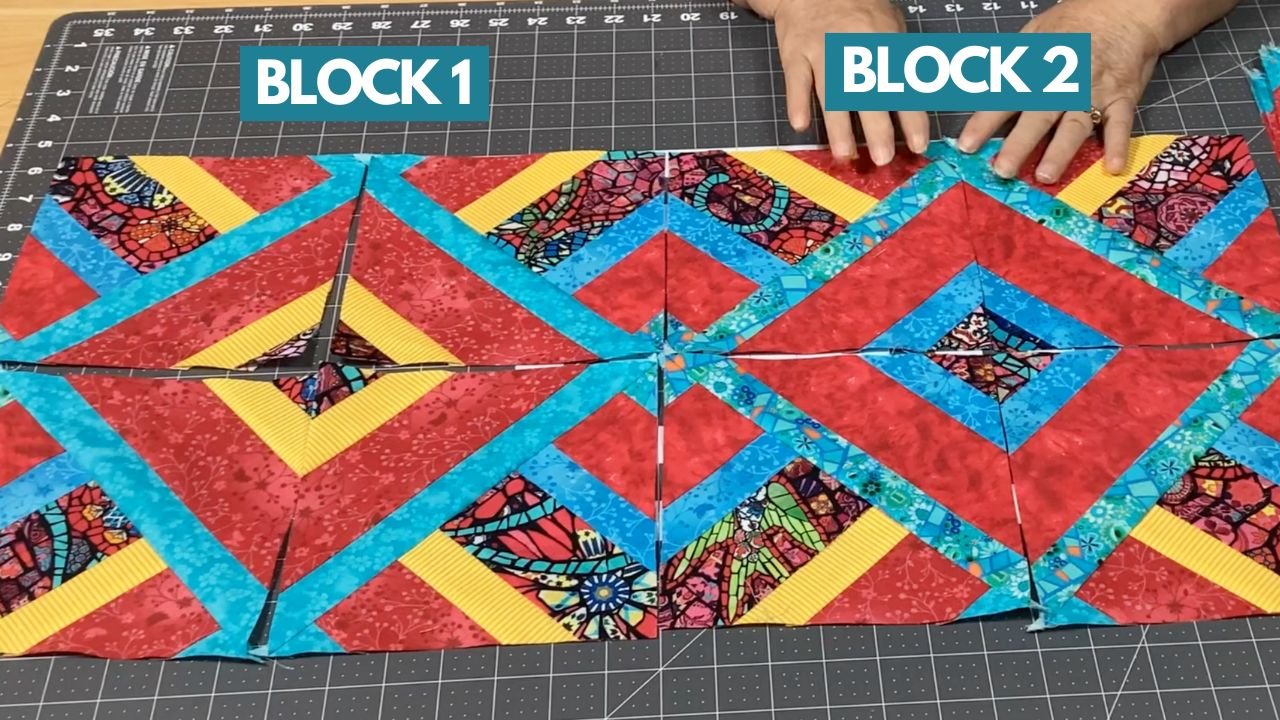
After cutting your squares, stack and rotate them according to the Hidden Wells technique. This rotation is what creates the optical illusion and gives the quilt its dynamic appearance.
Sew the rotated squares into larger blocks. Maintain consistent seam allowances (typically ¼”) to ensure all blocks align correctly when assembled. Take your time during this step to ensure accuracy.
Iron your completed blocks well, making sure they lie flat with minimal bulk. A well-pressed block is easier to assemble and results in a more professional-looking quilt top.
3. Assembling the Quilt Top
Once your blocks are finished, the next step in the Hidden Wells Quilt Pattern Tutorial is to lay them out and assemble the quilt top. Use a large flat surface or design wall to arrange your blocks in rows and columns.
Experiment with different block rotations to create movement and balance in your quilt. You’ll notice how each block interacts with the others, forming secondary patterns and adding visual interest.
Once you’re satisfied with your layout, begin sewing the blocks into rows. Be sure to pin at intersecting seams to keep your lines aligned. Matching these seams is essential for a clean and polished final quilt.
After each row is sewn, press the seams before joining them together. Alternating the pressing direction of rows can help reduce bulk and make the seams nest nicely.
Sew the rows together carefully, keeping an eye on matching seams and maintaining straight lines. Patience during this stage pays off in a quilt that looks expertly crafted.
When all rows are joined, give your quilt top a final press. Now your Hidden Wells masterpiece is ready for the next stage: quilting and binding.
4. Quilting and Finishing Touches
Now that your top is complete, the final phase of the Hidden Wells Quilt Pattern Tutorial involves quilting and binding. Start by layering your quilt sandwich—quilt top, batting, and backing—on a clean surface.
Baste the layers together using safety pins, spray adhesive, or hand basting stitches. Secure basting is essential to prevent shifting while quilting. Smooth out all wrinkles as you go.
Choose a quilting design that complements your blocks. Straight-line quilting enhances the geometric pattern, while free-motion designs can add softness and complexity.
Use a walking foot or free-motion foot depending on your chosen quilting style. Take your time and always start from the center and work your way outward to prevent puckering.
After quilting, square up the edges of your quilt using a rotary cutter and ruler. Make sure all corners are 90 degrees and all sides are straight for a clean finish.
Add your binding—whether you use double-fold or single-fold bias tape, machine stitch or hand-finish it—this final touch frames your Hidden Wells Quilt beautifully.
FAQ: Hidden Wells Quilt Pattern Tutorial
What is the Hidden Wells quilt pattern?
It’s a technique that involves sewing fabric strips into sets, cutting them into squares, and rotating the pieces to create an optical illusion of layered blocks.
Is the Hidden Wells Quilt Pattern good for beginners?
Yes! Despite its complex appearance, the technique is beginner-friendly, especially with this detailed Hidden Wells Quilt Pattern Tutorial.
What fabric types are best for this quilt?
100% cotton quilting fabric is ideal due to its stability and ease of handling. Batiks, solids, and tone-on-tone prints work particularly well.
How many fabrics should I use for the pattern?
Start with 4 to 6 fabrics in varying shades of light, medium, and dark for the best visual effect.
Can I make this quilt using scraps?
Absolutely! Scrappy versions look beautiful and make each quilt unique. Just maintain contrast in your strip sets.
Do I need special tools to make this quilt?
Basic quilting tools like a rotary cutter, cutting mat, quilting ruler, and sewing machine are all you need.
We hope this Hidden Wells Quilt Pattern Tutorial has helped you understand and master a stunning quilting technique that combines ease with elegance. From fabric selection to quilting and binding, each step has been broken down to guide you through your journey with clarity and confidence.
If you tried this pattern or plan to, we’d love to hear your thoughts! Leave a sincere opinion or suggestions for improvement—we’re always here to grow together in the beautiful art of quilting.