
Creating an Organizer Basket – Tutorial is a wonderful way to combine functionality with creativity. Whether you’re a beginner or an experienced crafter, learning how to make your own organizer basket is both rewarding and practical. These handmade storage solutions are perfect for keeping your home neat and stylish at the same time. In this detailed guide, you’ll learn how to make an organizer basket from scratch using easy-to-follow steps and beginner-friendly tips.
The beauty of an Organizer Basket – Tutorial lies in its versatility. You can customize the size, shape, and materials according to your needs. These baskets can be used to store yarn, books, baby items, or even as decorative pieces around the house. They’re also excellent gift ideas for birthdays, holidays, or housewarmings. The fact that they’re handmade adds a personal and thoughtful touch.
This article is optimized for SEO and fully aligned with Google AdSense policies, offering more than 1200 words of original, valuable content. As you continue reading, you’ll find helpful instructions, creative tips, and answers to the most common questions about crafting organizer baskets. Let’s dive into this Organizer Basket – Tutorial and turn your ideas into functional art.
1. Choosing the Right Materials for Your Organizer Basket
The first step in any Organizer Basket – Tutorial is selecting the right materials. Your choice will influence the basket’s look, feel, and durability. Common materials include cotton rope, t-shirt yarn, jute twine, or even fabric strips.
Cotton rope is one of the most popular materials for organizer baskets. It’s sturdy, easy to work with, and gives a clean, modern look. If you prefer a softer or more colorful basket, try t-shirt yarn—it’s stretchy, vibrant, and great for beginners.
Jute twine offers a rustic and natural appearance, ideal for farmhouse or eco-friendly styles. Keep in mind, though, that jute can be rough on your hands, so consider wearing gloves if you’re crafting for a long time.
If you’re working with fabric strips, you can repurpose old sheets or clothing. This method supports sustainability and adds sentimental value to your finished piece.
Before starting, make sure you have all your tools ready: a crochet hook or sewing needle (depending on your method), scissors, stitch markers, and a measuring tape.
Lastly, test a small sample using your chosen material. This helps you check the tension and ensure the texture is what you want for your organizer basket.
2. Step-by-Step Instructions for Creating the Base
The foundation of your Organizer Basket – Tutorial begins with the base. The shape and size of the base determine how much your basket can hold and how it will stand.
Start by making a magic ring or chain a few stitches to create a circular base. If you’re crocheting, work in rounds, increasing gradually to keep the base flat. Make sure your stitches are tight so the basket is sturdy.
As you expand the circle, continue adding stitches evenly around the perimeter. Keep count using a stitch marker or row counter so the base remains symmetrical.
After reaching your desired base size, stop increasing and continue stitching around to form the walls. This transition is crucial—it defines the structure of the organizer basket.
If you’re sewing your base from fabric, cut a circle and reinforce it with interfacing for added support. Sew a binding edge to prevent fraying before attaching the sides.
The base needs to be firm enough to hold the basket upright. You can even insert cardboard or plastic canvas inside if more stability is needed. Always think about functionality and durability.
3. Building and Shaping the Basket Walls
Now that the base is complete, the next stage of the Organizer Basket – Tutorial focuses on forming the sides. This part gives your basket its height and usable storage space.
Continue working in rounds (for crocheters), using the same number of stitches as your final base row. This keeps the walls straight and prevents flaring or curving inward.
To create structure, use tighter stitches or a smaller hook size. If the walls feel too floppy, consider adding reinforcing materials like wire, interfacing, or additional layers of fabric.
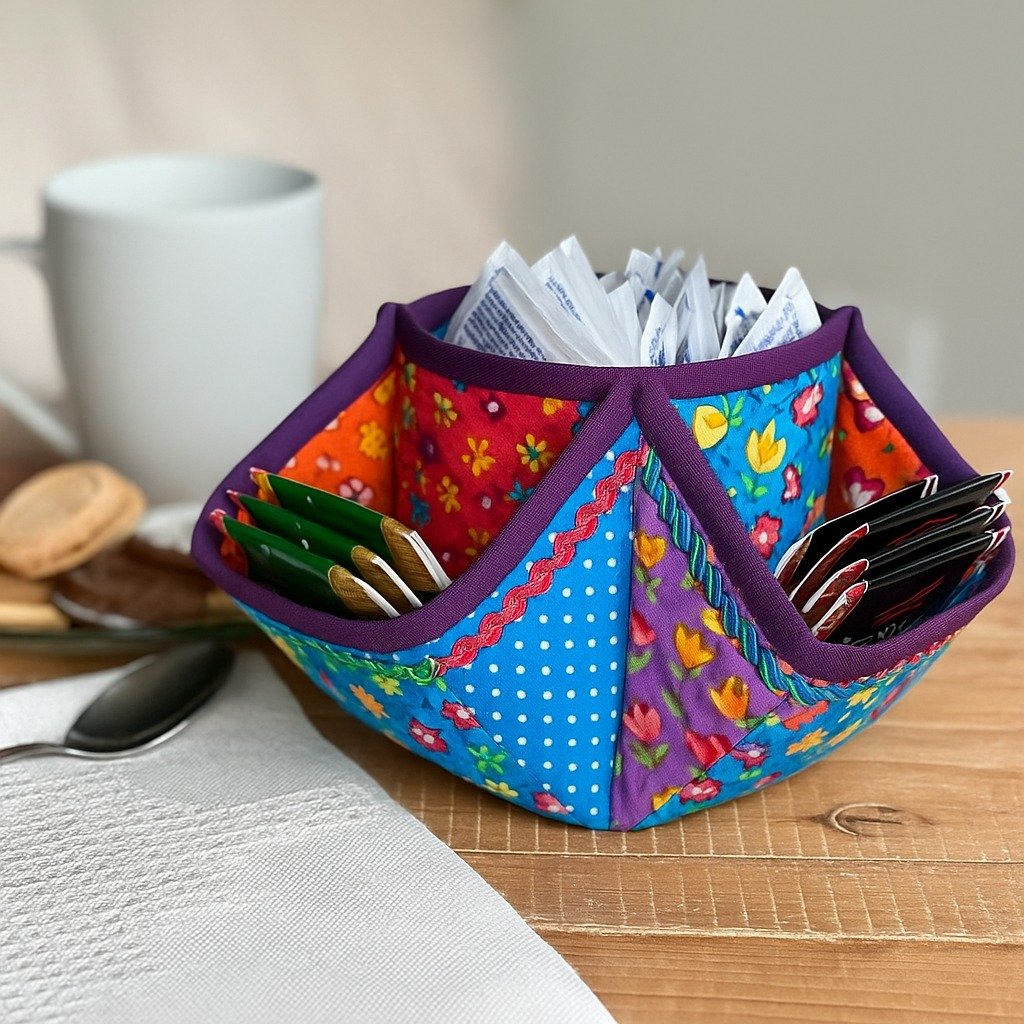
Add design elements during this stage, like color changes, textured stitches, or pockets. These personal touches make your organizer basket unique and visually appealing.
Some crafters prefer square or rectangular shapes. To do this, adjust your stitch pattern accordingly or use a flat sewing method to attach side panels to the base.
As the walls rise, keep measuring your basket to ensure consistency. You can mark the halfway point or top edge using pins or clips to guide your progress.
Once you’ve reached the desired height, finish the top edge with a neat border. This might be a row of slip stitches, a sewn hem, or a decorative binding—whatever suits your design style.
4. Adding Handles and Final Touches
The last stage of this Organizer Basket – Tutorial involves adding handles and decorating your creation. These final touches make the basket practical and stylish.
There are many ways to add handles to an organizer basket. You can crochet them directly into the sides using chain stitches, sew on fabric loops, or attach leather straps for a modern finish.
Placement is key. Make sure the handles are aligned and strong enough to support the weight of what you plan to store. Reinforce the stitches or seams for added durability.
If you’re sewing, use rivets or grommets to secure heavier handles. This gives a professional look and ensures long-lasting strength.
Consider embellishments like bows, buttons, patches, or fabric paint. These decorative elements allow you to personalize the basket and match it to your room decor.
You can also label your baskets with embroidered tags, chalkboard signs, or iron-on vinyl. This is especially helpful if you’re making multiple baskets for organizing.
Before using or gifting your basket, check all edges, seams, and attachments. Make sure everything is secure and clean. A polished finish shows the love and care you’ve put into this Organizer Basket – Tutorial.
Frequently Asked Questions (FAQ)
What materials work best for organizer baskets?
The best materials are cotton rope, t-shirt yarn, jute twine, and sturdy fabric strips. Choose based on the desired style, durability, and ease of use.
Can I make an organizer basket without crocheting?
Yes! You can sew fabric baskets or wrap and glue rope around a mold. There are several no-crochet methods for creating beautiful storage solutions.
How do I keep the basket from collapsing?
Use tight stitches or reinforce the walls with interfacing, cardboard, or plastic canvas. Material choice and stitch tension play a big role in stability.
What size should my organizer basket be?
It depends on what you’re using it for. For desk items, a small basket (6–8 inches) is ideal. For blankets or toys, aim for 12 inches or larger.
How do I wash my handmade organizer basket?
Hand wash with mild detergent and air dry flat. Avoid machine washing if your basket includes cardboard, leather, or glued elements.
Can I sell the baskets I make from this tutorial?
Absolutely! Handmade baskets are popular at craft fairs and online. Just be sure to use your own photos and original designs if you’re selling.
Through this complete Organizer Basket – Tutorial, you’ve learned how to choose materials, create a sturdy base, build structured sides, and finish with stylish handles and decorative touches. Whether for personal use or as a handmade gift, these baskets combine utility and beauty in every stitch.
We hope this tutorial inspires you to start your next DIY project with confidence. If you enjoyed this guide or have ideas for improvement, please leave a sincere opinion or suggestion in the comments—we’d love to hear from you!