
The Sunbonnet Sue Quilt Block Tutorial is a timeless guide for quilters who love tradition and charm in their projects. From its origins in early American quilting to its place in modern craft, the Sunbonnet Sue quilt block remains a favorite among hobbyists and professionals alike. In this comprehensive guide, we will walk you through everything you need to know to create your own version of this classic block—perfect for quilts, pillows, wall hangings, and more.
Whether you’re a beginner looking to practice your applique skills or a seasoned quilter interested in adding a nostalgic touch to your project, the Sunbonnet Sue Quilt Block Tutorial offers step-by-step guidance. This block not only tells a story with every stitch but also connects generations through fabric and creativity. It’s a wonderful addition to your quilting repertoire that will bring joy to both the maker and the viewer.
In this article, we will explore the materials you need, the process of creating your own Sunbonnet Sue, customization tips, and ways to incorporate the block into your finished quilt. With our SEO-optimized structure, you’ll easily find the information you need while enjoying a humanized and well-structured read that aligns with Google AdSense policies.
1. Understanding the History and Appeal of Sunbonnet Sue
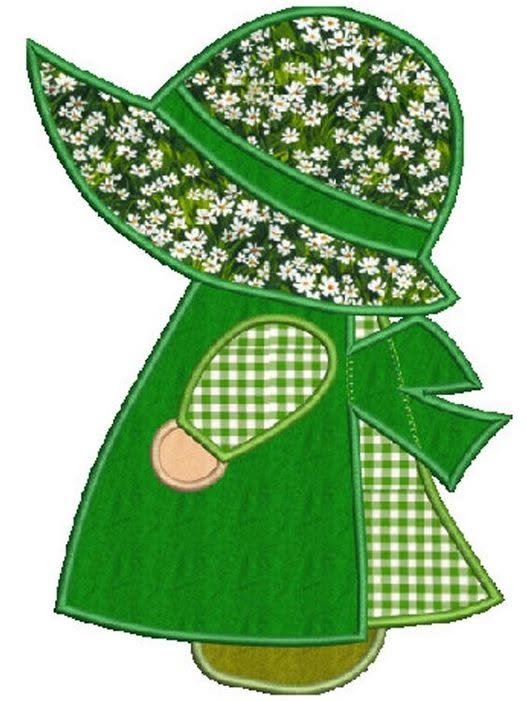
The Sunbonnet Sue quilt block has a rich history dating back to the 19th century, when it became a popular design among American quilters. The iconic silhouette of a girl with a wide-brimmed bonnet and a dress captures a sense of innocence and nostalgia.
Originally, the design was used to tell stories or represent daily life through the various positions and settings of Sue. This visual storytelling aspect gave quilters a creative outlet beyond traditional patchwork. Today, Sunbonnet Sue continues to be admired for its charm and personality.
Quilters often pass this pattern down through generations, making it a symbol of family heritage and creativity. Its simplicity allows for endless variation, making each Sue unique while staying true to the original form. This timeless pattern is an excellent starting point for new quilters.
The visual appeal of the block lies in its soft curves and layered appliqué technique, which allows crafters to experiment with fabrics and textures. You can use scraps from past projects or coordinate colors to match a quilt theme. The result is always heartwarming.
Modern interpretations of Sunbonnet Sue include updates like embroidery, hand-stitched embellishments, and even humorous or activist expressions of Sue’s role. Still, the core image remains deeply rooted in tradition and community.
By learning this Sunbonnet Sue Quilt Block Tutorial, you’re embracing a piece of quilt history while gaining valuable skills in applique and storytelling through fabric.
2. Materials and Preparation for Sunbonnet Sue Block
Before diving into the creation process, you’ll want to gather all necessary materials to make your Sunbonnet Sue quilt block a success. Choosing the right tools and fabrics ensures your project goes smoothly and your results are beautiful.
You’ll need basic quilting tools such as fabric scissors, pins, fusible web (if doing raw-edge applique), iron, and a sewing machine. Hand-sewing enthusiasts can complete the block using needle and thread instead. Select your materials based on your preferred technique.
For fabrics, choose cotton prints in various colors. You’ll need small pieces for the bonnet, dress, arm, and shoe—plus a background block to applique the pieces onto. A fat quarter bundle works well, offering coordinated prints while allowing personalization.
Templates are crucial to making the right shapes. You can print or trace Sunbonnet Sue templates from online sources or create your own. Just make sure the pieces are proportional and fit comfortably within a square quilt block (commonly 10” x 10” or 12” x 12”).
Pre-washing your fabrics is recommended to avoid shrinkage or color bleeding after your block is complete. Iron each fabric piece before cutting to ensure smooth lines and clean edges. Preparation is key to a polished final product.
If you’re a beginner, practice tracing and cutting the shapes on scrap fabric before working with your chosen pieces. This gives you confidence and helps you avoid errors in your final layout.
Now that you have your materials ready, you’re set to bring Sunbonnet Sue to life. Follow along for the step-by-step tutorial in the next section.
3. Step-by-Step Sunbonnet Sue Quilt Block Tutorial
Begin your Sunbonnet Sue Quilt Block Tutorial by tracing each part of the design onto fusible web (if using fusible applique). You should have a bonnet, dress, arm, shoe, and possibly a face or hatband depending on your version.
Cut each piece out roughly and fuse the web to the wrong side of your chosen fabric using a hot iron. Once it cools, carefully cut out each shape along the lines you traced earlier. This method gives you clean edges and minimizes fraying.
Position the pieces on your background square. Start with the dress, followed by the bonnet and arms, then the shoe. Adjust placement until you’re satisfied with how Sunbonnet Sue looks. Use a small ruler to center the design on the block.
Once everything is placed, fuse the pieces to the background with your iron. If not using fusible web, pin or baste them carefully so they don’t shift during sewing. You can also lightly mark outlines for needle-turn applique if you prefer that method.
Now it’s time to sew. For machine applique, use a zigzag or blanket stitch around each edge. Choose a thread color that blends or contrasts depending on your style. For hand-sewing, a whip stitch or blind stitch will secure each shape beautifully.
Finish the block by pressing it flat. At this point, your Sunbonnet Sue quilt block is complete and ready to be incorporated into a larger quilt or framed as an individual art piece. You’ve just mastered a cherished quilting tradition!
4. Creative Ideas to Customize Your Sunbonnet Sue Block
One of the best parts of the Sunbonnet Sue Quilt Block Tutorial is the opportunity for customization. With endless variations, you can reflect personality, season, or theme in your design, making every Sue different and delightful.
Change Sue’s outfit based on the season—pastel florals for spring, bright stripes for summer, plaids for fall, and cozy flannels for winter. You can even make a full quilt with a block for each month or holiday to tell a year-round story.
Add embroidered details like facial features, flowers, or names to personalize your Sunbonnet Sue block further. A little embroidery gives extra charm and makes the block stand out with handmade artistry.
Experiment with different applique techniques. Try raw-edge for a modern, rustic look or needle-turn for a soft, traditional feel. You can even use reverse applique or add fabric paint and embellishments for more artistic expression.
Make Sue active! Adjust her position to show her holding a balloon, watering flowers, or jumping in puddles. These small changes add movement and life to your quilt block, giving your Sue unique energy and narrative.
Involve children in choosing the fabrics or drawing their own version of Sue. This is a great way to share quilting with the next generation while creating a memory-filled quilt. Plus, kids love seeing their ideas turned into fabric art.
You can also create a series of Sunbonnet Sue blocks for different occasions—weddings, birthdays, or even graduation. Each version becomes a quilted keepsake, capturing special moments in your life through the timeless charm of Sue.
FAQ – Sunbonnet Sue Quilt Block Tutorial
What is the size of a typical Sunbonnet Sue quilt block?
Most Sunbonnet Sue quilt blocks are 10” to 12” square, but you can adjust the size to fit your project. Just ensure the pieces are scaled to match the block size.
Can beginners try this Sunbonnet Sue Quilt Block Tutorial?
Absolutely! This tutorial is perfect for beginners. The shapes are simple, and the applique technique can be done either by hand or machine depending on your skill level.
What type of fabric works best for Sunbonnet Sue blocks?
100% cotton quilting fabric is ideal. Choose small prints or solids for the bonnet, dress, and shoes. Coordinated bundles or scrap fabrics work beautifully.
Do I need a sewing machine to make a Sunbonnet Sue block?
No, you can hand-sew the entire block using basic stitches. However, a sewing machine will speed up the process, especially for blanket or zigzag stitching around the applique.
How do I download or create a Sunbonnet Sue template?
You can find printable Sunbonnet Sue templates online or trace from vintage quilting books. Ensure the sizing matches your intended block dimensions before cutting.
Can I make a full quilt using only Sunbonnet Sue blocks?
Yes! A full Sunbonnet Sue quilt can be a beautiful project. Vary each block by changing colors, accessories, or backgrounds to keep the quilt visually interesting
The Sunbonnet Sue Quilt Block Tutorial not only teaches a foundational quilting technique but also connects you to a long history of storytelling through fabric. With easy-to-follow steps, opportunities for personalization, and creative joy at every turn, this pattern is a must-learn for quilters of all levels.
We hope this guide has inspired you to start your own Sunbonnet Sue journey. Whether for a full quilt or a standalone block, this design brings warmth and character to any project.
If you enjoyed this tutorial or have tips of your own, please leave a sincere opinion and suggestions in the comments. We’d love to hear how your Sunbonnet Sue turned out and what creative twists you added!