
The Texas Quilt Block Tutorial is a delightful journey into the heart of traditional American quilting. Inspired by the Lone Star State, this block not only showcases a striking geometric design but also brings a touch of Southern charm to your quilting projects. If you’re looking to master a bold, symmetrical, and meaningful block, the Texas Quilt Block Tutorial is exactly what you need.
Whether you’re a beginner looking to explore your first quilt block or a seasoned quilter seeking inspiration, this tutorial provides everything you need to create a perfect Texas block. From fabric selection to cutting and piecing, every step is outlined in a human-friendly way, making this tutorial both accessible and rewarding. Following this Texas Quilt Block Tutorial, you’ll enhance your quilting skills while creating a pattern that stands the test of time.
Quilting is more than just sewing—it’s storytelling. And what better way to express your creativity than with the iconic Texas Quilt Block? This article is designed to guide you through the process in a simple, enjoyable, and SEO-optimized way. Let’s dive into this creative adventure and make something truly unforgettable!
1. Understanding the Texas Quilt Block
The Texas Quilt Block is a symbolic pattern often associated with pride, heritage, and bold design. It typically features a star or radiating shape, embodying the spirit of Texas and its independent legacy.
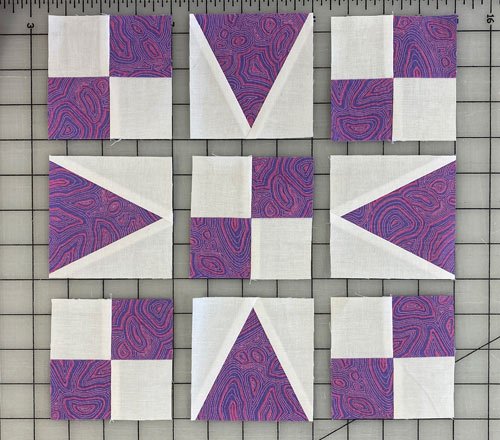
This block is generally built using a combination of half-square triangles and diamond shapes. The vibrant layout creates a beautiful central focus, ideal for larger quilt projects or as a standout square in a patchwork design.
Historically, this block has been used to represent state pride or commemorate events. Whether you live in Texas or simply admire its culture, this pattern lets you bring that admiration into your craft.
The Texas Quilt Block Tutorial teaches you how to maintain accuracy while cutting and sewing, ensuring that all angles align perfectly to create that classic star-shaped design.
Fabric choice is essential. Opt for bold contrasting colors like navy blue, red, and white, or go with earthy tones for a rustic Southern feel. Using high-quality cotton will also make your block last longer and feel softer.
By understanding the roots and design principles of the Texas Quilt Block, you’ll appreciate the tradition and craftsmanship that go into every stitch. This foundational knowledge helps you approach the next steps with confidence and creativity.
2. Materials and Fabric Preparation
Before starting your project, gather all essential quilting supplies. You’ll need a rotary cutter, self-healing mat, quilting ruler, pins, sewing machine, and an iron. These tools make the process smoother and more accurate.
Choosing the right fabric is key. For a traditional Texas Quilt Block, go with three or four contrasting colors. Classic combinations often include red, white, blue, and gold. Pre-washing your fabric is highly recommended to prevent shrinkage later.
Cutting is a crucial part of the process. Use a rotary cutter to achieve sharp, precise edges. For the Texas Quilt Block Tutorial, prepare several triangles, squares, and diamonds. Having a layout diagram nearby will be helpful.
Label your pieces to avoid confusion during assembly. A simple sticky note or washable fabric marker can save you from mixing up similar cuts. This is especially useful when working with symmetrical patterns.
Iron all fabric pieces before sewing. Flat fabric ensures more accurate seams and reduces puckering. Pressing seams as you go during assembly also contributes to a cleaner final block.
Lastly, make sure your workspace is clean and well-lit. Keeping your tools within reach will improve your efficiency and help maintain focus while creating your beautiful Texas Quilt Block.
3. Step-by-Step Construction Process
Start by sewing your half-square triangles (HSTs). Pair your squares right sides together, draw a diagonal line, and sew ¼ inch on either side. Cut along the line and press the seams open.
Next, move on to creating your diamond shapes. These can be tricky at first, so use a template if needed. Make sure to cut accurately and stitch slowly to maintain sharp points.
Lay out your block pieces before sewing. Use a flat surface and arrange them according to your pattern. The center star should be clear and symmetrical before stitching.
Begin assembling rows, starting from the center. Use pins to align edges and sew with a consistent seam allowance. Remember to press seams after each row to keep everything flat and crisp.
Once your rows are complete, join them to form the full block. Check for alignment and adjust as needed. If corners don’t match perfectly, use small adjustments rather than ripping out entire seams.
To finish the block, give it a final press and trim the edges to ensure a uniform size. Your completed Texas Quilt Block is now ready to be added to a larger quilt or displayed on its own!
4. Creative Uses and Variations
One of the joys of the Texas Quilt Block Tutorial is that it opens the door to creativity. While the classic block is stunning on its own, you can personalize it in numerous ways to make it your own.
Try using a monochromatic color scheme for a modern twist, or opt for bold patterns and batiks for a more eclectic look. The structure of the Texas block lends itself well to experimentation.
The Texas Quilt Block can be resized to suit various projects. Create mini blocks for potholders or pillow covers, or enlarge them for a dramatic quilt centerpiece.
Combine it with other traditional blocks like the Lone Star or Ohio Star to create a themed quilt. The versatility of this pattern makes it easy to mix and match with others.
Consider using embroidery or applique to embellish your Texas Quilt Block. Adding initials, dates, or symbols can make your quilt even more meaningful and personal.
Finally, share your finished blocks online or with local quilt groups. Seeing different interpretations of the same tutorial is both inspiring and educational. You might even inspire others to try the Texas Quilt Block Tutorial themselves!
FAQ: Texas Quilt Block Tutorial
What size should I cut my fabric pieces for a Texas Quilt Block?
It depends on your final block size, but common measurements include 4.5″ squares for HSTs and 2.5″ x 4.5″ diamonds. Use templates or reference charts for accuracy.
Is the Texas Quilt Block good for beginners?
Yes! While it requires attention to detail, it’s a great introduction to working with triangles and complex layouts. The tutorial simplifies each step.
How do I keep points from getting cut off?
Always use a ¼” seam allowance and press seams open when necessary. Accurate cutting and pinning are crucial to preserving sharp points.
Can I use scraps to make a Texas Quilt Block?
Absolutely! Scrappy versions are beautiful and eco-friendly. Just ensure your fabric pieces are large enough to accommodate the required cuts.
What’s the best color scheme for a Texas Quilt Block?
Traditional colors include red, white, and blue. However, you can get creative with any palette that suits your project or décor.
Can this block be used in larger quilt projects?
Yes! It works beautifully as a central motif or repeated across a quilt top. Adjust the block size as needed to fit your design.
PATTERN HERE
The Texas Quilt Block Tutorial offers quilters of all skill levels an opportunity to explore a design that is both meaningful and visually stunning. From understanding its heritage to selecting fabrics and assembling the pieces, this tutorial covers every step in a clear and approachable way.
With just a bit of time, patience, and creativity, you can produce a block that stands out and carries a rich sense of tradition. The possibilities for personalization and design variations are endless, making this a versatile addition to any quilting repertoire.
If you enjoyed this Texas Quilt Block Tutorial, we’d love to hear from you! Please leave a sincere comment with your thoughts or share any suggestions or questions you may have. Your feedback helps us keep crafting content that truly supports the quilting community.