
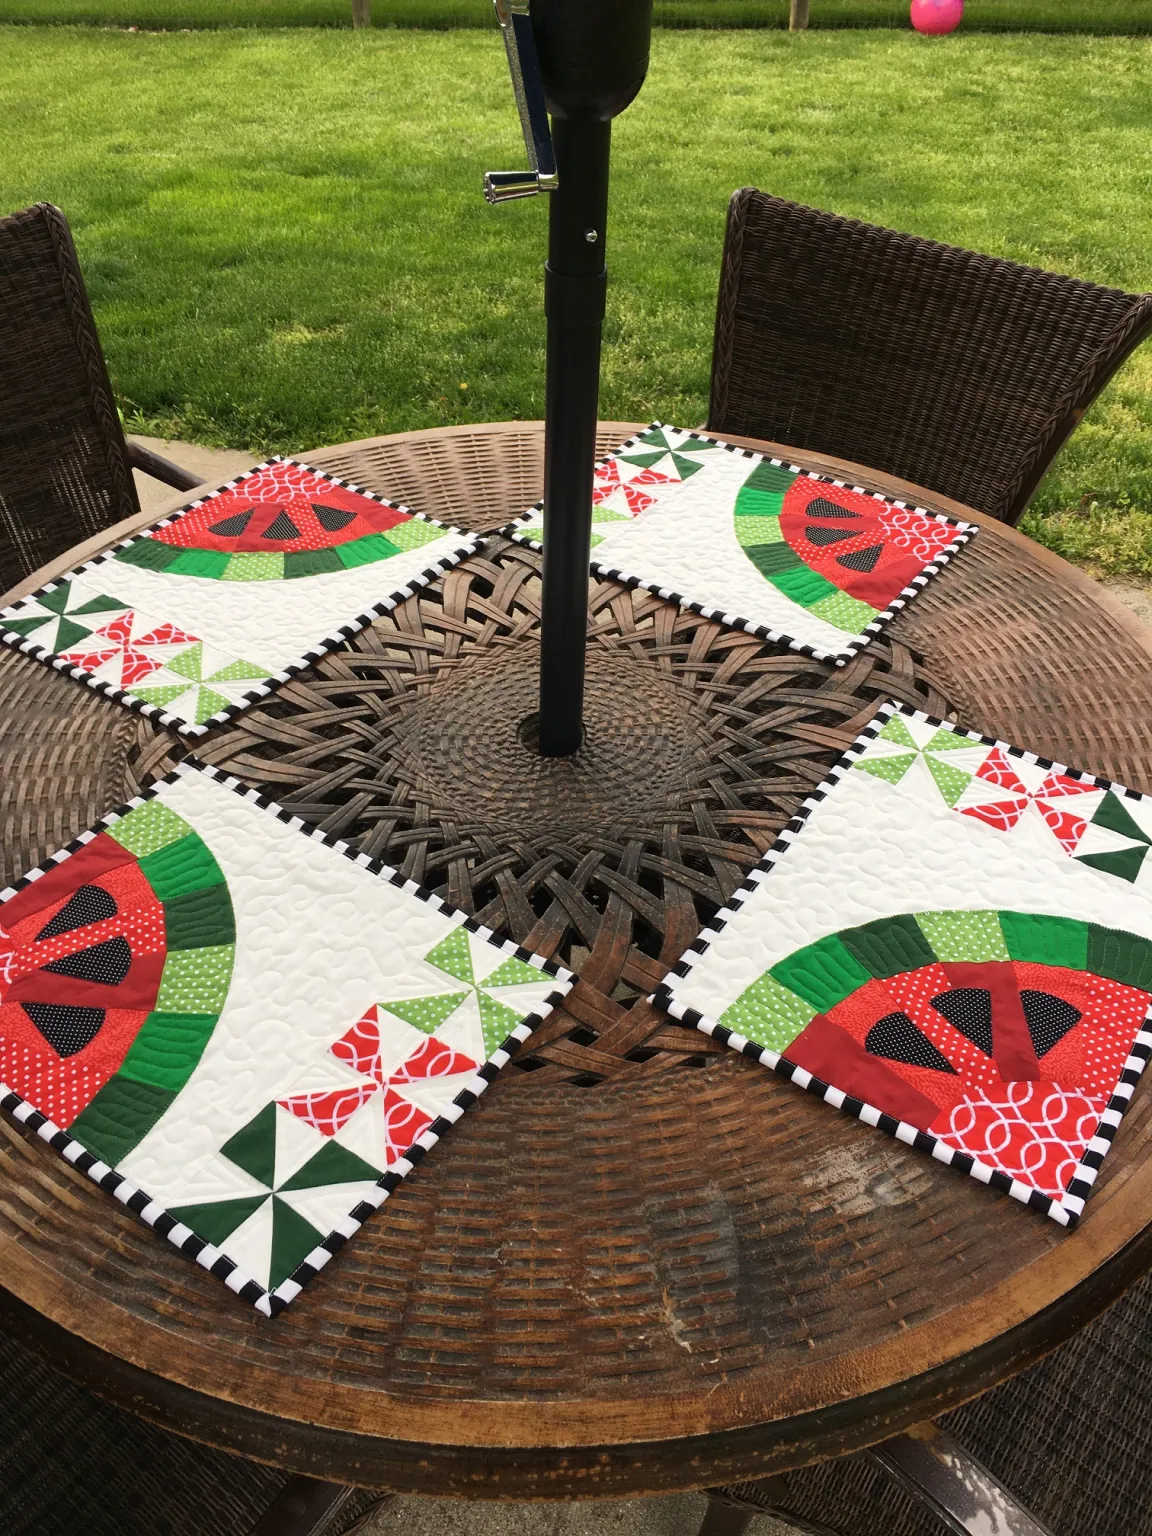
Watermelon quilts are known for their playful color combinations—vibrant reds, greens, and even seed-like black stitches. These cheerful designs bring to mind warm weather, laughter, and homemade creativity.
With the right free pattern, you can create a unique quilt that’s not only beautiful but also a conversation starter.
This guide will walk you through everything you need to know about starting your own Watermelon Quilt. From choosing the right fabrics to finishing your final stitch, we’ll explore helpful tips and techniques to ensure your quilt is as refreshing as the fruit it’s inspired by. Let’s dive into this juicy project with four easy-to-follow steps.

1. Choosing the Right Fabrics for Your Watermelon Quilt
Picking the right fabrics is essential when using a Watermelon Quilt free pattern. The boldness and charm of the quilt rely heavily on color and texture, so be mindful of your selections.
Start with a vibrant red or pink fabric to represent the flesh of the watermelon. Look for something with small dots or light patterns to mimic the juicy texture.
Next, choose a deep green fabric for the rind. A striped or textured green will add depth and character to the quilt design.
For the watermelon seeds, black or dark brown fabric pieces are ideal. You can appliqué these for a playful touch or use embroidery for finer details.
White or cream-colored fabric often works well to separate the red and green sections, mimicking the inner rind layer and adding visual contrast.
Always use 100% cotton quilting fabric for the best results. It’s easy to sew, durable, and comes in endless color and pattern options.
Consider pre-washing your fabrics to prevent shrinkage and dye bleeding later. This simple step helps maintain the quilt’s vibrant look.
2. Cutting and Arranging Your Quilt Pieces
Once your fabrics are selected, the next step is to cut and arrange your pieces according to the Watermelon Quilt free pattern. Accuracy is key for a professional-looking result.
Start by printing or sketching your free pattern layout. If it’s a block-based quilt, each block will have a repeating watermelon motif.
Use a rotary cutter, quilting ruler, and cutting mat to ensure precise shapes. Straight edges and consistent sizes will help your pieces fit together seamlessly.
Arrange your cut pieces before sewing. This step lets you experiment with layout and ensure the color distribution looks balanced and eye-catching.
If you’re creating watermelon slices, try pie-shaped segments with alternating red and green arcs. Add a few black seed accents for extra charm.
Keep blocks labeled if your design is complex. Sticky notes or chalk markers can help prevent mixing up the parts.
Don’t forget seam allowances! Most patterns include ¼ inch seams, so account for this in your measurements before you begin stitching.
3. Sewing Your Watermelon Quilt Blocks
Now it’s time to bring your quilt to life with stitching. Sewing the blocks properly will ensure your Watermelon Quilt free pattern turns out smooth and polished.
Begin with the main red section of each block. Securely sew the fabric pieces using a ¼ inch seam, then press the seams flat with an iron.
Attach the white divider strip, followed by the green rind section. Always press your seams as you go to keep your blocks crisp and flat.
Add appliqué or embroidered watermelon seeds to the red sections before joining the blocks. This keeps your layers smooth and prevents extra bulk.
Join all the blocks together row by row, double-checking alignment to keep the pattern consistent across the quilt.
Use pins or fabric clips to hold your pieces in place while sewing, especially for curved watermelon slices.
Once all the blocks are joined, press the entire quilt top carefully. Smooth seams and aligned pieces are the hallmark of a beautifully crafted quilt.
4. Quilting and Binding the Final Piece
With your quilt top complete, it’s time for quilting and binding—the final steps that bring your Watermelon Quilt free pattern project together.
Layer your quilt sandwich: backing fabric on the bottom, batting in the middle, and your quilt top on top. Baste the layers with safety pins or spray adhesive.
Choose a quilting pattern that complements your watermelon design. Swirls, waves, or seed-shaped curves can add visual interest.
Use a walking foot or free-motion foot depending on your preferred quilting style. Test on a scrap quilt sandwich first to adjust tension and speed.
Start quilting from the center and work outward to prevent puckering. Take your time and breathe—quilting is a process to enjoy.
Once quilting is complete, trim the edges and prepare your binding. A bright green or patterned binding adds a fresh finishing touch.
Hand-stitch or machine-sew the binding in place. Don’t rush this step—it frames your work and gives your quilt its polished, final look.
FAQ – Watermelon Quilt Free Pattern
What size is a typical watermelon quilt?
Sizes can vary, but common dimensions are 40”x60” for a throw or 60”x80” for a bed quilt. You can adjust the pattern to suit your needs.
Is the watermelon quilt beginner-friendly?
Yes! Many Watermelon Quilt free patterns are designed with beginners in mind, using basic piecing and simple appliqué techniques.
Where can I find a reliable free pattern?
There are many reputable quilting websites, blogs, and forums offering Watermelon Quilt free patterns. Always choose from trusted sources for clear instructions.
Can I machine wash my watermelon quilt?
Absolutely. Use cold water and a gentle cycle. Air drying or low-heat drying is best to maintain the fabric’s color and shape.
Do I need special tools to make this quilt?
You’ll need basic quilting supplies: rotary cutter, mat, ruler, sewing machine, and iron. Optional tools like a walking foot or embroidery tools can enhance your project.
How long does it take to finish a watermelon quilt?
It depends on the size and complexity, but most quilts can be completed in a weekend to a couple of weeks with consistent effort.
PATTERN HERE
Creating a Watermelon Quilt using a free pattern is a joyful and rewarding project that brings a splash of summer into your home. From selecting the perfect fabrics to stitching each block and quilting the final layers, this tutorial has walked you through each step of the process. Whether you’re quilting solo or with friends, your finished piece will be both functional and fun.