
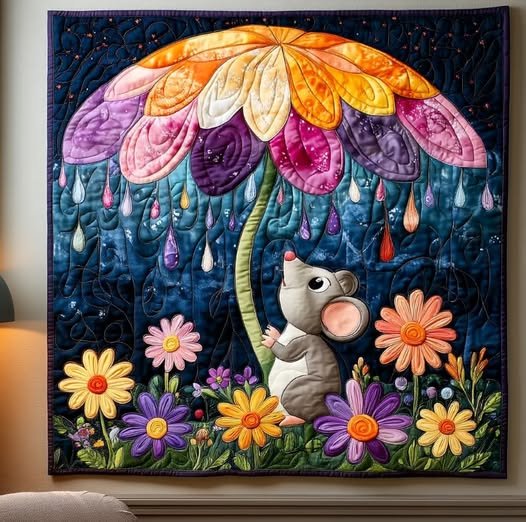
Stitchy Showers Quilt Pattern is one of those charming projects that instantly bring warmth, creativity, and a touch of handmade love into your home. Whether you are an experienced quilter or just beginning your journey into the world of fabric art, this pattern offers a perfect balance between simplicity and visual delight. The design combines playful fabric selections, precise stitching, and a rainy-day inspiration that makes it both fun and calming to create. Its versatility allows you to experiment with colors, textures, and arrangements to create a quilt that truly reflects your personal style.
The beauty of the Stitchy Showers Quilt Pattern lies in its ability to blend traditional quilting methods with a modern aesthetic. The quilt blocks can be arranged to mimic falling rain, gentle clouds, or even a mosaic of patchwork umbrellas, giving you endless options for customization. Many quilters love how this pattern can be made for any occasion—whether as a baby quilt, a cozy throw for a rainy afternoon, or a wall hanging that brings character to your space. Every stitch becomes a celebration of patience, color, and creativity.
Creating a Stitchy Showers Quilt is not just about sewing fabrics together—it’s about telling a story through patterns and textures. Each patch and seam contributes to a greater picture, a comforting masterpiece you can proudly say was made with your own hands. This design embodies the heart of quilting: the union of art and comfort, of craftsmanship and imagination. Let’s explore how to make your own version of this delightful project, from fabric selection to the final quilted stitches that tie it all together.
1. Choosing Fabrics for the Stitchy Showers Quilt Pattern
The first and most exciting step in creating your Stitchy Showers Quilt Pattern is choosing the right fabrics. Because this quilt’s theme is inspired by rainy days and cozy moments, you can play with soft blues, grays, and pastel tones to represent clouds and showers. However, don’t be afraid to mix in vibrant yellows or floral patterns for a cheerful contrast. Quilting is an art form where color harmony creates mood, so take your time to find fabrics that inspire you.
Consider using cotton fabric as your main material—it’s easy to work with, breathable, and long-lasting. You may also incorporate flannel or linen to add texture and warmth. Some quilters even like using fabric scraps from previous projects to give their quilt a nostalgic and eco-friendly touch. The charm of this pattern is that it looks beautiful even with a mix of old and new fabrics.
Before you start cutting, always prewash your fabrics to avoid shrinkage or color bleeding later. Iron them flat for clean cutting lines. This step may seem minor, but it ensures your Stitchy Showers Quilt has a smooth and professional finish once assembled.
To make your quilt more dynamic, try blending solid fabrics with prints. For instance, mix polka dots, stripes, or floral motifs among solid blocks. The different textures and designs mimic the natural beauty of a rainy landscape while keeping your piece visually balanced.
Finally, remember that fabric selection sets the tone for the entire quilt. Choose colors that evoke emotions—whether it’s calmness, joy, or nostalgia. Each shade you pick tells part of your quilt’s story, and that’s what makes handmade quilting so special.
Once your fabric selection is complete, it’s time to prepare your pieces and move on to the next phase—cutting and assembling your pattern blocks.
2. Cutting and Piecing Your Stitchy Showers Quilt Blocks
The heart of every Stitchy Showers Quilt Pattern lies in its blocks. Each block acts as a building unit that contributes to the overall design. Begin by cutting your fabrics into squares or rectangles according to your chosen layout. A rotary cutter and cutting mat will help you achieve precision and consistency across all pieces.
Accuracy is key in quilting. Small cutting errors can add up and affect the alignment of your quilt later. Take your time to measure twice and cut once. Keep your blocks neatly organized by color or size to make assembly easier.
Once your pieces are cut, you can start piecing them together. Use a quarter-inch seam allowance for all your seams—a quilting standard that ensures perfect alignment. Press the seams open or to one side depending on your design preference. This helps create a smooth surface and prevents bulk where seams intersect.
A great tip when assembling the Stitchy Showers Quilt is to lay out your blocks before sewing them together. This visual layout helps you identify color balance and pattern flow. You might decide to rearrange certain blocks to achieve a more cohesive look.
Sew your rows together carefully, pinning at each intersection to keep lines straight. Press after each step. The repetitive rhythm of stitching and pressing creates a soothing flow—one of the reasons quilting feels so meditative and rewarding.
Once your quilt top is complete, trim the edges evenly and admire your work. You’re now ready for the next step: adding the batting and backing to bring your quilt to life.
3. Quilting and Finishing Techniques
Now comes the exciting stage of quilting your Stitchy Showers Quilt Pattern—turning your layered fabrics into a unified and cozy masterpiece. The process of quilting involves stitching through all layers (top, batting, and backing) to secure them together.
Begin by preparing your quilt sandwich. Lay your backing fabric face down, followed by the batting, and then your quilt top facing up. Smooth out each layer and secure them with safety pins or basting spray to prevent shifting during sewing.
When choosing a quilting design, think about the mood you want your finished piece to convey. Gentle wave or raindrop patterns complement the theme perfectly. You can also try straight-line quilting for a clean and modern look. The choice is yours, and experimentation often leads to delightful surprises.
If you are quilting by machine, adjust your stitch length and tension to suit your fabric and batting type. For hand quilting, use a strong thread and short, even stitches to achieve a classic, textured finish. Either way, each stitch reinforces your fabric layers and adds personality to your quilt.
Once quilting is complete, it’s time to add binding around the edges. This not only secures your layers but also gives your quilt a polished and professional look. Choose a binding fabric that complements your quilt’s colors, and sew it carefully around all sides.
Finally, don’t forget to label your quilt. Adding your name, date, and project title (“Stitchy Showers Quilt Pattern”) creates a meaningful record of your creative journey—a reminder of the time, care, and love stitched into every inch.
4. Creative Ideas and Personal Touches
One of the most enjoyable parts of working on the Stitchy Showers Quilt Pattern is adding your personal touches. Customization is what makes handmade quilts so extraordinary. No two quilts are ever the same, and your creative vision brings it to life.
Consider incorporating appliqué elements such as small raindrops, umbrellas, or even fabric flowers. These details enhance the visual appeal and make your quilt truly one-of-a-kind. If you enjoy embroidery, try adding delicate stitching along certain blocks for extra charm.
You can also experiment with fabric placement to create motion or direction—just like real rainfall. Diagonal arrangements or gradient color transitions can make your quilt appear as if it’s gently “raining” across the surface.
Another creative idea is to personalize your quilt with embroidered initials or special dates. This turns it into a thoughtful gift for loved ones or a cherished keepsake for yourself. Handmade quilts carry emotional value that no store-bought blanket can match.
Don’t be afraid to mix modern and vintage fabrics. The contrast adds depth and texture, reflecting the balance between nostalgia and contemporary design. Remember, quilting is both a skill and a form of self-expression.
At the end of the day, the best part about the Stitchy Showers Quilt Pattern is not just finishing it—it’s the joy of the process. Every cut, every stitch, and every creative decision tells a piece of your story through fabric and thread.
Frequently Asked Questions (FAQ)
1. What skill level is required for the Stitchy Showers Quilt Pattern?
This pattern is suitable for confident beginners and intermediate quilters. Basic knowledge of cutting, piecing, and sewing straight seams is helpful, but the design is forgiving and adaptable.
2. How much fabric do I need for this quilt?
The fabric requirement depends on the size you plan to make. For a throw-sized quilt, you’ll typically need about 2 to 3 yards of fabric for the top, plus additional yardage for backing and binding.
3. Can I use scraps for this pattern?
Absolutely! The Stitchy Showers Quilt Pattern is perfect for using up fabric scraps. Mixing different prints and textures gives your quilt a playful and unique look.
4. Should I quilt by hand or machine?
Both options work beautifully. Hand quilting adds a traditional charm, while machine quilting offers speed and precision. Choose the method that best fits your comfort and style.
5. How do I care for my finished quilt?
Wash your quilt gently in cold water using a mild detergent. Air drying is preferred, but you can tumble dry on low heat. This helps preserve the colors and fabric integrity for years.
6. Can I resize the pattern?
Yes! You can easily adjust the Stitchy Showers Quilt Pattern to create anything from a baby quilt to a large bedspread. Simply add or subtract blocks to achieve the desired dimensions.
PATTERN HERE
The Stitchy Showers Quilt Pattern is more than just a quilting project—it’s a celebration of creativity, patience, and personal expression. From selecting fabrics to the final stitches, each step offers a chance to connect with your craft and create something that carries warmth and meaning. Quilting allows you to transform simple materials into a piece of art that can be cherished for generations.
If you’ve enjoyed this guide, take a moment to share your honest opinion and suggestions. Your feedback helps inspire new projects and ideas for passionate quilters everywhere. Let your creativity rain down—just like in the Stitchy Showers Quilt Pattern!