
Calcifer Plush Quilt Pattern is a magical and heartwarming project for any sewing or quilting enthusiast who loves fantasy-inspired crafts. This pattern captures the essence of the fiery little spirit from Howl’s Moving Castle, turning him into a soft and cozy plush quilt. Whether you’re an experienced quilter or a beginner eager to take on a creative challenge, this project brings a blend of whimsy, warmth, and artistry to your home decor. With its vibrant colors and unique design, the Calcifer Plush Quilt Pattern is perfect for anyone who enjoys combining fandom passion with the comfort of handmade creations.
Creating a Calcifer quilt is not just about sewing fabrics together—it’s about telling a story through texture, color, and imagination. The glowing face of Calcifer, stitched carefully in layers of fabric, makes for a striking centerpiece that stands out whether used as a decorative throw, wall hanging, or even a gift for a friend who adores Studio Ghibli. Every stitch contributes to giving life to this fiery companion, turning a simple quilt into a piece of art filled with personality and warmth.
Before diving into the steps, it’s essential to prepare with the right tools and mindset. Quilting requires patience and attention to detail, but the results are incredibly rewarding. The Calcifer Plush Quilt Pattern lets you experiment with applique techniques, plush textures, and layered designs that make the finished piece both visually stunning and tactilely pleasing. So, let’s explore how you can bring this delightful flame spirit to life, one stitch at a time.
1. Getting Started with the Calcifer Plush Quilt Pattern
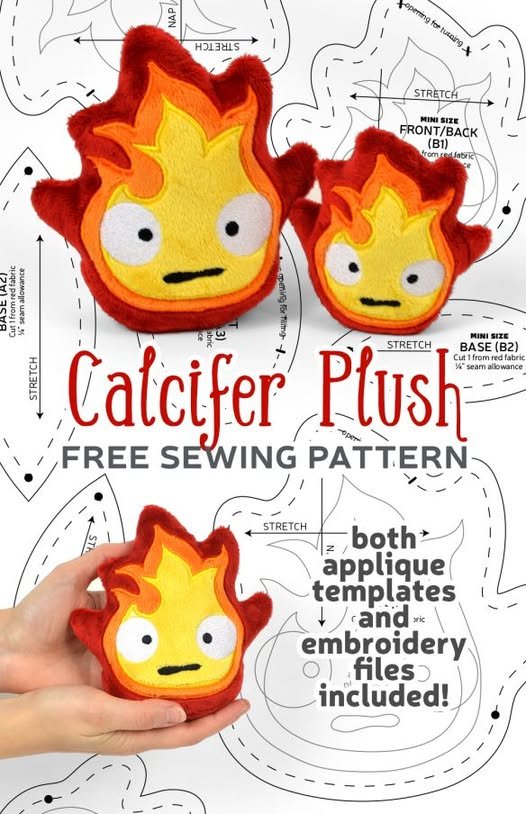
Before you start cutting and sewing, it’s crucial to gather all your materials and understand the pattern layout. A Calcifer Plush Quilt Pattern usually includes detailed instructions and templates for creating the iconic flame shape and expressive face. You’ll need fabrics in shades of orange, yellow, and red to recreate Calcifer’s fiery glow, along with soft materials like fleece or minky for the plush texture.
Once your materials are ready, take time to study the pattern pieces and plan your color placement. Proper preparation helps ensure that your finished quilt maintains the right proportions and captures Calcifer’s friendly yet mischievous expression. Using high-quality cotton fabric for the base and soft plush fabric for the appliqué ensures durability and comfort.
It’s helpful to prewash your fabrics to prevent shrinkage and color bleeding after your quilt is finished. For beginners, this is an excellent opportunity to practice fabric handling and cutting precision. Marking each section before sewing saves time and prevents confusion later in the process.
The next step is to trace and cut your pattern pieces. Depending on the pattern version, Calcifer’s face details—like his eyes and mouth—may come as separate templates. Using fusible webbing can make these pieces easier to attach, keeping them in place as you stitch.
Once everything is cut and arranged, you can begin assembling the quilt top. Start from the center with Calcifer’s flame body and gradually build outwards. This layering technique helps maintain symmetry and a smooth finish.
Finally, baste your quilt sandwich (top, batting, and backing) together before quilting. This step ensures that the layers stay aligned while sewing, helping to achieve clean lines and even stitching throughout the piece.
2. Appliqué and Stitching Techniques for Calcifer
Appliqué is at the heart of the Calcifer Plush Quilt Pattern, giving depth and detail to Calcifer’s fiery form. You can use either raw-edge or turned-edge appliqué, depending on your skill level and desired finish. Raw-edge appliqué works well for beginners, while turned-edge creates a more polished, seamless look.
To start, position Calcifer’s flame body onto your quilt background and secure it with pins or fabric glue. Use a satin stitch or zigzag stitch around the edges to prevent fraying and add definition. Choose thread colors that complement your fabric—orange, yellow, and red tones blend beautifully to create a warm, glowing effect.
For the facial features, embroidery is an excellent option to add personality. Using black or dark gray thread, carefully stitch Calcifer’s expressive eyes and playful smile. You can even add small highlights in white to make his face more lively and animated.
Quilting the background can further enhance Calcifer’s fiery energy. Free-motion quilting in wavy or spiral patterns mimics the movement of flames, creating visual interest and a sense of motion. This step turns the quilt into a truly dynamic art piece.
To add plushness, consider using batting with extra loft or layering soft fabrics under Calcifer’s face. This gives the quilt a three-dimensional effect and makes Calcifer appear as if he’s glowing from within.
When you finish the appliqué and quilting, trim the edges evenly and prepare for binding. A bright border that complements Calcifer’s colors—perhaps deep red or burnt orange—adds a perfect finishing touch to your quilt.
3. Adding Texture and Dimension to Your Plush Quilt
The Calcifer Plush Quilt Pattern is unique because it combines quilting with plush design techniques. Adding dimension makes the quilt feel luxurious and huggable, transforming it from a simple blanket into a comforting piece of art.
One way to achieve this is by using textured fabrics. Minky, fleece, or velour give a soft and fluffy touch to Calcifer’s flame body. Mixing matte and shiny fabrics also creates contrast, emphasizing the glowing areas of his design.
Stuffing parts of the appliqué lightly with batting can enhance the plush effect. For example, adding a small amount of stuffing under Calcifer’s cheeks or flame tips makes them stand out and adds realism. Just be sure to secure these areas firmly with close stitching to maintain durability.
Layering fabrics of different shades can also create depth. Gradually transitioning from dark orange at the base to bright yellow at the tips simulates the natural gradient of fire. Fabric blending like this is visually appealing and enhances the pattern’s artistic value.
If you want to go a step further, try outlining Calcifer with embroidery or quilting lines in metallic thread. The shimmer will catch the light, giving your quilt a magical glow reminiscent of the fire spirit himself.
Finally, adding details like embroidered sparks or flame swirls around Calcifer completes the design beautifully. These small embellishments help tie the entire quilt together, giving it a cohesive, finished look.
4. Finishing Touches and Display Ideas
Once your Calcifer Plush Quilt Pattern is complete, it’s time to think about how to display or gift it. This quilt can serve multiple purposes—use it as a cozy throw, a child’s blanket, or a stunning wall hanging for a Studio Ghibli-themed room.
To hang your quilt, sew a sleeve on the back to insert a rod or dowel. This keeps it flat and preserves its shape when displayed. If gifting, consider wrapping it with a note explaining the handmade process—it adds sentimental value and showcases your effort.
Proper care ensures your quilt stays vibrant and plush for years. Always wash gently with cold water and air-dry or tumble dry on low. Avoid harsh detergents that can fade the colors or damage the plush texture.
Another idea is to create a matching pillow or mini version of Calcifer to complement your quilt. This adds cohesion to your decor and gives you more ways to enjoy the design.
If you love personalization, embroider your initials or a date in one corner. It’s a lovely way to mark your creation and make it a keepsake piece.
Lastly, share your finished quilt with the quilting community online or locally. Projects like the Calcifer Plush Quilt Pattern inspire others and celebrate creativity in the world of fabric art.
FAQ About the Calcifer Plush Quilt Pattern
1. What is included in a Calcifer Plush Quilt Pattern?
Most patterns include templates for Calcifer’s shape, step-by-step instructions, and fabric recommendations. Some may also offer embroidery guides for his facial features.
2. Is this project suitable for beginners?
Yes, with patience and basic sewing knowledge, beginners can complete this pattern. The plush elements and appliqué techniques may require practice, but they are manageable with clear instructions.
3. What fabrics work best for this pattern?
Soft materials like fleece, minky, or flannel create the plush feel, while cotton is ideal for the quilt base. Using a mix of textures enhances the visual and tactile appeal.
4. How long does it take to make a Calcifer quilt?
The timeframe varies based on experience level, but most crafters complete it in one to two weeks, working a few hours each day.
5. Can I resize the pattern for a smaller or larger quilt?
Absolutely. The pattern can be scaled up or down depending on your needs—just adjust fabric quantities accordingly.
6. How do I keep my Calcifer quilt looking new?
Wash gently in cold water and use mild detergent. Avoid bleach and high heat, as they can damage colors and plush fibers.
PATTERN HERE PDF
Creating a Calcifer Plush Quilt Pattern is a delightful journey that combines imagination, craftsmanship, and love for handmade art. Through appliqué, color blending, and texture, you bring to life a beloved character in a cozy and creative way. Whether displayed proudly or snuggled with during movie nights, this quilt radiates warmth and joy.
If you’ve followed this guide and made your own Calcifer quilt, we’d love to hear your thoughts! Share your honest opinion, suggestions, or experiences—your feedback helps inspire more creative projects and keeps the quilting spirit burning bright.