
If you’re searching for a creative and festive way to celebrate Halloween, the Fun Halloween Bag Quilt Pattern is the perfect project for you! Combining the art of quilting with the excitement of spooky season, this pattern allows you to craft a charming, reusable bag that’s both decorative and practical. Whether you’re making it for your kids to collect candies or as a themed accessory to show off during the fall season, this quilted Halloween bag brings together color, texture, and joy in one delightful design.
The Fun Halloween Bag Quilt Pattern captures the spirit of Halloween with playful motifs like pumpkins, ghosts, bats, and spider webs—all pieced together with your favorite quilting fabrics. This project is perfect for beginners who want to explore quilting while creating something useful and fun. With the right combination of fabrics and creativity, you can make each bag unique, reflecting your personality or matching your home’s seasonal décor.
One of the best parts about making your own quilted bag is the opportunity to use leftover fabric scraps from previous projects. The Fun Halloween Bag Quilt Pattern is designed to make the most of those scraps, giving new life to small pieces of fabric that might otherwise go unused. It’s eco-friendly, economical, and endlessly customizable. Plus, the process of quilting and assembling the bag is a relaxing and rewarding craft that helps you embrace the cozy autumn atmosphere.
1. Getting Started with the Fun Halloween Bag Quilt Pattern
Before diving into the sewing process, it’s essential to gather all your materials and plan your design. The Fun Halloween Bag Quilt Pattern doesn’t require complicated tools—just basic quilting supplies and your favorite spooky fabrics. Start by selecting fabrics in traditional Halloween colors like orange, black, purple, and green. Look for patterns that feature witches, cats, ghosts, or candy corn for extra charm.
Next, prepare your fabric by washing, drying, and ironing it. This step ensures your pieces won’t shrink after the bag is assembled. Once your fabric is ready, use a rotary cutter and ruler to cut your quilting pieces according to the pattern’s measurements. Accuracy is key in quilting, especially when assembling smaller blocks that form your bag’s panels.
Choose a coordinating thread color that complements your fabric palette. You might opt for black for contrast or a soft orange for a subtle finish. The Fun Halloween Bag Quilt Pattern typically features a patchwork front panel, which can be as simple or detailed as you wish. Some quilters enjoy piecing together tiny squares, while others prefer using appliqué designs like pumpkins or ghosts to add dimension.
When piecing your quilt blocks, always press the seams flat for a smooth, professional look. This also helps align your blocks neatly when sewing the bag together. Once the front panel is complete, you’ll quilt it onto batting for added sturdiness. This not only enhances the bag’s structure but also gives it that classic quilted texture that makes it special.
Remember that the inside of your bag matters too! Add a lining fabric with a playful print—perhaps candy motifs or stars. The lining will hide your seams and make the bag stronger. You can even include a small pocket inside for storing smaller Halloween treats.
Finally, finish your bag with sturdy handles. Fabric handles work well, but you can also use cotton webbing for durability. Once assembled, your Fun Halloween Bag Quilt Pattern will come to life as a beautiful, functional piece that celebrates your love for Halloween and quilting alike.
2. Creative Design Ideas for Your Halloween Quilt Bag
The beauty of the Fun Halloween Bag Quilt Pattern lies in its flexibility. You can customize it endlessly to suit your personal taste, your children’s preferences, or the overall Halloween theme you want to express. Start by brainstorming color combinations. Classic orange and black are timeless, but mixing in purple, lime green, or even metallic accents can add a modern twist.
For those who love traditional quilt blocks, consider using simple patchwork squares or half-square triangles to create geometric patterns. To make your design more festive, incorporate Halloween-themed appliqués such as ghosts, pumpkins, or witch hats. Each appliqué can be hand-stitched or fused with iron-on adhesive, depending on your preferred method.
Fabric selection also plays a big role in your final look. You can use cotton quilting fabric for a smooth finish or mix in textured fabrics like felt or velvet to give your bag more depth. The Fun Halloween Bag Quilt Pattern allows for creative freedom, so don’t be afraid to experiment with textures and prints.
If you want your bag to glow—literally—try using glow-in-the-dark fabrics or thread. This adds an exciting touch, especially for children who go trick-or-treating at night. It’s both fun and functional, ensuring your bag stands out in the dark.
You can also personalize your bag by adding embroidered names or initials. Imagine your child’s name stitched across a pumpkin patch block—it’s a simple detail that transforms your Fun Halloween Bag Quilt Pattern into a keepsake. It’s also a thoughtful handmade gift idea for friends or family who adore Halloween.
Lastly, think about embellishments. Add buttons shaped like bats, ribbons along the handles, or lace trims for a vintage vibe. These small touches enhance your quilt bag’s charm and make it a truly one-of-a-kind Halloween accessory.
3. Step-by-Step Quilting and Assembly
Now that your design is ready, it’s time to bring your Fun Halloween Bag Quilt Pattern to life. Start by piecing together your quilt top. Arrange your chosen fabric squares or blocks on a flat surface before sewing them. Play around with the layout until you’re happy with the pattern. Once satisfied, begin sewing the pieces together row by row, pressing seams after each step.
After assembling the quilt top, layer it with batting and backing fabric. Pin or baste the layers together to keep them from shifting while quilting. Use a walking foot for even stitching, and quilt as desired—straight lines, diagonal designs, or free-motion quilting all work beautifully.
Once quilted, trim the edges neatly. Then, cut the back panel and lining fabric to match the dimensions of the quilted front. Sew the front and back panels together, right sides facing each other, leaving the top edge open. Turn the bag right side out and press the seams.
For the lining, sew the pieces together the same way but leave a small opening at the bottom to turn the bag later. Place the lining inside the quilted exterior with right sides facing each other. Sew along the top edge to attach them. Then, pull the bag through the opening, stitch the gap closed, and press everything flat.
To make handles, cut two strips of fabric or use pre-made webbing. Stitch them securely to the top of the bag, reinforcing the seams to ensure they hold weight. You can adjust the handle length depending on whether you want a hand-held or shoulder-style bag.
Finish by topstitching along the upper edge for a polished look. This adds strength and helps the bag maintain its shape. Your Fun Halloween Bag Quilt Pattern is now complete—a handmade treasure ready to fill with candies, decorations, or even quilting supplies!
4. Tips to Personalize and Preserve Your Halloween Quilt Bag
Creating a Fun Halloween Bag Quilt Pattern is just the beginning. To make your bag last for years, proper care and maintenance are key. Start by reinforcing seams and handles if you plan to carry heavy items. A double row of stitching or decorative topstitch can provide extra durability.
When it comes to washing, always handle your quilted bag with care. Gentle hand washing or using a delicate cycle with cold water helps preserve the fabric’s colors and structure. Avoid harsh detergents, as they may fade your festive designs.
To store your bag after Halloween, keep it in a cool, dry place. You can stuff it lightly with tissue paper to help retain its shape. This way, when next Halloween rolls around, your Fun Halloween Bag Quilt Pattern will look as good as new and ready for another season of spooky fun.
If you enjoy making seasonal crafts, consider creating a matching set—perhaps a table runner or a mini wall quilt using the same fabrics and motifs. This brings cohesion to your home décor and makes your Halloween celebrations even more festive.
For those who love gifting handmade items, these quilted bags make heartwarming presents. Fill them with candies, cookies, or small trinkets for friends, coworkers, or teachers. It’s a personal touch that reflects time, effort, and creativity.
Finally, don’t forget to document your work. Take photos of your finished Fun Halloween Bag Quilt Pattern and share them with fellow quilting enthusiasts. Your design might inspire others to start their own Halloween quilting journey.
FAQ: Fun Halloween Bag Quilt Pattern
1. What skill level is needed for this quilt bag?
The Fun Halloween Bag Quilt Pattern is beginner-friendly. Basic quilting and sewing skills are enough to complete it successfully.
2. Can I use fabric scraps for this project?
Absolutely! This pattern is perfect for using leftover fabric scraps from previous quilting projects.
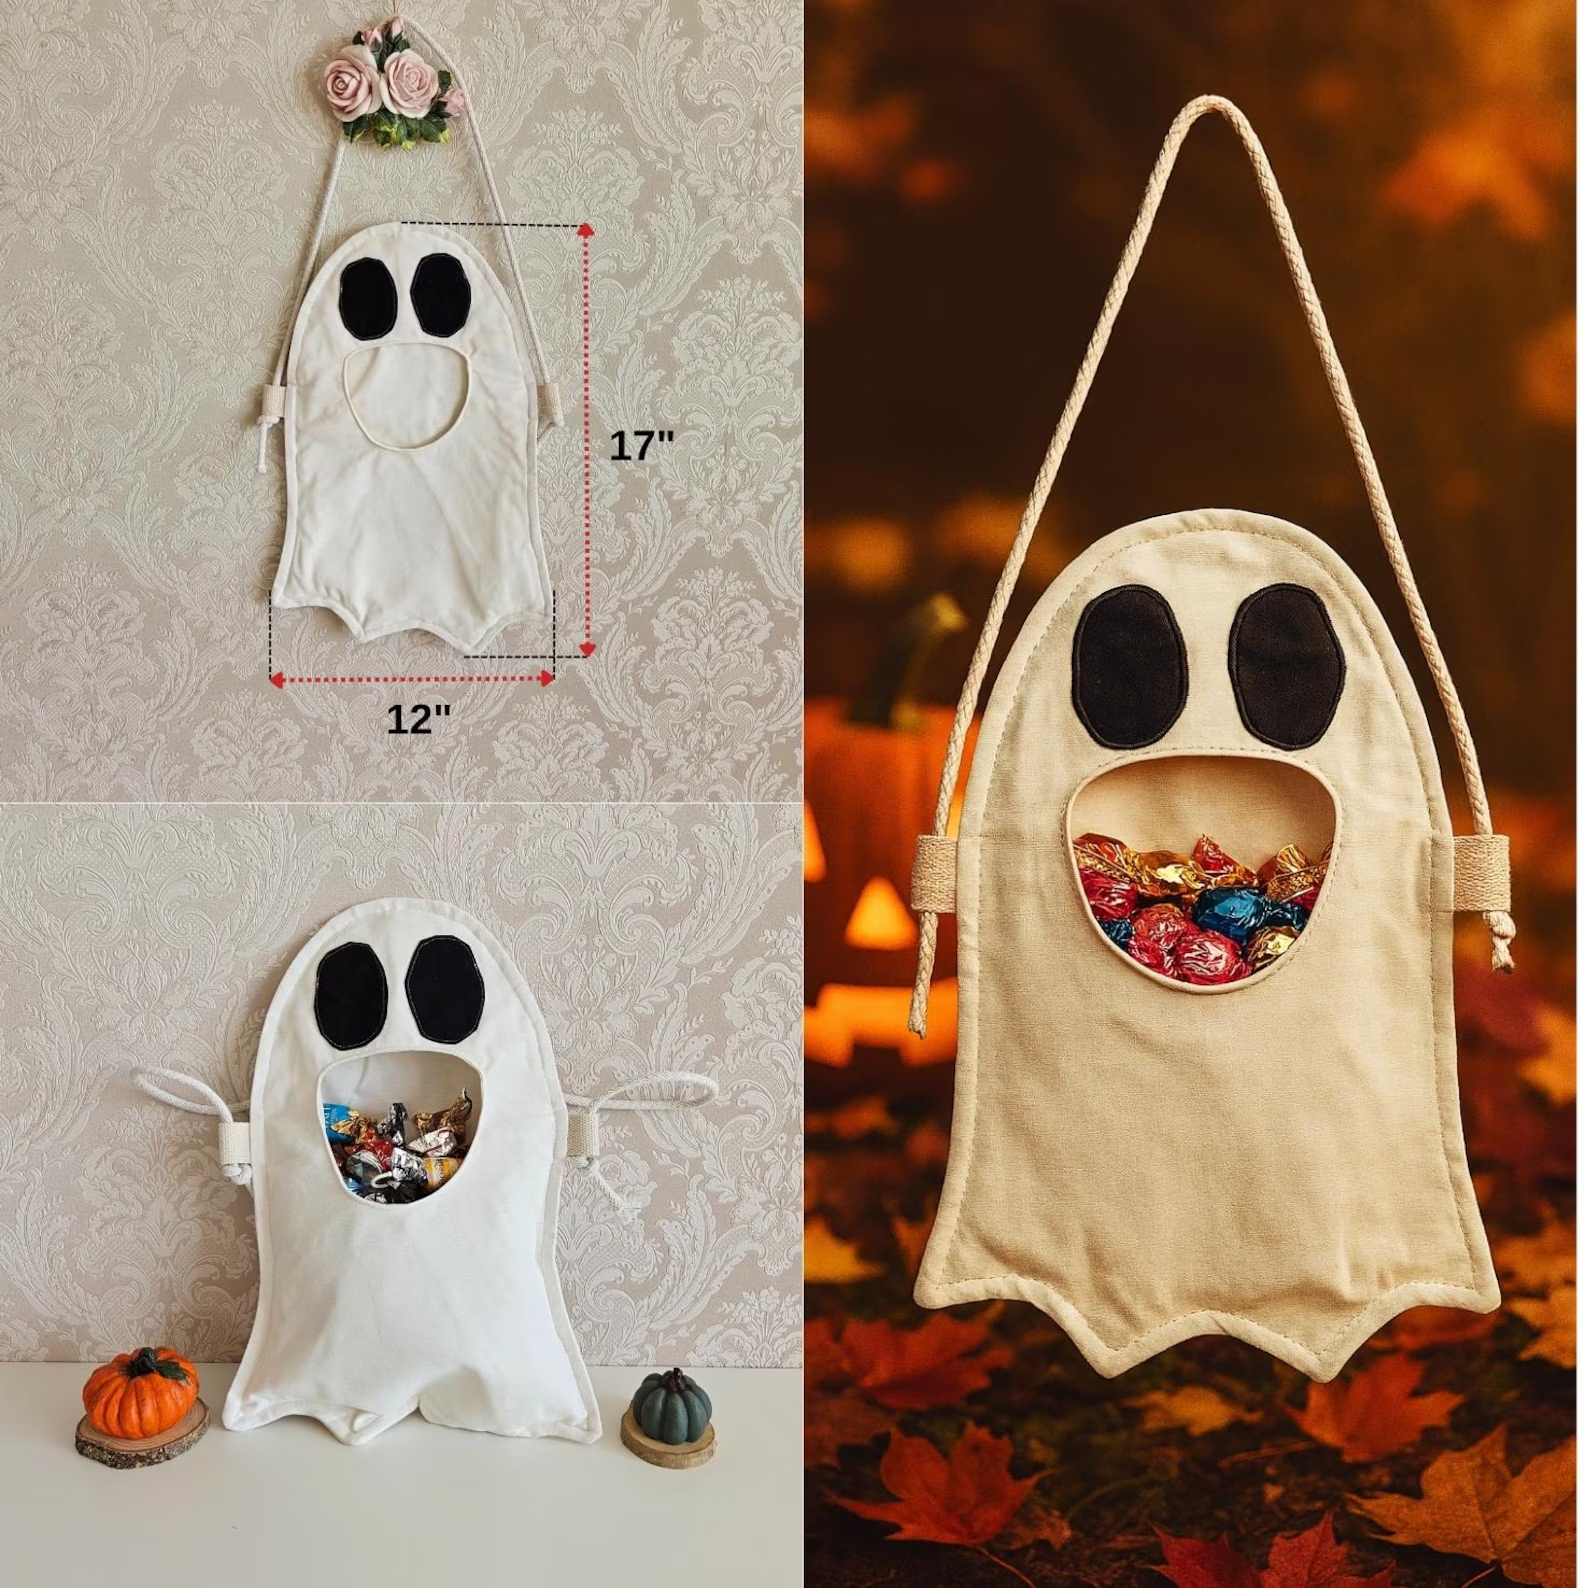
3. What size should the bag be?
The size depends on your needs, but a standard size of 12” x 14” works well for carrying Halloween treats.
4. How long does it take to make?
Most quilters can complete it in a weekend, depending on the complexity of their design and embellishments.
5. Can I wash the quilted bag?
Yes, but use gentle washing methods and air-dry it to preserve the colors and stitches.
6. Is it suitable for kids?
Definitely! The Fun Halloween Bag Quilt Pattern is great for kids—they’ll love using it for trick-or-treating or storing small toys.
PATTERN HERE
The Fun Halloween Bag Quilt Pattern combines creativity, tradition, and seasonal excitement in one delightful project. From selecting fabrics to assembling and decorating, every step offers joy and satisfaction. Whether you’re crafting it for your family or as a gift, this quilted bag captures the playful spirit of Halloween while showcasing your quilting talent. We hope this guide inspired you to start your own version—don’t forget to share your experience, leave a sincere opinion, and offer suggestions on how we can make future quilting projects even more magical!