
If you’ve been looking for a Tote Tutorial FREE PATTERN that is both easy to follow and beautifully designed, you’ve come to the right place. This complete guide will walk you through the process of creating your very own stylish tote bag using a simple pattern that even beginners can follow. With the rise in interest for DIY crafts, tote bags have become a must-have item—both functional and fashionable.
Whether you’re aiming to reduce plastic waste, personalize your accessories, or create handmade gifts, a tote bag is the perfect project. This Tote Tutorial FREE PATTERN includes clear instructions, helpful tips, and SEO-friendly advice to ensure your finished product turns out beautifully. The design is versatile enough to suit a range of styles and occasions, making it a great choice for anyone who enjoys crafting with purpose.
Using this guide, you’ll learn not only how to construct a tote bag but also how to select materials, customize the design, and apply finishing techniques. The steps are broken down into easy-to-understand parts, and this Tote Tutorial FREE PATTERN will support you every step of the way, no matter your experience level.
1. Choosing the Right Materials
Before you begin your Tote Tutorial FREE PATTERN, it’s essential to gather the right materials. Choosing the correct fabric, thread, and accessories can make a big difference in how your tote turns out.
First, select a durable fabric like canvas, cotton, or denim. These materials are ideal because they provide the strength needed to carry items while maintaining the tote’s shape. Avoid using stretchy or thin fabrics as they may not hold up well over time.
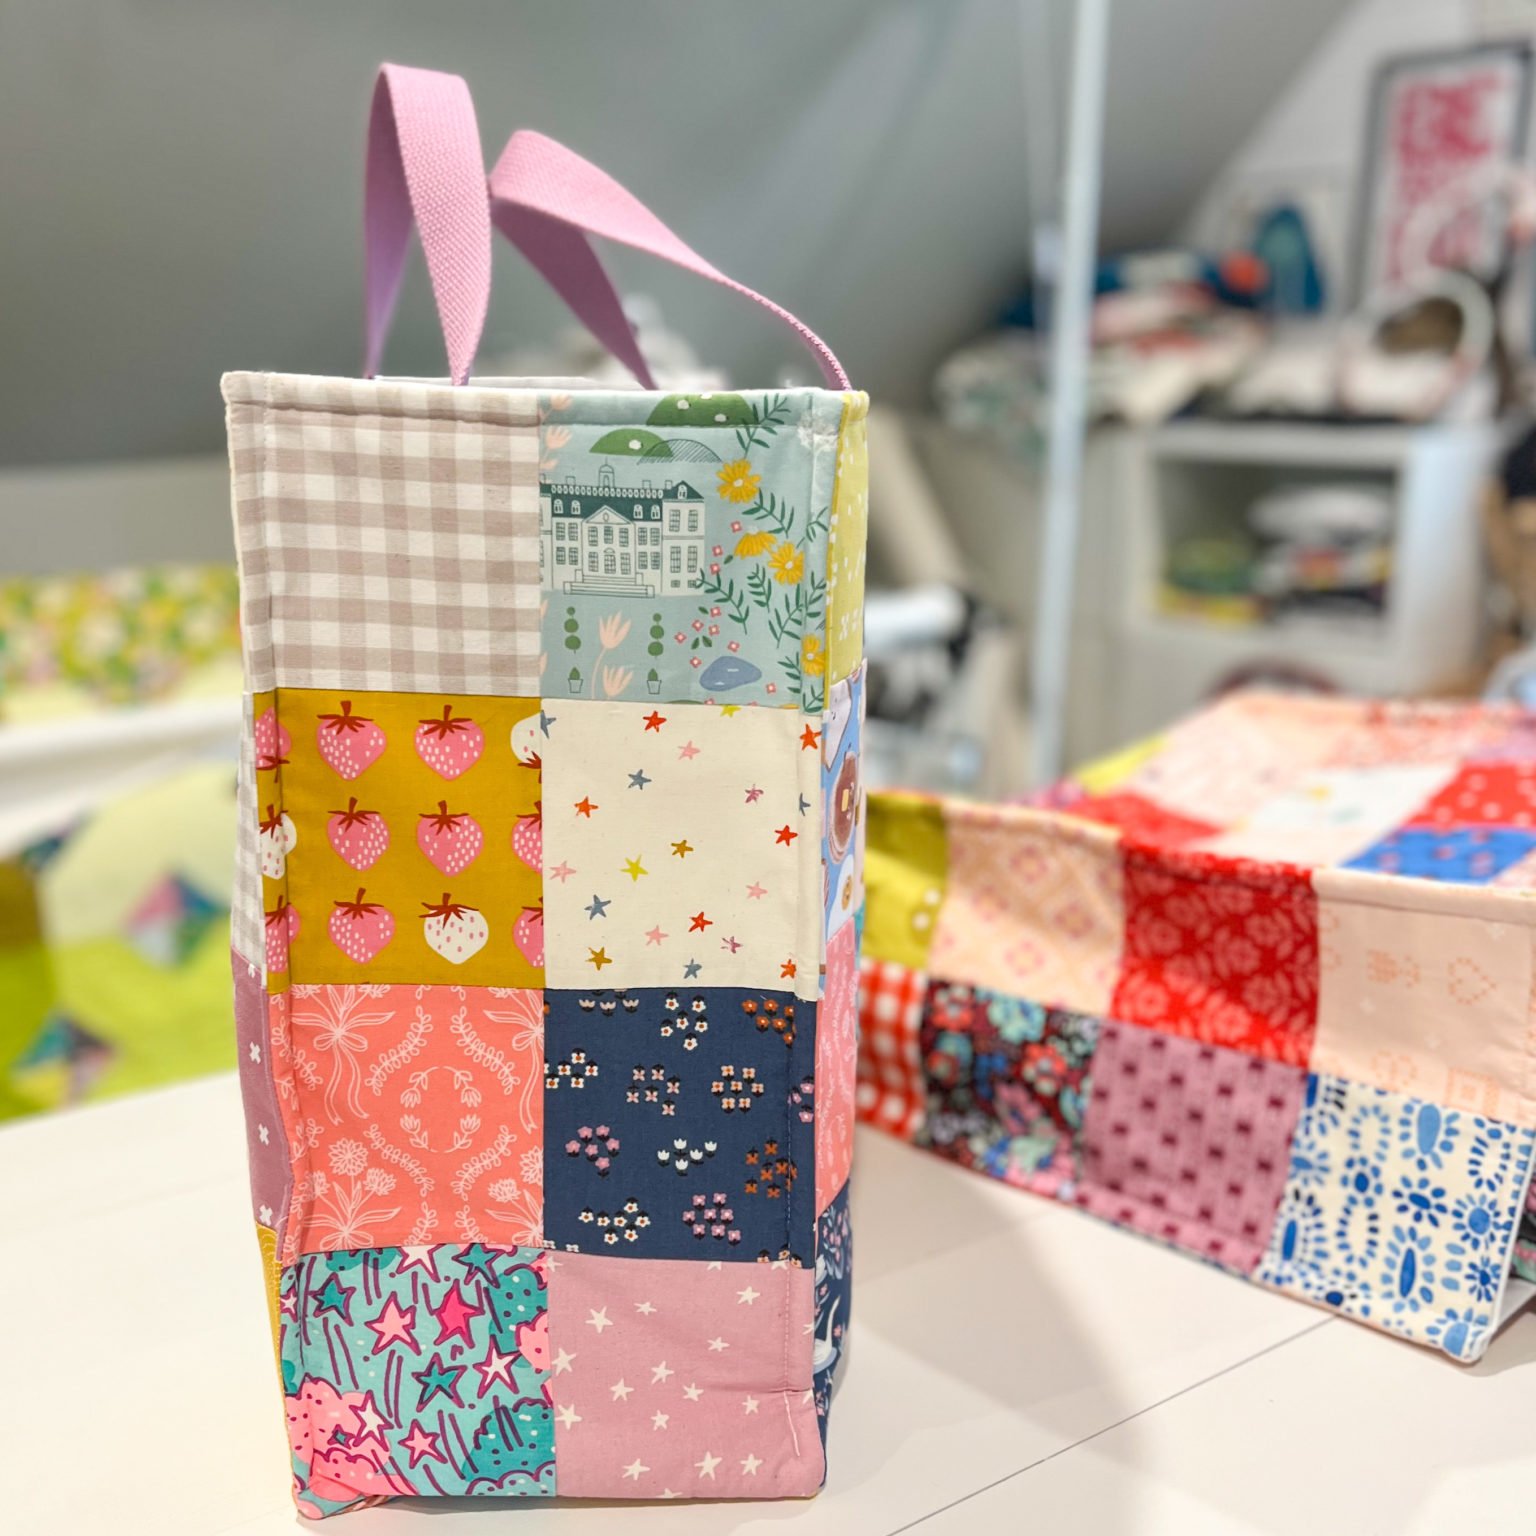
Next, consider the color and pattern of your fabric. Solid colors offer a clean, minimal look, while patterned fabrics can give your tote a fun, bold personality. Think about where you’ll be using the bag to guide your design choices.
You’ll also need matching or complementary thread for sewing. Using a high-quality thread ensures your seams are strong and long-lasting. Polyester or cotton-wrapped polyester thread is often the best choice for tote bags.
Don’t forget the accessories. Depending on your design, you may want to add zippers, magnetic snaps, or inner pockets. These add both function and style to your finished product.
Finally, gather your tools: fabric scissors, pins, measuring tape, and a sewing machine. A rotary cutter and cutting mat can also help for more precise cuts.
Being well-prepared at the start of your Tote Tutorial FREE PATTERN means you’ll spend less time troubleshooting and more time enjoying your creation.
2. Cutting and Preparing Your Fabric
The next step in your Tote Tutorial FREE PATTERN is cutting your fabric to size and preparing all the necessary pieces. Accuracy here ensures your tote bag will be symmetrical and neatly finished.
Begin by laying your fabric flat on a clean surface. Use a measuring tape to mark out your pieces: a standard tote is usually about 15” wide by 16” tall, but you can adjust based on your preference. Don’t forget to include seam allowances—typically ½ inch on all sides.
Cut two identical rectangles for the body of the bag. If you’re adding a lining, cut two more rectangles of the same size in a coordinating fabric.
Next, cut the straps. These should each be about 22” to 26” long and 4” wide before folding and stitching. Again, adjust according to your comfort and style.
If you want to include pockets, now’s the time to cut those as well. A 7”x9” rectangle works well for an interior pocket. For exterior pockets, you can get creative with sizing and placement.
After cutting, iron all pieces flat to make sewing easier and more accurate. This step may seem small but plays a big role in achieving a professional finish.
Your fabric is now ready, and you’re well on your way with this Tote Tutorial FREE PATTERN. The preparation stage lays the groundwork for a smooth sewing process.
3. Assembling the Tote Bag
Now comes the exciting part of the Tote Tutorial FREE PATTERN—assembling the pieces and watching your tote take shape. Even if you’re a beginner, these steps are straightforward and rewarding.
Start with the pocket (if using). Fold the top edge down by ¼ inch twice, press it, and sew it in place to create a clean edge. Position it on one piece of the lining or outer fabric, pin it down, and stitch around the sides and bottom.
Place the outer pieces of the tote bag right sides together. Sew along the sides and bottom using a ½-inch seam allowance. Do the same for the lining pieces, but leave a 3-inch opening in the bottom for turning later.
To give your tote a flat bottom, pinch each corner so the side seam meets the bottom seam, forming a triangle. Measure about 2 inches from the tip and sew straight across, then cut off the excess. Repeat for all corners.
Now, make the straps. Fold each strap piece in half lengthwise, right sides together, and sew along the edge. Turn them inside out, press flat, and topstitch for durability and a neat look.
Attach the straps to the top edge of the outer bag, positioning them evenly about 3 inches from each side seam. Pin in place and stitch down using a small seam allowance.
With the outer bag right side out and the lining inside out, insert the outer bag into the lining so right sides are facing. Align and pin the top edges, then sew all the way around.
4. Finishing Touches and Personalization
You’re in the final stretch of your Tote Tutorial FREE PATTERN, and now it’s time to finish the bag and add personal touches that make it uniquely yours.
Turn the tote right side out through the hole in the lining. Push out the corners for a sharp finish and give the bag a good press with your iron.
Sew the opening in the lining closed by folding the raw edges inward and stitching a close seam. Then tuck the lining into the tote and press the top edge flat.
To secure the top and add a polished look, topstitch around the entire upper edge of the bag. This step not only adds strength but also gives the bag a professional finish.
You can add embellishments like buttons, embroidery, iron-on patches, or even fabric paint to make your tote stand out. These little extras can transform a simple bag into something truly special.
Consider also adding a key holder or a zippered compartment for extra functionality. These small additions can make your tote even more useful in everyday life.
This final stage is where your creativity can shine. With your Tote Tutorial FREE PATTERN now complete, you’ve created a practical and beautiful tote bag to enjoy or gift.
FAQ – Frequently Asked Questions
What is the best fabric for a DIY tote bag?
The best fabrics for tote bags are durable and strong—canvas, denim, or cotton twill are excellent choices. These materials hold shape well and can handle regular use.
Can I hand-sew a tote bag if I don’t have a sewing machine?
Yes, it’s possible to hand-sew a tote bag using a strong backstitch. However, it will take longer and may not be as durable as machine-sewn versions.
What are standard tote bag dimensions?
A typical tote bag measures around 15 inches wide by 16 inches tall with 22–26-inch long straps. These dimensions are customizable based on your needs.
How can I add pockets to the tote bag?
Pockets can be sewn onto the lining or exterior before the bag is assembled. Be sure to hem the top edge of the pocket for a clean finish and stitch securely on three sides.
Is the Tote Tutorial FREE PATTERN suitable for beginners?
Absolutely! This Tote Tutorial FREE PATTERN is designed with beginners in mind, offering simple steps and plenty of tips for a successful project.
Can I sell tote bags made from this pattern?
Yes, you can sell the finished products as long as the pattern is free for personal or commercial use. Always check the licensing details if using third-party designs.
PATTERN HERE
This Tote Tutorial FREE PATTERN has guided you through every step of creating a custom tote bag—from choosing the right materials to sewing and personalizing your final product. Whether you’re making it for yourself or as a thoughtful gift, the result is a durable and stylish bag that reflects your creativity.