
If you’re looking for a creative and functional project, this Quilted Sewing Machine Cover Tutorial is the perfect choice. Whether you’re protecting your machine from dust or adding a touch of style to your sewing space, a quilted cover does both beautifully. In this detailed guide, you’ll learn everything from fabric selection to stitching techniques, ensuring your project is beginner-friendly and satisfying.
Creating a quilted sewing machine cover not only helps maintain your sewing machine in good condition but also gives you a great opportunity to practice quilting techniques. It’s a practical sewing project that combines utility with a bit of fun and flair. With just a few materials and some basic sewing skills, you’ll have a lovely and personalized cover in no time.
This Quilted Sewing Machine Cover Tutorial will walk you through every step to ensure your cover fits well, looks professional, and is durable. Whether you’re using it as a decorative piece or a dust protector, following this guide will give you a high-quality finished product. Let’s dive into this charming and useful sewing journey.
1. Choosing the Right Materials
The first step in this quilted sewing machine cover tutorial is selecting the appropriate materials. The right fabric and batting make a huge difference in how your finished piece looks and functions.
Start with 100% cotton quilting fabric for both the outer layer and lining. Cotton is easy to work with and comes in a variety of prints that can match your sewing room decor.
For the quilted effect, use a medium-weight batting. This adds structure and softness to your cover, giving it a plush, high-quality feel.
You’ll also need coordinating thread, quilting pins, a rotary cutter, and a measuring tape. Having the right tools on hand makes the process smoother and more enjoyable.
Velcro, snaps, or buttons can be used for securing the cover at the bottom or back. Choose a fastening method that suits your style and sewing experience.
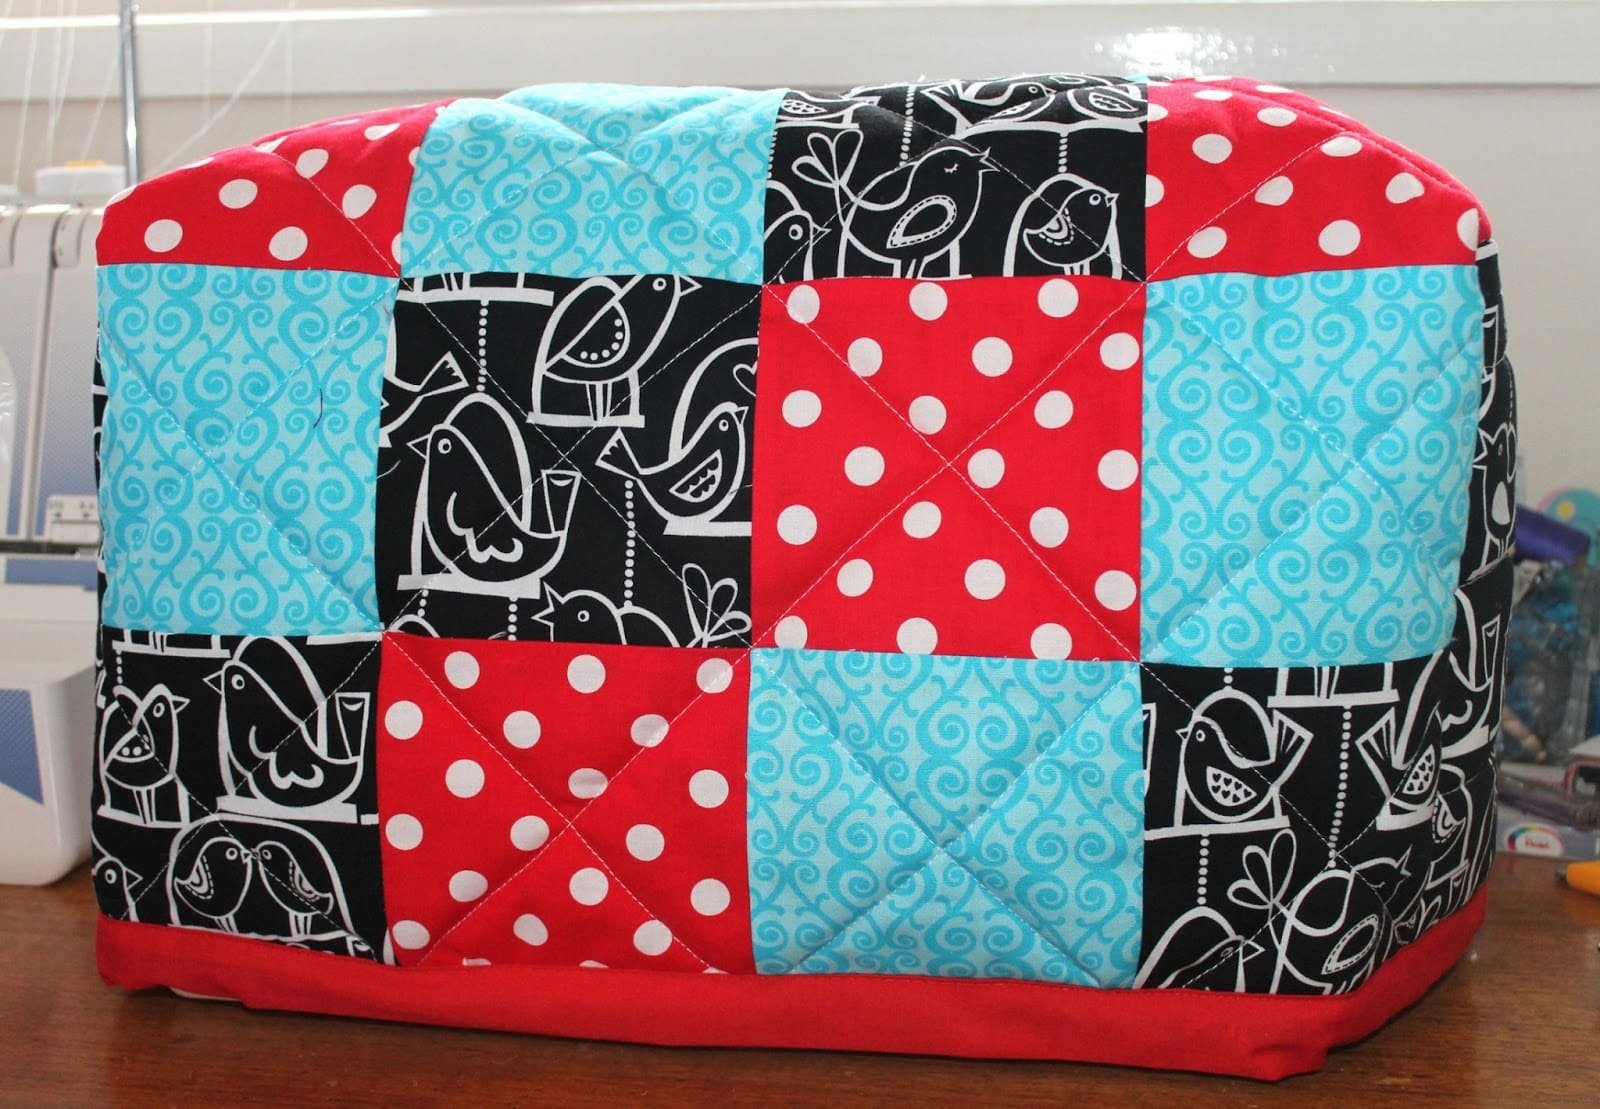
Lastly, consider adding decorative elements such as piping, patchwork, or applique to personalize your cover. These details make your quilted sewing machine cover one-of-a-kind.
2. Measuring and Cutting Your Fabric
Accurate measurements are crucial to ensure your quilted sewing machine cover fits snugly and looks professional. A poorly fitted cover can look sloppy and may not protect your machine properly.
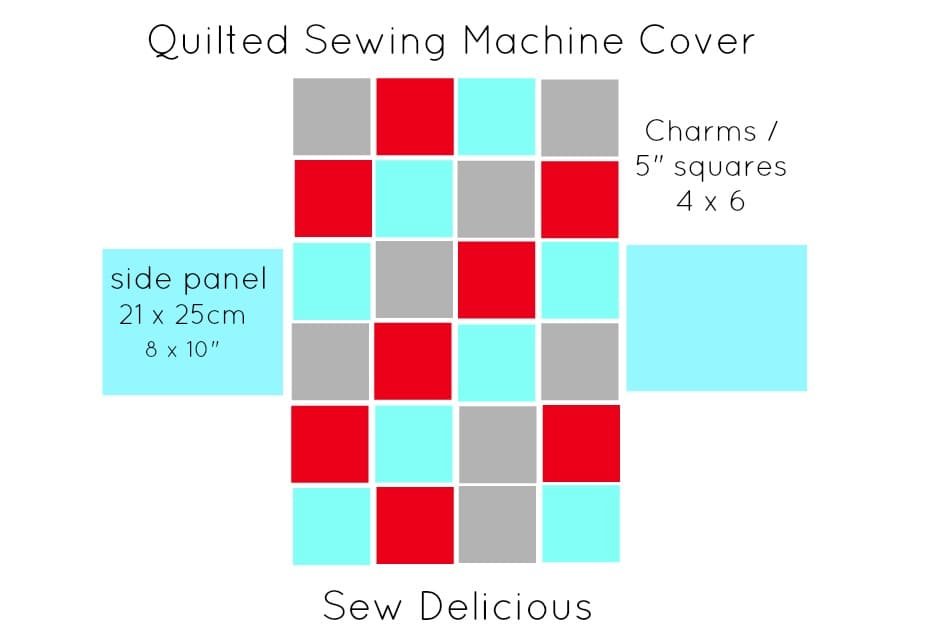
Begin by measuring the height, width, and depth of your sewing machine. Add at least 1 inch to each measurement for seam allowances and ease.
Next, draw your pattern on a large piece of paper or fabric. This will act as your guide when cutting both the outer fabric and the lining.
Cut your fabric and batting layers according to the pattern. Each side of the cover should have both an outer fabric and a lining, with batting sandwiched between them.
If you’re planning to include pockets or extra design elements, cut those pieces as well. Label them to avoid confusion during the sewing process.
Before you move on, double-check all pieces for accuracy. This extra step can prevent frustration later on when you begin assembling the cover.
3. Quilting and Assembling the Pieces
This part of the quilted sewing machine cover tutorial focuses on stitching the layers together to create that classic quilted look. It’s where the real fun begins!
Start by layering your outer fabric, batting, and lining. Use quilting pins or clips to keep the layers in place securely.
Use a walking foot on your sewing machine to prevent the layers from shifting. You can quilt in straight lines, crosshatch, or even use free-motion quilting depending on your skill level.
Once your pieces are quilted, trim any excess batting or fabric for clean edges. This helps the final assembly go smoothly.
Join the quilted panels together with a 1/2 inch seam allowance. Typically, you’ll attach the front, back, sides, and top panels before adding the bottom flap (if you choose to have one).
Press the seams open or to one side to reduce bulk. This step improves the overall look and makes the cover easier to manage.
Finish the raw edges with bias tape or a zigzag stitch to prevent fraying and enhance durability. This gives your quilted sewing machine cover a polished, professional appearance.
4. Finishing Touches and Customization
Now that your cover is assembled, it’s time to personalize it and add any final details. This is where your creativity can shine in your quilted sewing machine cover tutorial.
Attach any closure mechanisms you planned earlier. Velcro is the easiest and most adjustable, but buttons or snaps offer a more decorative look.
Add external pockets if desired. These can hold accessories like scissors, bobbins, or measuring tapes—making your cover both stylish and practical.
Consider adding a handle on the top for easy lifting. Make sure it’s securely stitched and reinforced with extra layers of fabric or interfacing.
Use decorative stitching or embroidery to make your cover unique. You can even add your initials or a fun sewing-related quote.
If you have leftover scraps, create matching accessories like a pincushion or thread catcher to complement your cover.
Give everything a final press and check for loose threads or uneven seams. A quick tidy-up makes your finished quilted sewing machine cover look store-bought and long-lasting.
FAQ – Quilted Sewing Machine Cover Tutorial
Q1: Can beginners make a quilted sewing machine cover?
Absolutely! This project is ideal for beginners because it involves simple shapes and basic sewing techniques. Just follow the steps carefully, and you’ll have a great result.
Q2: What size should I make the cover?
Measure your sewing machine’s height, width, and depth, and add at least 1 inch to each measurement for seam allowance and ease. You can create a custom pattern based on these dimensions.
Q3: What fabric is best for a quilted sewing machine cover?
100% cotton quilting fabric is recommended for both the outer and lining layers. It’s easy to sew and available in countless patterns and colors.
Q4: Can I wash my quilted sewing machine cover?
Yes, if you use machine-washable materials like cotton and polyester batting. Be sure to pre-wash your fabric to prevent shrinkage after sewing.
Q5: Is batting necessary for this project?
Yes, batting adds structure, protection, and that classic quilted texture. Medium-weight cotton or polyester batting works best.
Q6: How can I add pockets or decorations?
Pockets can be stitched onto the outer panels before final assembly. Decorations like applique or embroidery can be added at any stage but are easiest to apply before quilting.
PATTERN HERE
In this Quilted Sewing Machine Cover Tutorial, you’ve learned how to choose the right materials, measure and cut fabric accurately, quilt and assemble each piece, and customize your creation to reflect your personal style. A quilted cover is a practical and creative way to protect your machine and add charm to your sewing area.